
Today I’m going to show you how to make the most awesome decor balls out of beans.
And let me tell you what, these balls are absolutely magical! 
Yes, you read that right. Beans.
(If you don’t know me by now, I really like creating cool stuff using totally random items.)
I saw some decor balls at Michael’s Arts and Crafts last week and my first thought was,
“Are those Beans? Seriously, beans?”
Followed by my second thought,
“$4.99 ?!?! Per Ball ?! WHAT ?!!!
Which was quickly followed by my third thought,
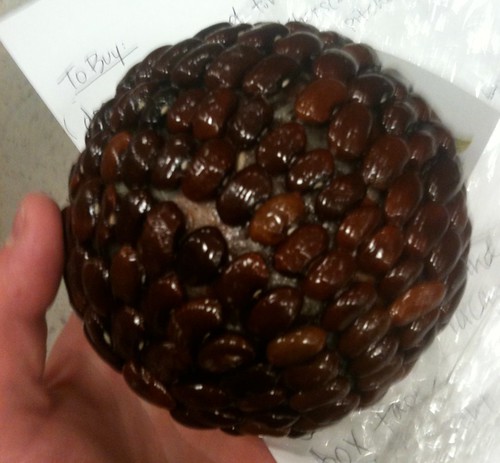
“I’m takin’ a picture of this and I’m making my own. There’s no way I’m paying five bucks a ball for some beans!”
And here’s the photo, courtsey of my iPhone – hence the most fabulous quality.
And here’s how YOU can create your very own bean balls.
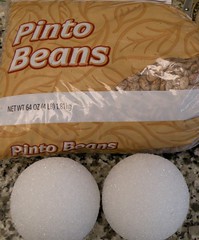
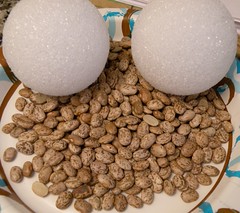
Buy a bag of beans. Pinto Beans are a great size to work with. Also, get some type of ball – I used foam craft balls.
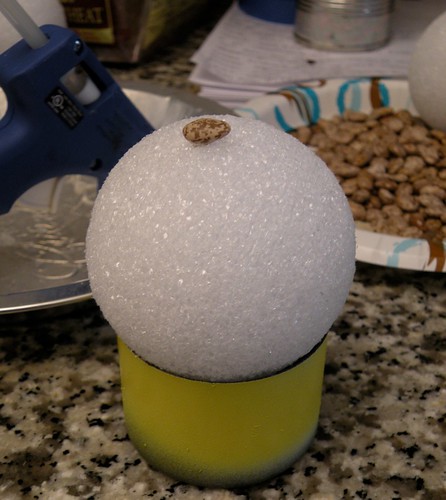
Start gluing the beans onto the ball. I kept the ball from rolling off the counter by setting it inside a spray paint lid.
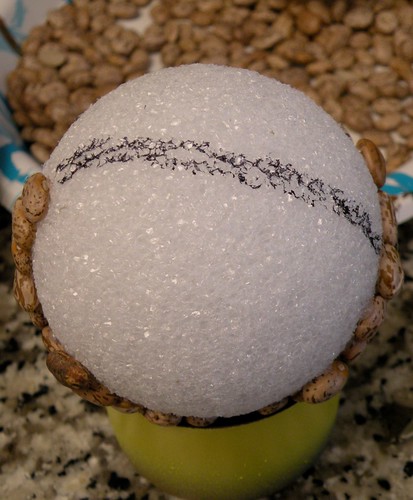
After I started gluing the beans on I realized I should probably mark the circumference of the ball with a sharpie so my bean lines were straight.
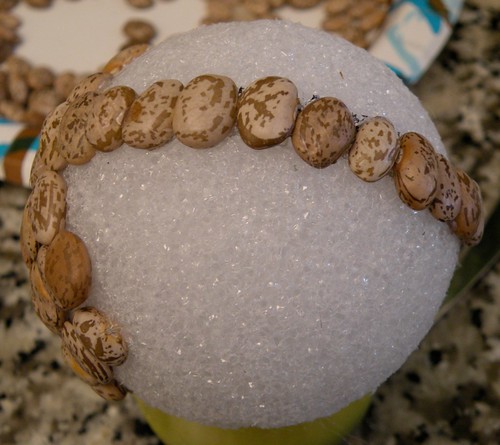
Then I just kept gluing the beans on in a nice flat tidy row.

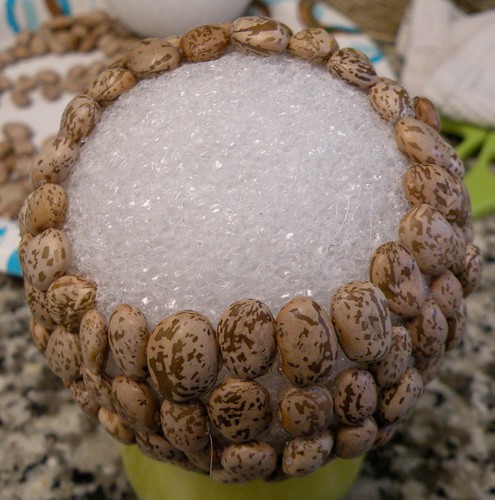
Be careful while making your bean balls. You know what they say about beans being the magical fruit… You don’t want any explosions in your crafting area. 
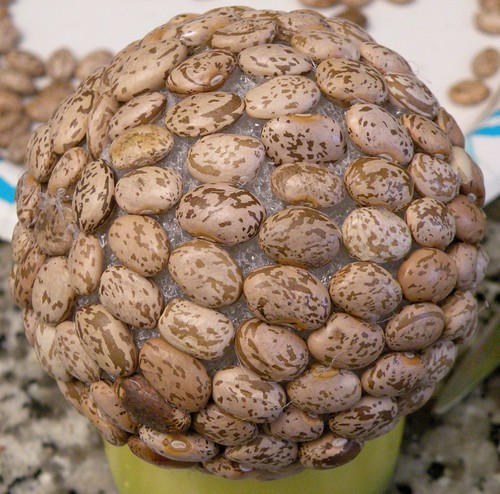
Done. Cool, hua?
What good is a decor ball all by itself?
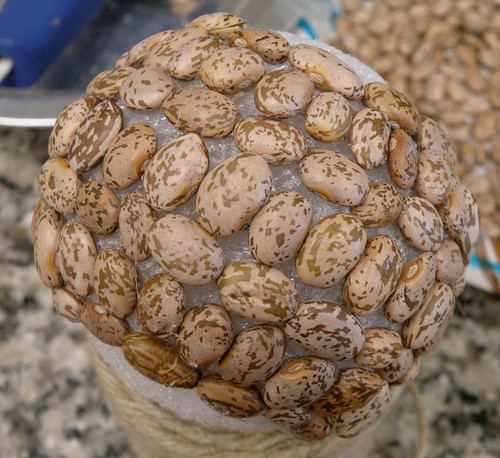
I made a 2nd one with a different pattern on it. Can you see the pattern??
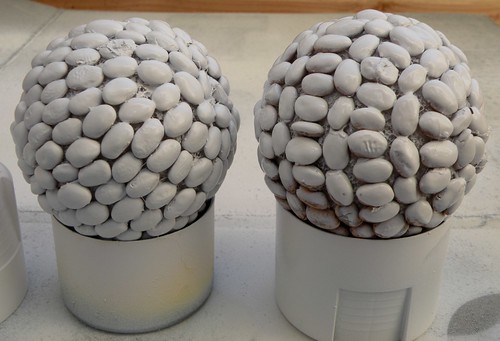
Once the balls were done I primed them with spray paint primer.
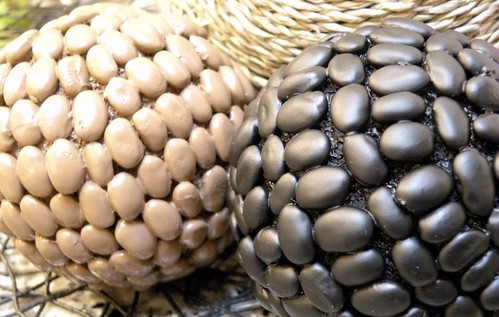
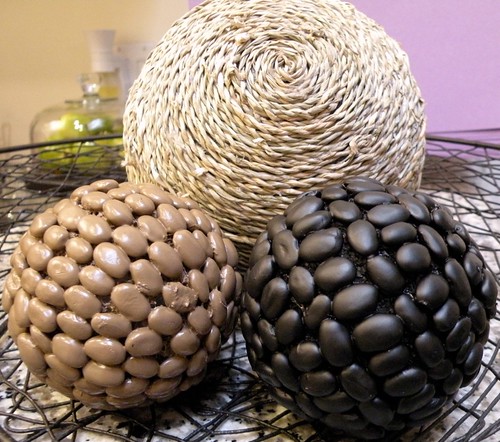
Then I spray painted one black and one brown using flat spray paint.
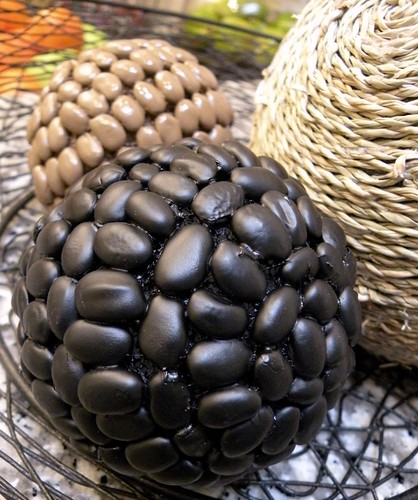
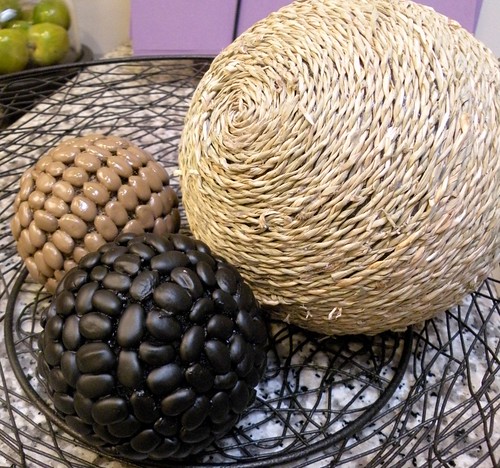
I think they look great with the Large Decor Ball.
Don’t waste your five bucks on a cheap-o bean ball. Just make some.
Personally I think mine look way better than the Michael’s one anyway.
Michael’s ball:
Ewwwww.
House of Hepworths decor balls:
Hooray!
Ya, mine are better.
And less gassy.
Yours is WAY cuter! Thanks for the tutorial!
Way to go! Your’s does look better!!
*hugs*deb
Yours is definitely better!! Love the white one…that is my fav!! So cool!
Thanks
Hugs
SueAnn
This is so cool! Yours are DIVINE – the store ones I wouldn’t have even looked at! Thanks for the tut. I’m gonna have to try this.
Awesome idea! They look great and yes, better than the stores.
I also thought about trying to make the same thing but I was thinking coffee beans, pinto beans would definitely be cheaper. I really like that you have them in two colors – looks like something from an expensive store!
Your balls ROCK!
I can’t wait to try this craft out….I enjoy reading your post….and I like your ideas of decorating on a budget….as my coworker says “Cool Beans”….can’t wait to see your next post… you inspire me!!!
I just made some a few months ago too! I used smaller beans and glued them on randomly, turned out great!
Look at you Mrs Fancy pants! I shared your blog post about your first balls you made here:
http://www.esbechic.com/1/post/2010/04/house-of-hepworths-a-blog-feature.html
Thanks for being rock’n awesome!
Whoa, I never would have thought of that. Even if I had seen it in the store. Way to go! It looks perfect next to your Large Decor Ball.
Thank you for linking this to A Little Craft Therapy with Life in the Pitts.
They turned out great! When I did mine, I just glued them on randomly…next time I will try a pattern…and some spray paint!
Since I didn’t win your large ball, I guess I’m gonna have to make my own! lol I’ll just have to use the “paper ribbon” that I have …couldn’t find an inexpensive jute mat anywhere around here!
That is a great idea! How much did the styrofoam balls cost?!? They always seem so expensive. I may try and find some cheaper toy balls at the dollar store to try this with.
SUPERBE!!!!!
Excellente idée!!!!
Cool! Thanks for sharing.
Thanks for sharing! What kind of glue do you recommend?
Lovin those!! Who would have thought of beans??
very cute…i will definitely be stealing this idea
What a cool idea! You’re so creative with this stuff! Never would have though of using food to decorate!
@Sarah – Glue? I definitely recommend hot glue. It holds really well and dries within seconds. Most other glues dry too slow for this type of project.
I just found your blog. Cute cute! Uhm…your bean balls are SOOOOOO much cuter then the one from the store. Oh my I actually can’t believe how BAD the one from the store looks! You did a much better job!!
I love your balls {tee-hee}! Seriously, I think yours are better ~ it looks like something sticky was covering the Michaels balls.
Okay, you have GOT to stop making such awesome stuff that I MUST copy!! ha! Kidding of course…keep ’em coming! I posted today about something you inspired me to do. You can check it out here: http://thesimpler-life.blogspot.com/2010/04/boring-knife-block-turned-fab.html
sosoooooo
CLEVER and pretty!
xoxo
B’s
Very nice. I remember doing this in school with lots of different kinds of beans to make Christmas ornaments.
Thanks for linking up to Make it Yours day!
Your decor balls are a million billion times better than that sticky looking mess from Michaels. (I bet we’d need to get out the glue gun to reattach a bean or two. Theirs just looked all wonkity.)
Fabulous. I simply must do this! AND I do see the different pattern.
These look so cool! I’d have never thought of that. I was just at Michael’s today, but I must have missed those. I’m def adding this one to my idea book. Thanks!
Your bean balls are beautiful!
I wonder, if you left the beans naked, whether they would survive? Perhaps they need the paint to preserve them.
I made some of these several years ago and I used kidney beans which were a pretty color. I also used lentils and split peas…they were super time consuming, but they looked great! Yours look awesome, I never thought to use spray paint! I just painted the balls to match the legume that I was applying.
I made some of these several years ago and I used kidney beans which were a pretty color. I also used lentils and split peas…they were super time consuming, but they looked great! Yours look awesome, I never thought to use spray paint! I love the colors you chose. I just painted the balls to match the legume that I was applying, I think it was before the spray painting craze hit. Spray paint sure lends itself to endless color possibilities.
Love the texture and the idea!!
LOVE THESE!! I am making me some of these today!! FABULOUS!!! Thanks for your wonderful ideas!!!
Seriously love this idea! I was going to make some twine balls, but I am going to have to add beans to some of them!
Just stopped over after seeing your link at trendy treehouse – what a great idea on the bean balls They look awesome and are so much better than spending 5 bucks on some at the store!
Those are great–love that you spray painted them!
Wow, this is fantastic!
Love them… I think I’ll need to make some
Who would of guessed… These turned out great.
Thanks for joining Get Your Craft on Thursday! Please join me next week for another great party!
So cute and frugal! Just my type of project. Your does look 100% better then Michaels!!! Thanks for sharing.
Oh my goodness – how adorable! They look great. Beans, who would have thought!
Jeanine
OMG, girl! We should be best friends. Everytime I stop by your blog I am amazed at how much alike we are. I had this SAME conversation with myself today as I walked through the GW and found some mini balls with mini beans on them!! I love how yours turned out. I was so planning on making these this week. lol
For $5 you could make a whole army of balls. Your bean balls are so much nicer than the Micheal’s version. Thanks for the tutorial.
Lov’n it! And they do look way better…great work! These are awesome! Thanks for sharing at SSB!
Ginger
Hmmmm. I might have to try this, although my eyes would probably start crossing after gluing on the umpteenth bean!
Thank you for bringing your hodgepodge to the party! Will be drawing the winners soon!
~Gay~
itsahodgepodgelife.blogspot.com
I love these. Great idea! Thanks for sharing at ‘Look at me, I’m SO Crafty!’ at Fun to Craft.
Wow I love the look of these!
Yours turned out better than the Michael’s version. I am definitely doing this. So glad I saw your link on Tip Junkie!!!
Those did turn out nice!
wow. I did this EXACT same project a few months ago. It was featured a few places too.
http://alittleofthis—alittleofthat.blogspot.com/2010/01/easy-and-cheap-jar-fillers.html
wow. I did this EXACT same project a few months ago. It was featured on a few blogs.
http://alittleofthis—alittleofthat.blogspot.com/2010/01/easy-and-cheap-jar-fillers.html
I just made a few of my first ones last week for my bathroom! I made one with pinto beans, one with rice & one with split peas! I love the different textures you can come up with out of FOOD from your PANTRY!!! And yes…yours look MUCH BETTER than Michaels!
Cute! They look great. I’m sooo gonna have to try this. Thank you for sharing!
Hi Allison,
I love the twine covered ball and the bean balls look so much better then the ones I made as a child! So funny, how these things come back around but thankfully what you’ve made is so much more pleasing to the eye! ♥ It was a kid craft in my youth.
I’m visiting for Three or More Tuesday..would love to have you drop by when you have a chance.
Have a wonderful day…
Hugs,
Stephanie ♥
I love it when you recreate something and it turns out even better than the original! This would be a great project for my kids to do.
Yours are definitely better than Michaels. Great tutorial!
LOVE these! The black one is my favorite! I tried to make some once using twine around a balloon and then popped a balloon. They need to be replaced by these for sure! So cute.
very cute! I have been looking for a fun, inexpensive project to do with a group of lady friends. This one seems like it would appeal to many personalities/decor styles, so it may be the one! Thanks so much for linking up to “Anti-Procrastination Tuesdays” @ New Nostalgia! Would love to see more from you next week!!
I’m new to the blogging world and I LOVE, LOVE, LOVE your site. I just found you this morning and you’re my very first feature on my little blog and I’ve added a link to your site! Thanks for the awesome idea!
They turned out fabulous!
Hi there! You were featured on Mad Skills Monday for this awesome project! Congrats!
Ginger
SSB
Soo cute! I love the ones with twine, and teh braided ball, and the bean ball. Okay, so I love ALL of them!
Hi- i did you just buy white spray paint primer and use that prior to any spray paint color?
Thank you!
I remember thinking the same thing you did, $5 for a ball!! I’m currently sitting here sorting a mixed bag of beans to make these right now. I do the same thing, take a picture and go home and make it. I got on pinterest and got more pics of different ones and making even more now. Thanks.