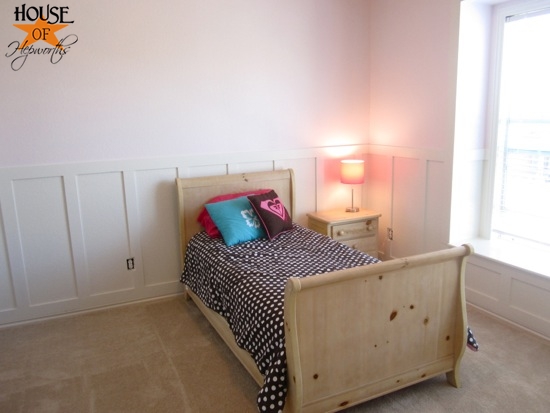
Okay guys, I’m here to {finally} tell you how I did the board & batten in Kinsey’s new pinkalicious bedroom.
The first (and most daunting) task was to deal with the window. All the board and batten would butt into any moulding around the window, so it needed to be done first.
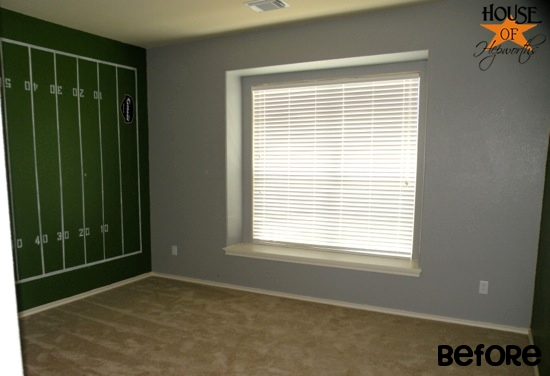
Kinsey has this big pretty window seat in her room, but it was looking pretty boring and green for my liking.
I’ve wanted to frame it out with moulding since the day I saw it. I had a general idea of how I wanted it to look, but I didn’t actually come up with a specific plan until I stared measuring and drawing it out on paper. This is finally what I came up with, and I’m quite pleased with it.
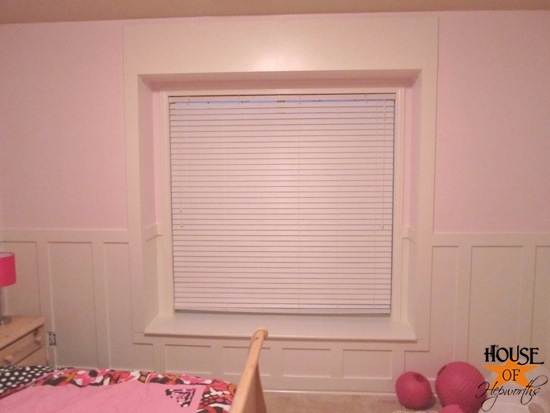
I took the picture at night because I was hopeful that it would be easier to see without the sun’s glare shining through. It is easier to see, but the pictures are not the best because of the night shot.
It’s still kinda hard to see against the light pink, so outlined all the wood to help you see the lines.
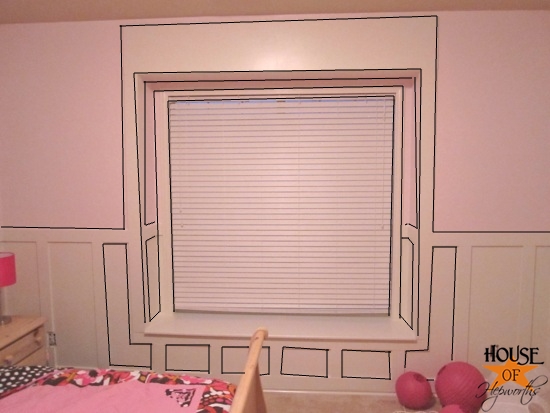
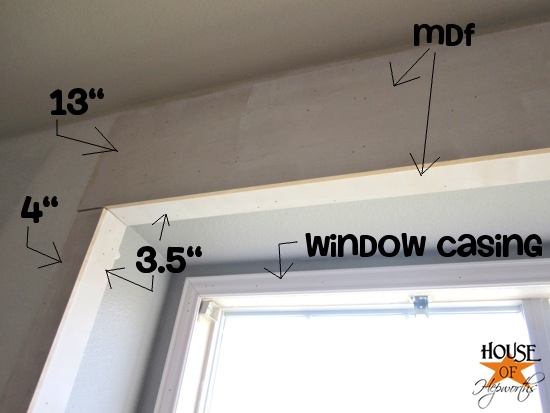
The first pieces I hung were the three 3.5″ pieces inside the big window opening (not around the actual window – that is window casing.) Here’s a pretty good diagram of each piece and what size MDF I used.
Because of my rounded edges throughout my house, I didn’t have a straight line to work with to make sure the MDF was on perfectly straight against the corner edge, so I nailed some temporary MDF scraps up to create something for my planks to sit flush against.
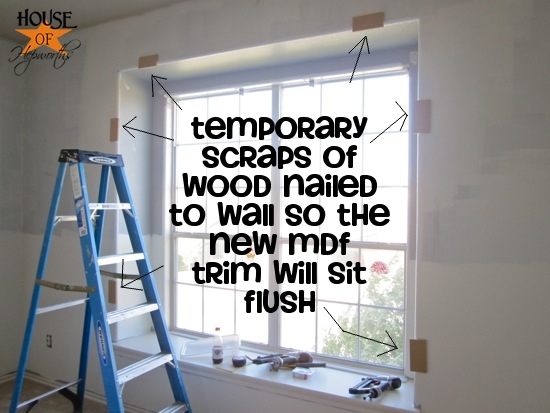
Does that make sense?
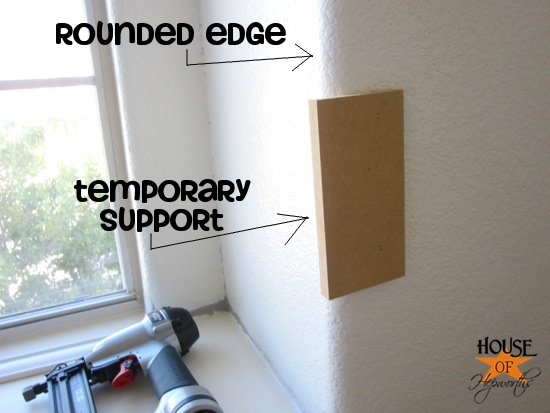
I just needed something to show me where the corner is so I could make sure my planks lined up perfectly around the rounded edges.
I’m sorry that sounds so confusing. I hope you understand what the heck I’m talking about.
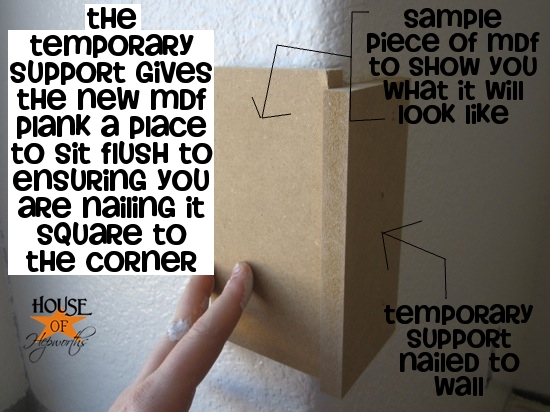
Once the temporary boards were in place I simply used the nail gun to nail in the long planks in place.
The next thing I had to do was prep for the planks on either side of the big window opening. I wanted the planks to go completely around the window, but the big window seat/sill was sticking out about an inch on either side blocking the path. Also, the moulding under the window needed to go so I could replace it with the new 3.5″ MDF.
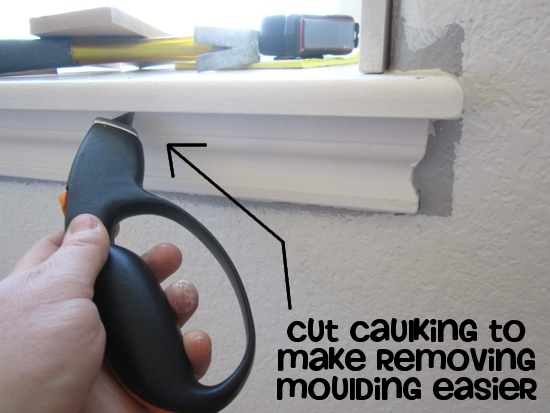
To remove the moulding, I first sliced through the caulking around the entire strip of moulding.
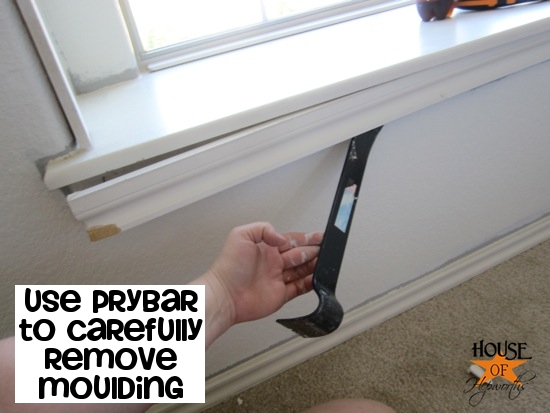
Then I easily pried the moulding off the wall using a prybar.
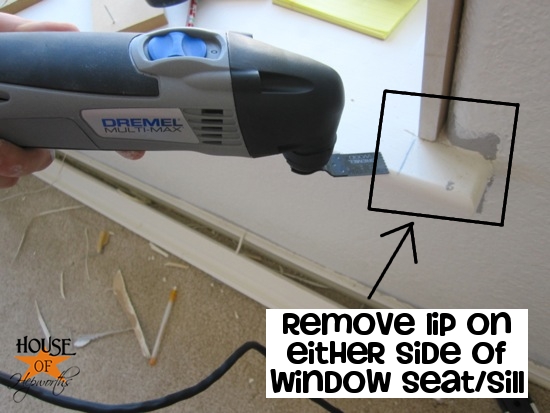
Once the moulding was removed I needed to tackle the little overhang on either side of the sill. It was a piece of cake to remove with my Dremel.
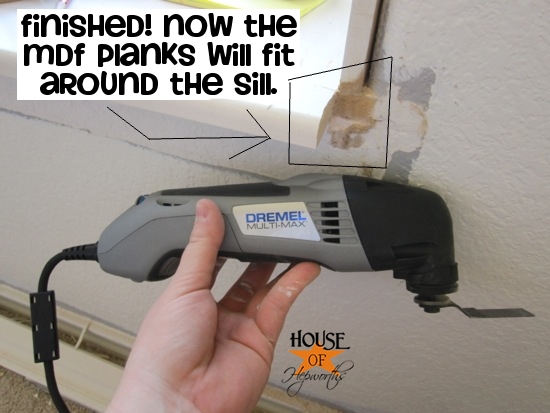
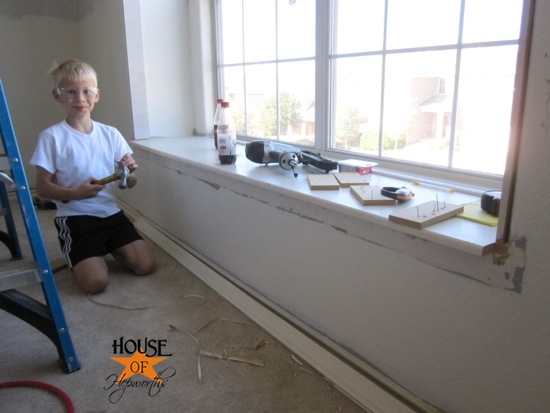
Once the sill pieces were hung, I hung either side plank. I purposely made them 4″ (1/2″ larger than all the other planks) to give them more oomph. From there I measured from the outside of the left plank across the window to the outside of the right plank, then cut my 13″ wide header board the exact proper length. Nailing it up was really easy. I just drove about 30 nails into it with my nail gun.

For the final step I added the bottom 3.5″ MDF plank across the bottom of the window creating a frame around the entire window seat. Then I framed out the actual window with window casing moulding (like I’ve done to all the other windows downstairs).
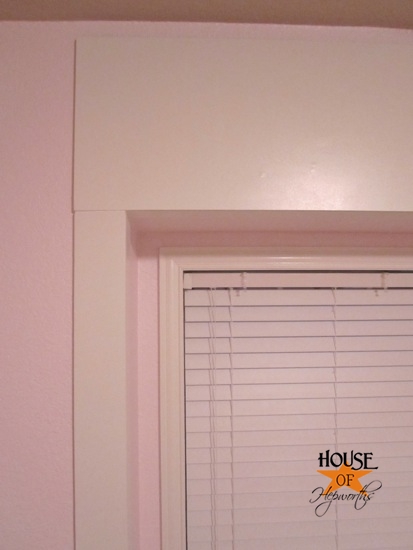

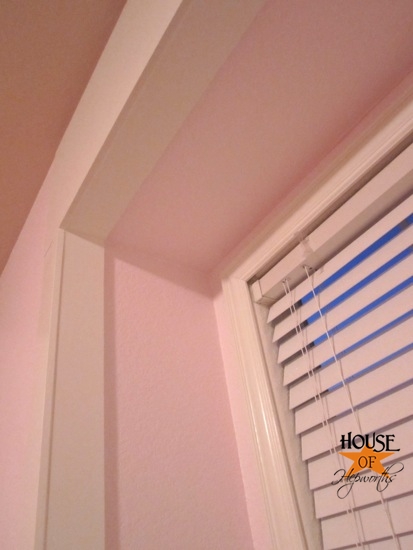
Once the window was {finally} trimmed out, it was time to start on the board and batten. The board & batten was super easy compared to all the measuring and thought that went into the window.
I’ve read several tutorials that say to measure each separate vertical plank one at a time and install them all separately. Um, no thanks. Too much work. I cheated my way through this project, and frankly, it went way faster and my results were just as good as the other way.
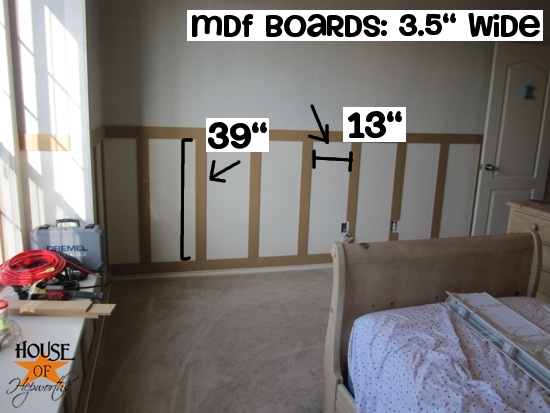
First thing I did was lay the MDF planks directly on top of the previous baseboard and nailed it in. I measured and nailed the MDF around the entire perimeter of the room along the floor on top of the baseboards.
Next, I decided how tall I wanted my top piece to be and figured out how tall each vertical plank needed to be, which turned out to be 39″ for each vertical plank. I simply cut two 39″ pieces of MDF and labeled them “template” with a pencil. I used these two pieces to hang the top rail around the entire room. I hung the chair rail in my dining room and piano room this exact same way with a yard stick cut down to size (tutorial here).
(This is a two person job.) Both of you each take one “template” board. Set them vertically on top of the new MDF baseboard you just hung. (Do not nail your templates to the wall. Just hold them.) Set your top MDF plank across the template boards (the board that runs parallel to your baseboard around the room). Nail the top board. Work your way around the room using your template boards and guides. Seriously. So easy. No level required.
Now cut about a bizillion boards the same length as your template boards (39″).
To place the boards, I started under the window (I had to cut these shorter to fit under the widow).
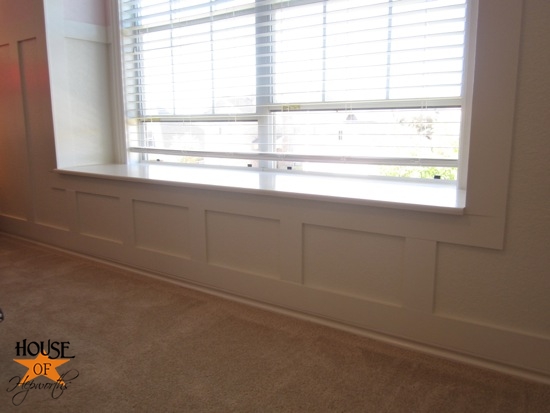
I pretty much set boards out until I liked the spacing of them then just measured how far apart they were. They came to 13″ apart, so I created two more “template” boards 13″ long. I started center under the window and worked towards either wall.
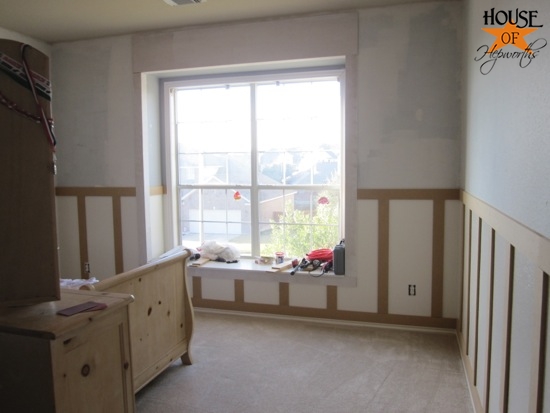
I used the level for the first center board, but I pretty much never used the level after that. My “template” boards did my spacing for me perfectly. I’d nail a board, hold the two 13″ template boards horizontally next to it, wedge my next vertical board up, and nail it in. Then I’d take the template boards and move to the next set.
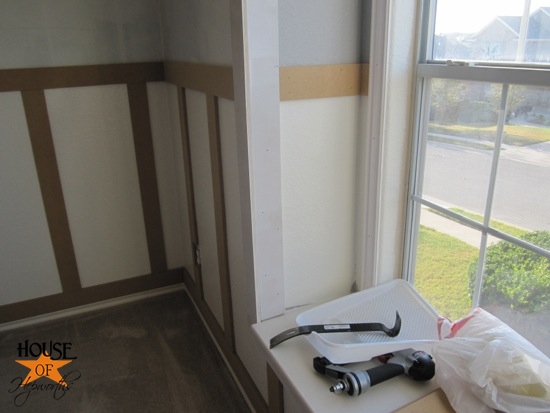
Every single board fit perfectly and I didn’t have to measure each one separately. It was so easy.
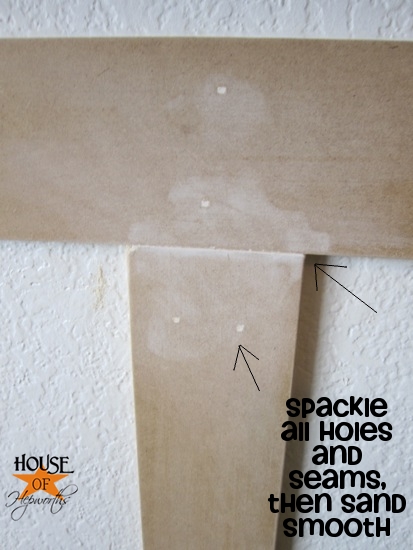
Once they were all done, I spackled up all the holes, then caulked all the seams, and sanded everything down nice and smooth with my electric sander and 150 grit paper.
From there, I rolled on primer onto each board, then painted each board white. It wasn’t hard to paint them, I just had to hand paint around every edge of every box which seemed to take forever and gave me a serious claw hand.
There are a few tricky spots I want to show you real quick, just in case you run into something like this.
First off, when you work around the room, unless you are a mathematician and pre-plan (I am not and I did not), you will probably run into spots that just don’t quite fit. Just fudge it. You can’t even tell.
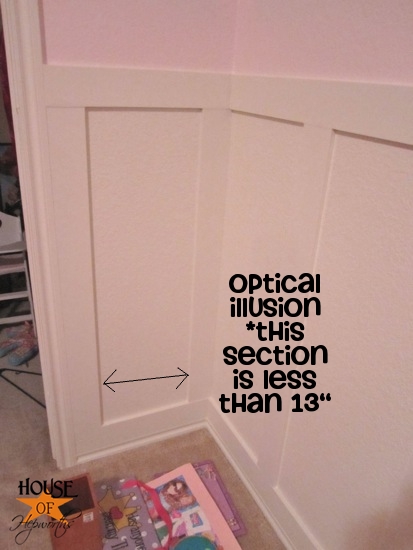
Also, when it came time to go around a corner, I chose to add a board to either side of the corner instead of keeping up with my 13″ apart planks.
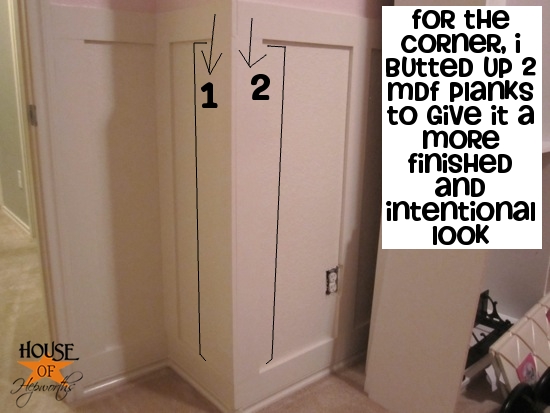
I just butted up the edges of the planks to create a nice square corner, then caulked it all to make it look pretty.
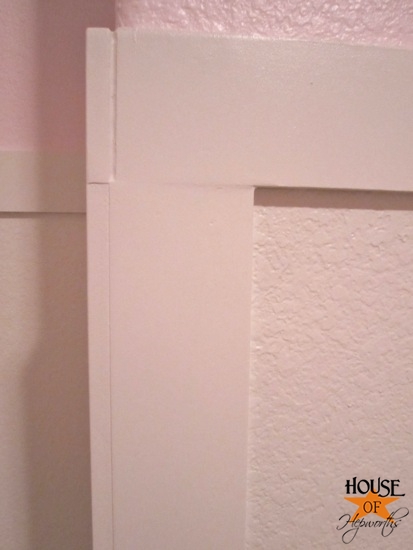
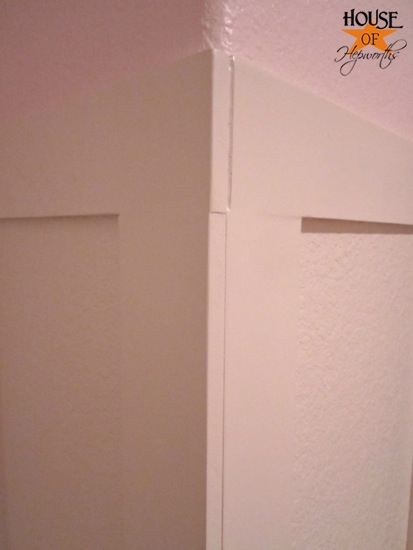
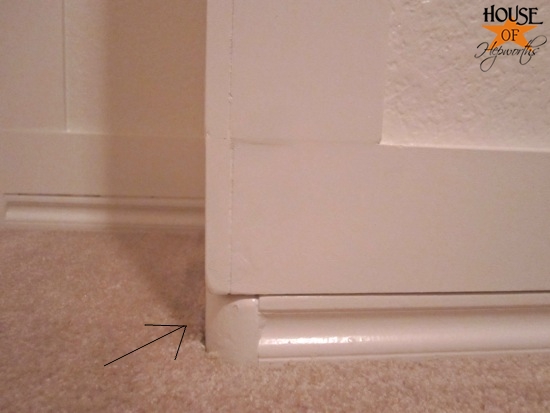
As for the baseboard around the curved edge, I just let the planks sit squarely on top of it. It’s hardly noticeable as it’s on the floor, but I personally think it looks good anyway. It wasn’t worth the hassle trying to make the original baseboard square.
I had hoped when I randomly decided to space the boards 13″ apart that I would miss most plug outlets. Measuring in advance would require too much effort, and seriously, what are the chances I’d hit more than one anyway?
WRONG. I hit ALL BUT ONE outlet. Not kidding. I had to cut around 5 plug outlets. What are the chances? Only I would have such luck, I tell ya.
I measured based on each outlet having a cover on them. I used the original covers as a guide, but threw them away afterward because they were gross and chipped and broken, so now I need to go buy more. But trust me, these boards will fit around the covers like a glove. I’ll show you once I buy them.
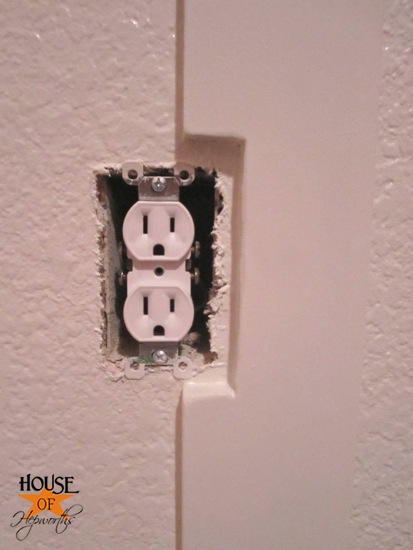
I used my Dremel Saw-Max to cut out around each outlet (before I nailed them to the wall just to be clear. I did not cut onto the wall next to an outlet!). I wish I would have taken pictures with the saw. I’ve used it several times now and it is the bomb diggidy bomb. Great for little projects. Love it!
I know I’ve given a lot of words (too many words!) and not enough pictures to show the process, but I just want to remind you that Sarah and Emily both have great tutorials that I used, so if you need more of a tutorial than what I’ve given, check out their posts.
So there you have it. How I transformed Kinsey’s room from a blind-me grass green football field…
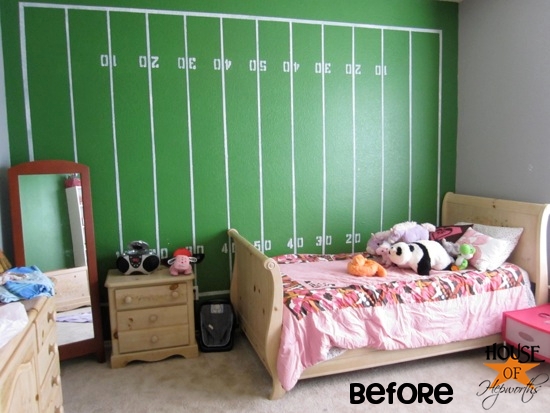
Into a pink board & batten room fit for a princess.

Oh, and one more thing! Colors! They are both from Sherwin Williams. The white is semi-gloss “Alabaster” and the pink is Satin “Rosily”.
I think the pink will be just darling once I get some accent colors in there with it. I’m hoping to incorporate some orange (are you shocked?) and different shades of pink. What can I say? She is a pink girlie girl who’s favorite hobbies include playing with her American Girl, drawing, being crafty, playing dress-up and putting on jewelry and makeup, and reading books like Pinkalicious! and Fancy Nancy. Girlie.Girl. Not sure where she got it from because I’m certainly NOT a girlie girl. But it’s sure fun to have one!
I really hope you have been able to see how easy it is to install this stuff. Anyone can do it! You do not need a degree to cut MDF and nail it to the wall. Grab your husband or your BFF and get crackin’!
(I am not responsible for any damages or injuries you may receive while attempting this project yourself. Do it at your own risk. I’m only showing you how I did it, which may or may not even be the right way. So attempt using a miter saw and nail gun at your own risk!)
You did a great job! I would love to do something like this..only my hubby won’t teach me to use power tools cause he’s worried I’ll cut myself, and I’m too stubborn to let him do it! Did I mention my first senence was “I can do it myself”! lol! I guess I’ll have to wait till one of us gives in! But your room is lovely…definitely worth all your work!
I’m exhausted just reading the tutorial! Great work!!!
Love it!!!! You are amazing!!
LOVE how you did the window ! Wish I had seen this before I did my board and batten, my big window could totally use this! Gorgeous!
Amazing, Love it and my favorite finishing touch is the vacuum lines- but I am OCD like that 🙂
Love it, love it, love it. You just helped me add to the list of “honey do” projects that we will be completing. hehehehe
I’m sure your husband loves me now. lol
The board and batten looks great! It makes my head hurt to think about trying something like that myself! Just curious, how deep is the window seat? Is it deep enough to put a cushion or pillows in there?
I haven’t measured it, but it is definitely deep enough for a cushion and that is actually on my to-do list for her room. 🙂
Oh my goodness! You. are. amazing!! Everything you do is fabulous! 🙂
This turned out FANTASTIC! You did such a great job!!!
Love love love the room…and around the window is fabulous!
Hugs
SueAnn
Great job! It looks terrific!
I would have been SOOOOO nervous about cutting that window sill. But I love what you did with framing out the window. (And, I like that a little pink still shows at the top.)
I’d love you to link up your tutorial to our Friday FREE-FOR-ALL Linky Party!
http://www.cookingatcafed.com/2011/11/friday-free-for-all-linky-party-111811.html
We meet each week on Fridays and you can vote for as many people as you want by pressing the “like” button. Hope you join us!
All the best,
Dana at Cafe D
I love it. Looks clean and neat! Great tutorial too!
Wow, Allison! You’re DIY super woman! Beautiful, beautiful job! Your hard work will pay off – forever! I love it! Great tutorial!
OK, this is fricken awesome! I’m going to have to try to give this a go.
You did a great job! I saw something similar done on the Nate show. Again beautiful job.
Your B&B turned out so nice. I bet your daughter is super thrilled to have a girly room.
I love this!
Thank you so much for posting about your window. We are going to be tackling our mudroom and adding bead board next month… now I want to trim out the windows like you did. Such an awesome idea and I LOVE how it turned out!
You are welcome! I’m glad my post is going to help you out. It’s good to know my blogging actually helps and inspires.
Thanks for submitting this to our Link Party! We’ve featured you in this week’s round-up. Unfortunately, we don’t have a button yet, but one’s coming!
We’d love to have you submit yet another project in this week’s party!
Here’s the link!
Im curious how you draw images on your pictures in the blogs? Like the hand drawn images ?
I REALLY hate to sound stupid but, what does MDF stand for?
What thickness of MDF did you use? 1/2 inch?
THANK YOU so much for posting how you framed out your window!! I have windows with the window sill but no side mouldings and I have been trying for a long time to figure out how to take out the entire sill and replace it to make it longer and now thanks to you, I have a much easier way – just cut them off!! Thanks again so much. I will be tackling it this week!
How did you decide on the height?
I would also like to know if you used 1/2″ or 1/4″ MDF? We are going to tackle some board and batten in our entryway and will also have to set it on top of the existing baseboards 🙂 Thanks for the great tutorial, very helpful!!
This is 1/4″