Hey! I hope you had a smashing weekend. We got loads of spring yard work done, and I am so thrilled with how the yard is coming together!
In addition to working on the yard though, I’ve been trying to give my ugly little guest bathroom a fresh makeover.
Today I’m going to share a super-easy trick to getting shelves (or anything else) to sit level on the wall.
Let’s recap first though. The bathroom started like this:

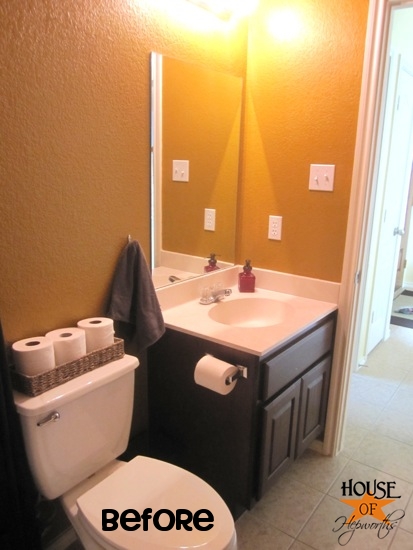
The last place I left off had the bathroom looking a whole lot less barfy:
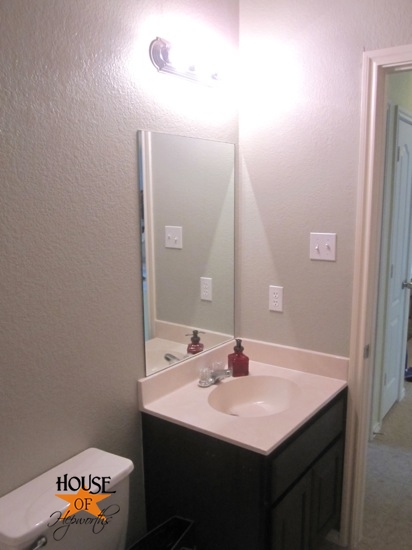
I painted it the same color as my piano room – Route 66 by Dutch Boy.
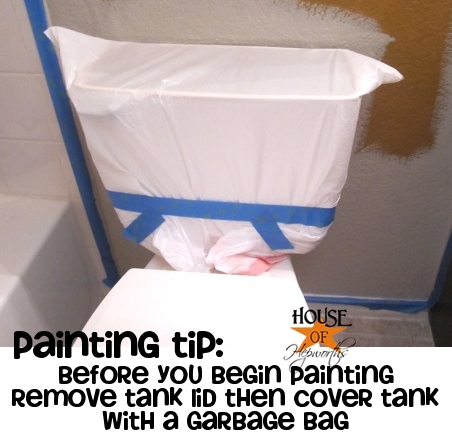
I also threw in a tip about painting around a toilet. Sure you can remove the whole tank, but seriously. Do you really want to remove the whole tank? I didn’t think so. And neither do I!
Well, today I’m back to share another step in the guest bathroom makeover. This time it involves hanging some pretty shelves above the toilet.
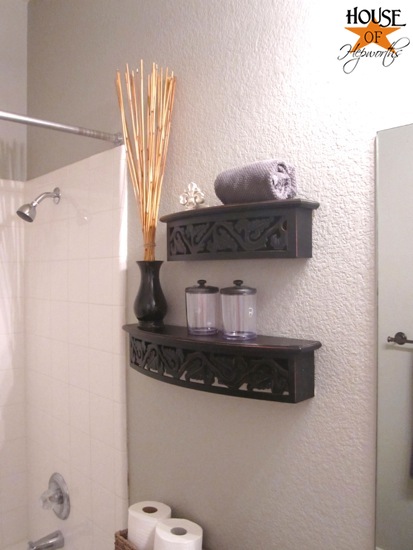
I found these shelves at Ross a few years ago when we were living in a little fully-furnished apartment in Beverly Hills, California (Ben’s Company sent us out there for 6 months for a project).
Okay, so this is so weird. I posted about these shelves almost exactly 2 years ago, to the day. How weird is that?
Anyway… the shelves got a little switcharoo with the decor when I showed you guys how to paint ceramic a month later.
Looking up these old posts really brought back some fond memories of living in the 90210. Well, we actually lived in 90211, but who’s counting? There’s a part of me that really misses that little apartment, our simple carefree life, and our many weekend vacations around Los Angeles.
And of course, who can forget that I started this blog almost two years ago (this Tuesday will be my two year blogiversary!) in that cute little Beverly Hills apartment.
Wow. Nostalgic anyone? Not sure what got into me. Let’s get back on topic, shall we?
Where was I? Oh, shelves. Right. Okay, so I’ve had these shelves in my stash of crap-I-want-to-use-but-don’t-know-where-to-put-it pile for a year and a half. This bathroom makeover seemed like the perfect opportunity to proudly display these beautiful shelves.
Only problem? (A problem I chose to ignore in Beverly Hills)…
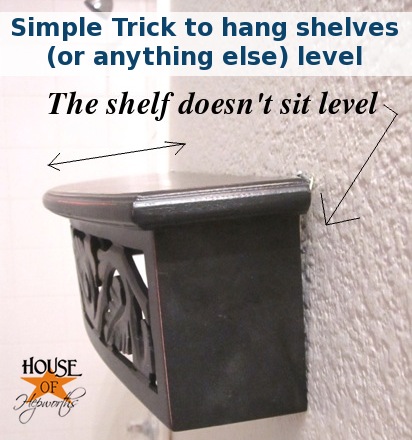
They don’t sit level from the wall. Check it:
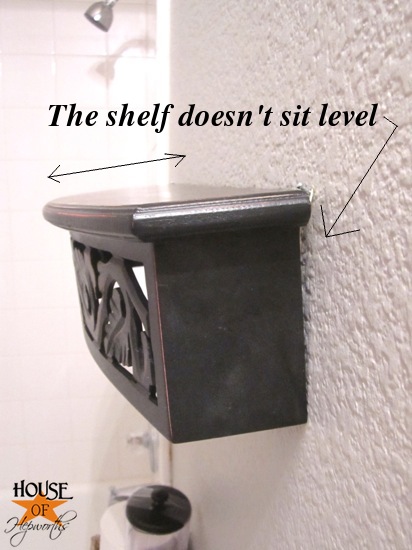
How would you like to be minding your own business doin’ your thang on the porcelain throne, when all of a sudden something rolls off the shelf and smacks you on top of your head? Ya, me neither!
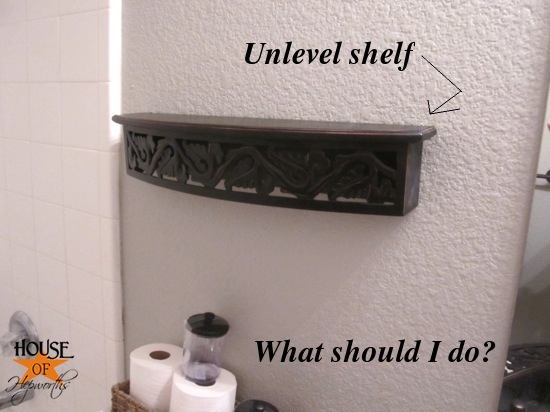
Obviously I needed to do something to get these things to sit level.
I went into my office and dug around for a minute trying to figure out what I could use to remedy this non-level situation. I totally scored when I stumbled upon the best invention ever. One that I use constantly around my house.
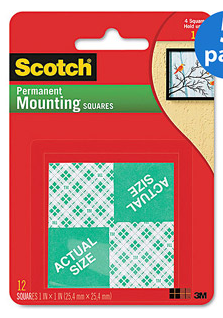
Scotch Mounting Squares.
These things are the best! They are kinda thick, and are sticky on both sides.
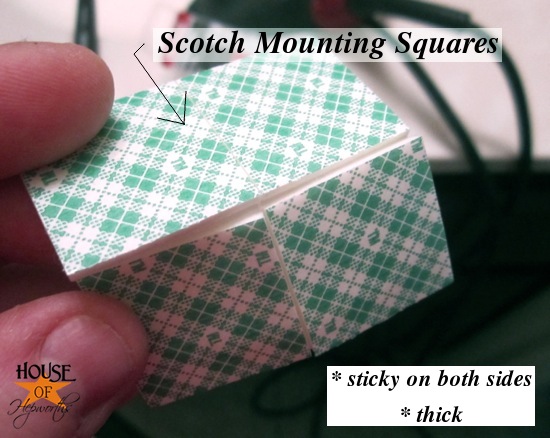
These squares will totally do the trick. All I did was take a square and cut it in half. Then I peeled off the paper on ONE side of each square, then stuck the two rectangles together to form a thicker Mounting Square.
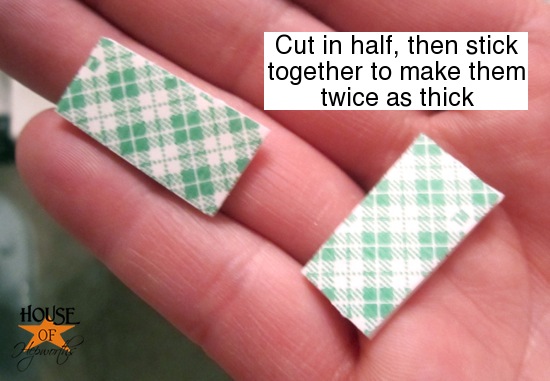
From there, I peeled off the paper on ONE side, and stuck it to the bottom corner of my shelf. Then I did this again for the other bottom corner.
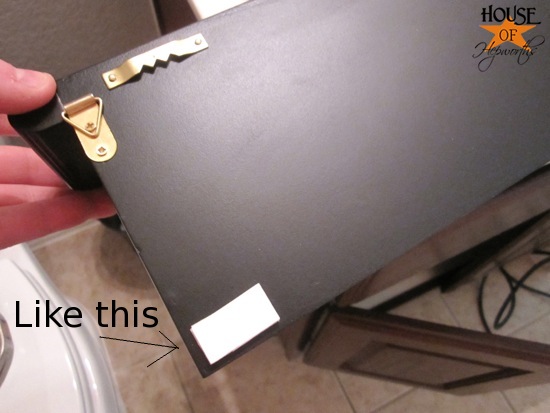
Please note: I didn’t peel the paper off the back side of the Mounting Square. I didn’t want it sticking to the wall, I just wanted it to sit against the wall.
See how the two pieces are stuck together then stuck to the shelf?
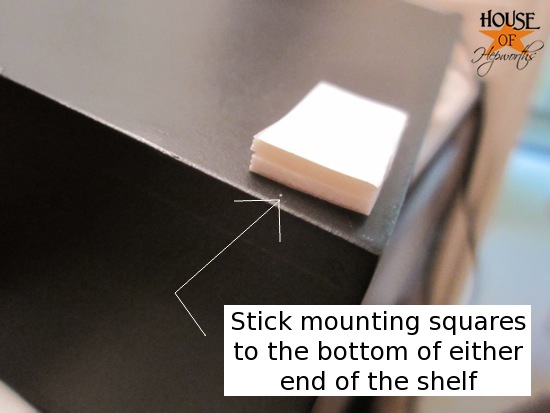
When I hung the shelves, the Mounting Squares gave it just enough space against the wall to make the shelves sit flush and level.
Such a simple and cheap solution to a really irritating issue!
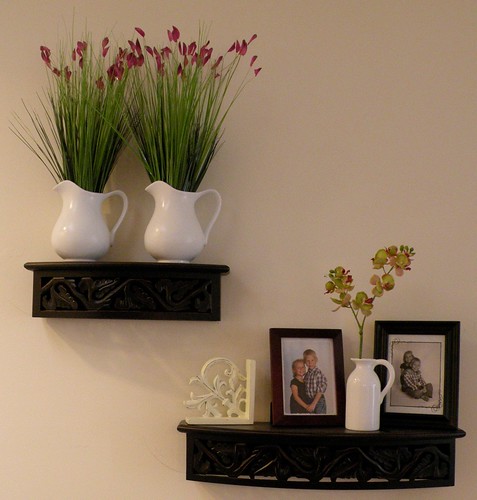
Look how great they look now!

I’ll be back tomorrow with even more riveting updates to this small but well used bathroom. Hopefully the end result will blow. your. mind. And not just when you are high either.
Have a great day, my friend! Stay tuned because in addition to this bathroom makeover, I’ve also got a laundry room renovation going on, and both kids are getting a little bedroom updating too. Yes, I am crazy! I love DIYing though!


Sometimes it’s the simplest ideas that make the biggest differences. I’d never thought of this idea so thank you for sharing.
Smiles,
Lesli @ BeautifullyCoastal.com
this is so clever. one of those ‘why didnt i think of that’ – kind of ideas.
thank you for sharing.
too funny the great ideas you come up with in a pinch!
Such a great tip! I am off to level some shelves
Clever! I was having that same problem in our old house with some shelves! Love your trip down memory lane for the blog! Congrats on 2 years!
Great idea….looks fabulous….smiles
I recommend Museum Wax for keeping things attached to the shelves (if you don’t plan on needing to take something off for a while). I’m from CA, so the only way something gets to go on a ledge shelf is if it is tacked down with Museum Wax.
Great tip, Alison! Now if I could figure out how to level my brain, I’d be in great shape…hahaha…
I put a medium size mirror up in my formal lv. rm. but it seems to want to twik , so I grabbed some of the wax you use to hold candles inside their little holders. I got my mirror back to level an took one corner and put the wax on it. Then I pressed the corner of the mirror against the wall, I now have a mirror that does not move! Sometimes the other types of sticky holds if not careful takes paint with it when you remove it, so I tried this. Another great tip, I painted a headboard and needed it leaned against my wall as I painted it, too cold outside to paint in March. I grabbed wax paper and blue paint tape and taped it to the wall in sections of where the headboard rested. I was able to paint the top and it did not stick and leave paper behind. Just a few touch ups after dry and removed paper from wall. touch ups were where wax paper stuck on headboard .
SO SIMPLE!! I have a bathroom shelf that sits slanted like that, and some mounting squares in the garage…guess what I’m off todo right now? Thanks so much for this (I wish I had thought of it!) tip! Fantastic!
using a thick thumb tack underneath on the inside under the top shelf area works great too
GENIUS!!!!!!!!!!! I am so doing this! GENIUS!!!!!!!!!!!!!!
You are a lifesaver! I know exactly where I’m going to use this tip!
Dear House of Hepworth,
I bought a bunch of dynamite sheet sets and after a couple of years the fitted sheets have all torn leaving me with just the top sheet . . any ideas of what to do with the top sheets ? They’re all really pretty and in good condition. I have a dozen of them.
Yours HDL
I love problem solvers. I are one! Something goes around in my brain … it’s kind of like the rotating thingamajig that tells me my computer is loading … that says I know there’s something simple I have around here that will fix this. Sometimes it takes a day or two (more often than not … a few sleepless nights) but finally my computer … er … brain stops loading and I find that simple and usually free solution. I think I just have that crossword puzzle solving mindset that won’t let me rest until I find a solution. I can feel when it’s just on the tip of my tongue (so to speak) I’ve used this mounting tape method myself. I also have huge rolls of stick on velcro someone gave me that I use in a similar manner … when the need arises. (Wow … I am long winded … gotta work on that)
I have those exact shelves. I flipped them over and now they hold so much more. Love your tip. That is why I flipped them. They would not hang straight. Keep up the good work.
Simply brilliant! I will remember this, as this is a huge pet-peeve of mine, and I’m sure it’s what has been keeping me from putting up my shelves for the past, oh…2 years or so….thank you
Very nice job on the bathroom redo. A question; would you consider stashing the toilet paper somewhere else or keeping it covered on top of the tank? Thinking about what the “job” of the toilet paper takes away a little polish from the room.
Well, aren’t you clever?! When you said “easy”, I was thinking, “yeah, right”, but that is super easy! Thanks for sharing! Oh, and I love the toilet idea, too!
Great Idea….on my way to fix my shelves now!
wow this is great! I would never have thought of using something like this. Now I know what to do in the future
Great Idea – I have used clear thumb tacks in the back of the wood shelf or if the shelf is plastic but it into the wall – the clear is almost unnoticeable and works perfect
Thumb tacks are a great option too!
Why not just use the little felt pads for the bottom of furniture? You can buy those in different colors and thicknesses and they have the peel-off backs too and are a LOT cheaper! I just rehung a HUGE heavy mirror (took it down to rehab it with paint) with them on the bottom because the mirror had pulled the paint off the wall at the bottom where it sat against the wall.
Also another tip to hang something on wall is to buy one of those cheapie metal thresholds that they sell at home improvement stores. Cut 2 pieces that are the length you need for your item. Attach one to the item with a ‘flare’ pointed down, hang another on the wall with thee flare pointed up. Then just hang the flare on the other flare. It’s just like what Pottery Barn puts on some of their heavier items (only theirs has a level bubble thingy). This one works just the same!!!