Hey hey House of Hep readers! My name is Beth from Sawdust and Embryos, and I’m so honored to have the opportunity to be a guest here today! Allison is a huge DIY role-model of mine, and a major pioneer in the DIY biz… and I’m so grateful she’s letting me in on some of the action!

At Sawdust and Embryos, my man-boy (Nick) and I love to share our many DIY endeavors, furniture transformations, various tutorials, updates to our home, and the adventures of raising twin toddlers! There’s never a dull moment… that’s fo SHO.
I’m excited to throw down a few of our all-time FAVE projects for your viewing pleasure! You can click on each photo for the full story/tutorial…
Kitchen remodels are known to be the MOST EXPENSIVE… but all we did to change things up was to add recessed lighting, paint the backsplash to look like tile, and paint the walls (using a glossy swirl technique on one wall). It’s amazing what a little paint and good lighting can do!
Joel Dewberry Inspired Dresser: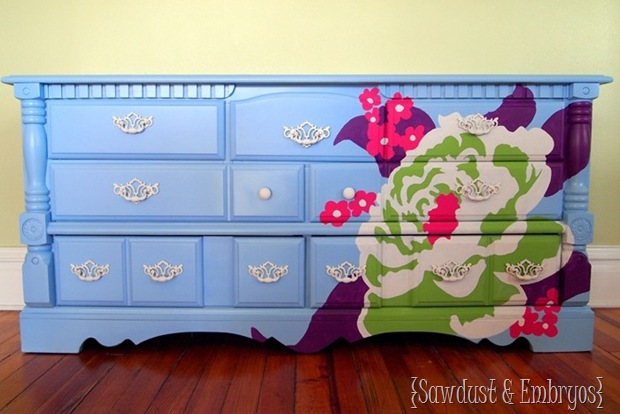
This dresser started out very chunky and outdated. After prepping, priming and painting, I scanned and photocopied the Joel Dewberry fabric onto a transparency and… using a projector, traced and painted the design right onto the dresser. It’s FAR easier than you could possibly imagine, and has SUCH beautiful results! I hope you’re give it a try! (most libraries have projectors they loan out for free). You can use any design, pattern… anything! Full Tutorial HERE!
Wood Grain Coffee Table: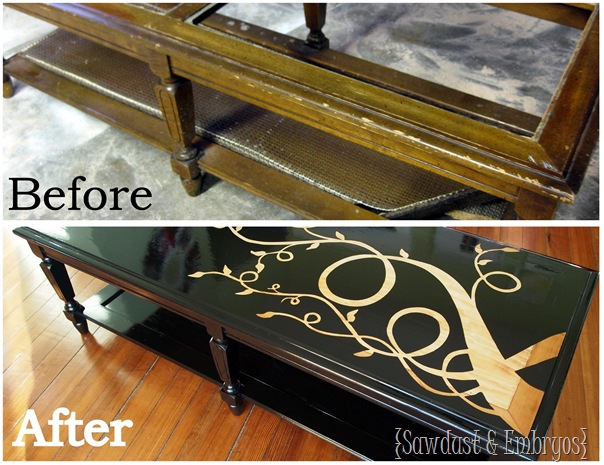
This tragic cast-off coffee table was destined for greatness! After making the necessary repairs, we applied a swirly vinyl, and primed and painted over it. Then we removed the vinyl, revealing the beautiful wood grain underneath, and finished by slapping on several coats of poly…. leaving us with such a sleek/glossy and unique piece! Detailed tutorial for this process HERE!
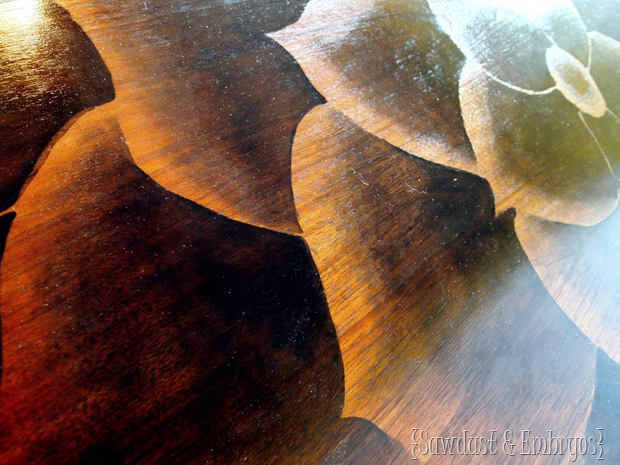
After literally pulling this buffet out of a burn pile, I decided to try a brand new technique and see if I could make artwork with stain… shading as if I was drawing with charcoal. And wouldn’t you know it? It turned out AMAZING if I do say so myself. Olive it. Before and after pics and full tutorial HERE.
EASY Upholstered Headboard Tutorial: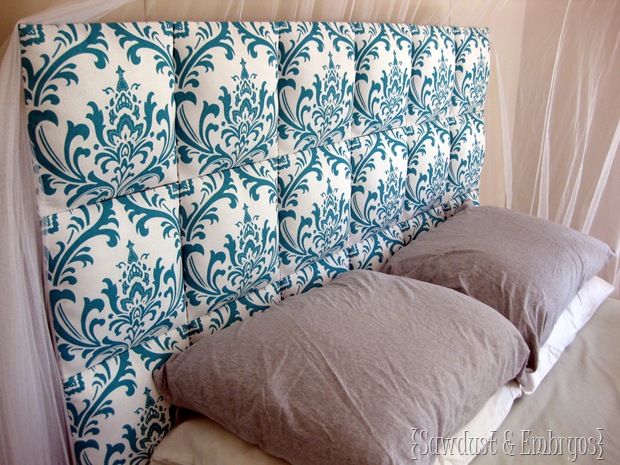
We desperately wanted an upholstered headboard in our bedroom, but all the DIY tutorials out there are SO complicated! So we came up with our own way to make it happen… by upholstering individual squares and securing them to a ‘backboard’. It’s so simple and perfect for a nonexistent budget like ours! Full headboard tutorial HERE! And if you want to know how we installed our headboard in front of a window, and see our master bedroom in all it’s glory, click HERE!
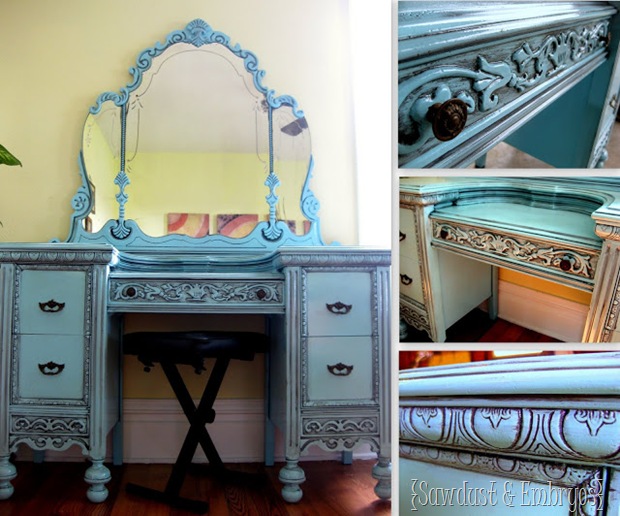
This is one of our very first furniture transformations, and remains one of our favorites! There were no special treatments or techniques we used (other than Glazing), but it’s such a beautiful, ornate piece… and we love how the explosion of color really gives it some personality.
These are just a handful of MANY projects we’ve done on our blog Sawdust and Embryos, and we love laying out very detailed instructions so you can feel confident trying your hand at these ideas yourself! HUGE hanks again to Allison for being kind enough to let us take over her blog for a day!
Please consider stopping by Sawdust and Embryos and saying hello! We’d be honored to have you snoop around!


Wow! I am so glad you and Allison are friends or I may have never found you!! What an awesome blog you have! I am following!!
I can’t wait to have the time this week to read all of your older posts!
Thanks,
Darlene
http://www.MyHoneyBunch.CO
OMG! I love that kitchen wall! I am going over there right now ;o) Er, virtually anyway!