I have been working on the kids’ gender-neutral bathroom this week and it is turing out exactly how I have been envisioning it. I am so excited to share the progress with you guys.
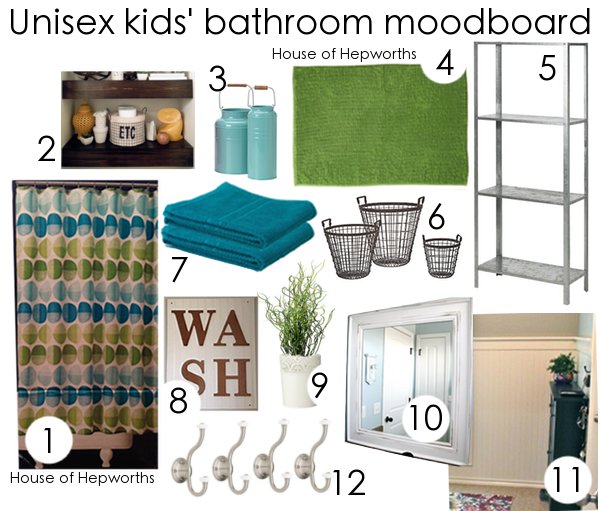
Last week I showed you the mood board I created for the bathroom. I am so glad that you all liked it! I am pretty good at power tools and crafting and stuff, but the whole “decorating” thing is not really my forte, though I do try. Hearing that you liked my concept convinced me that my collection of stuff wasn’t a total train-wreck.
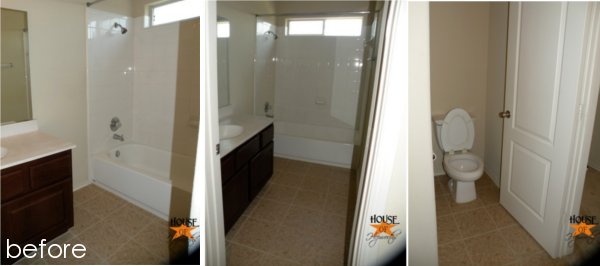
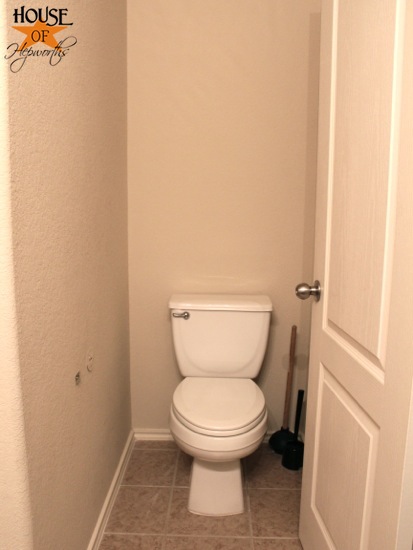
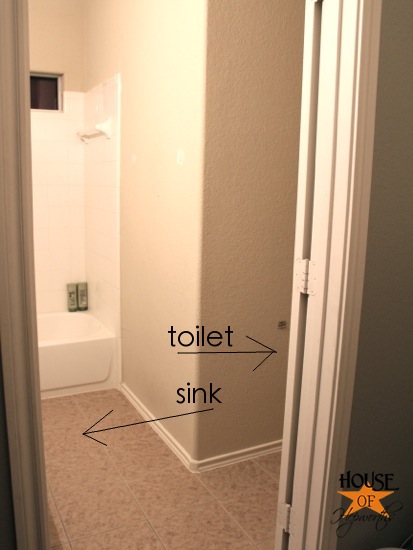
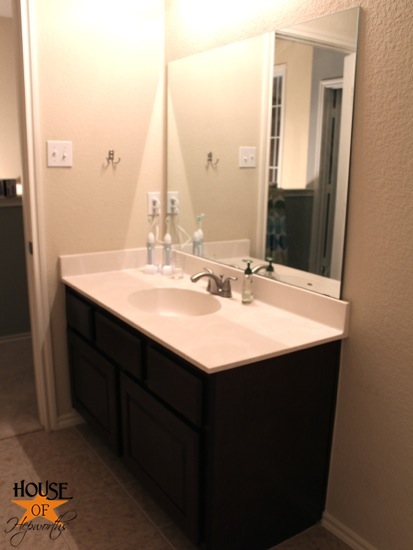
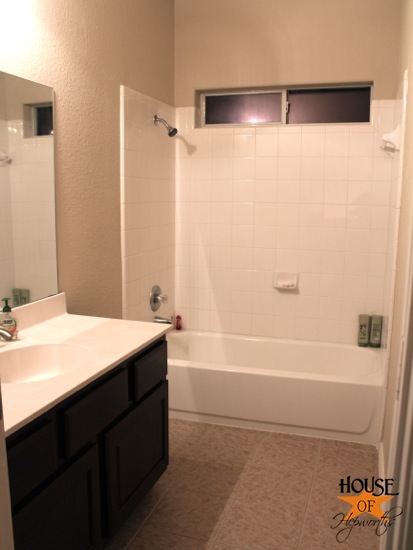
Here’s where I stared from:
Before I dive into all the details I think it will be helpful if you see the end result so as you read along you can visualize what I’m doing and why I’m doing it. Today I’m going to take you through adding all the moulding, but I’ll stop before any of it gets caulked, puttied, or painted. It’s still looking pretty raw, but trust me, after I’m done painting it will look perfect. Caulk is excellent at hiding all the little imperfections.
I didn’t photograph this part, but to hang the beadboard and all the other moulding I used Liquid Nails for Panelling and I used my nail gun and air compressor with 18 gauge nails. I chose the 18 gauge nails because they are shorter than the 16 gauge nails and I didn’t want to accidentally hit any plumbing behind the walls.
Also, just a handy little tip: Beadboard comes in 4′ x 8′ pieces. They are huge and heavy and probably won’t fit in your car. I always have our local hardware store cut the boards in half for me so they are a more manageable 4′ x 4′, which just so happens to be the perfect height to slap on your walls.
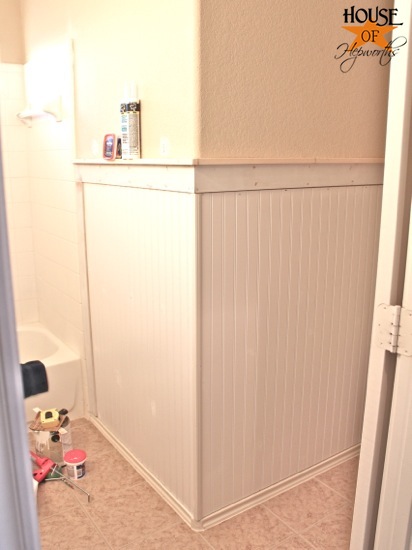
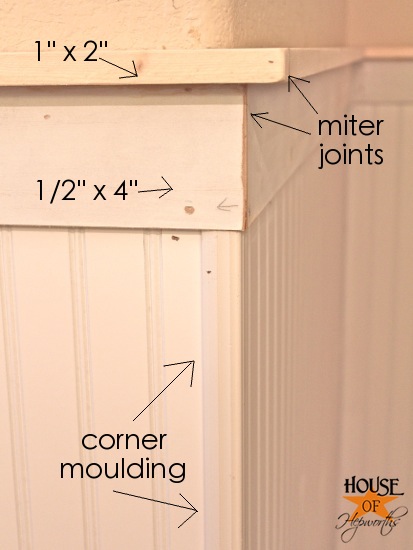
I added 4′ tall beadboard onto all the walls, topped it with a piece of 1/2″ x 4″ MDF (our local hardware store will cut a sheet of MDF down for you to any size you want), then added a piece of 1″ x 2″ whitewood on top to finish it off and add a little shelf. The one outer corner in this bathroom (above image) has a strip of corner moulding to hide the raw edges of beadboard.
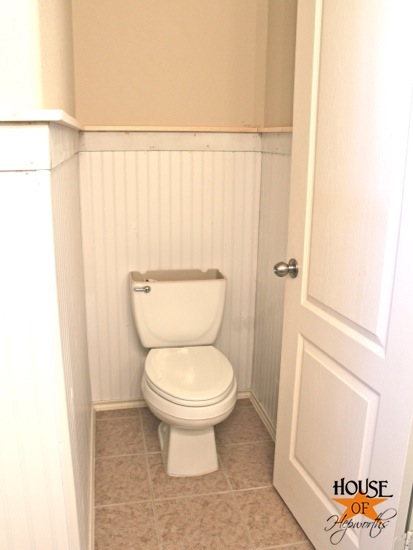
A view of the little toilet area:
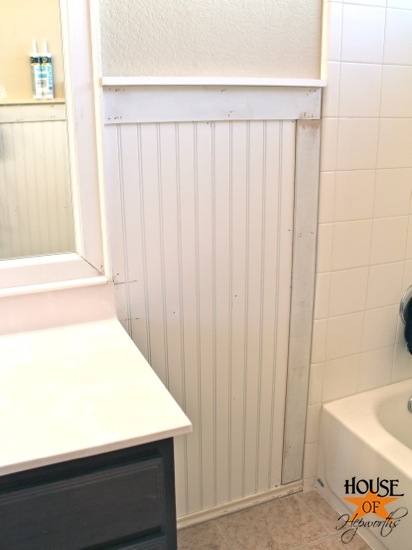
Between the sink and the bathtub:
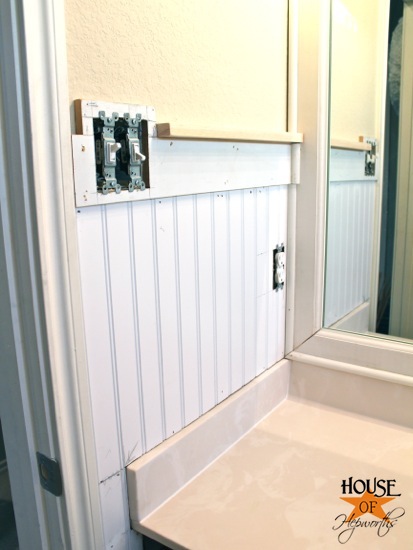
Next to the sink. I had to get creative with those two switches and the plug outlet. I’ll dive more into that in a bit.
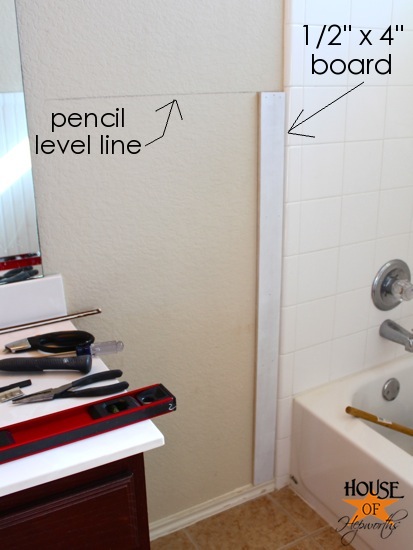
I started by framing out next to the bathtub. I ran a 1/2″ x 4″ board down either side of the tub just to give it a more finished look. I installed these first so that it was easier to measure for the beadboard. (Math isn’t really my most favorite thing in the world so I try to come up with ways to make the measurements as easy as possible.)
Once the vertical boards were installed I began hanging all the beadboard. I hung all the beadboard before I did anything else.
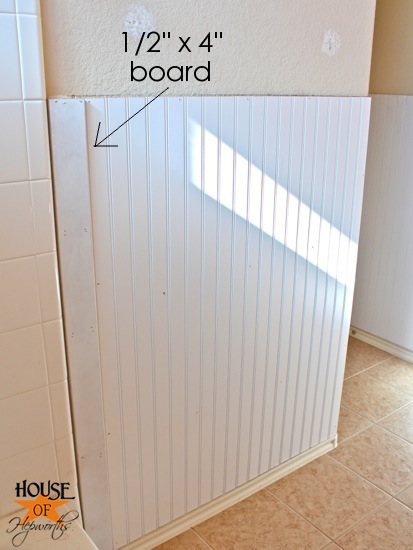
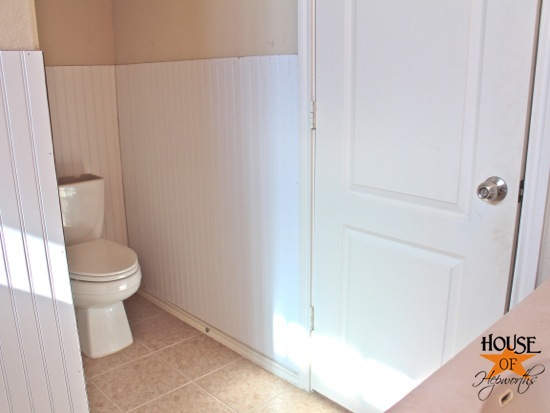
Where the two edges of beadboard came together in this outer corner, I just left them raw. I ended up capping them with a piece of corner moulding, so it was okay that they were off by about a 1/16th of an inch.
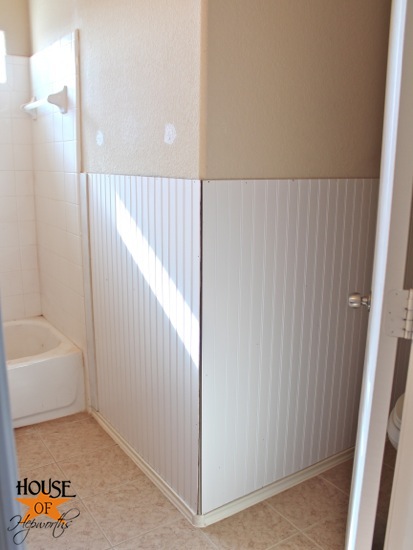
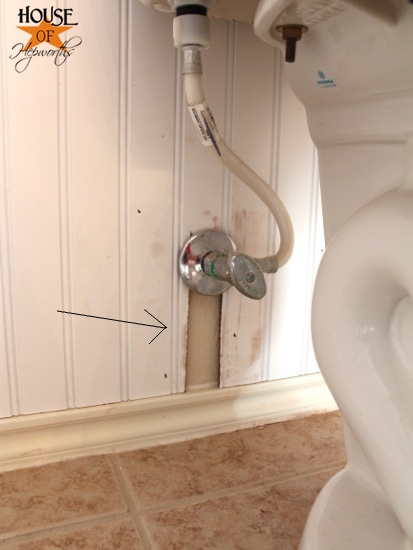
Around the toilet was a bit more tricky because I didn’t have much space to work in. Also, there’s a plumbing pipe that goes from the toilet into the wall. I needed to get the beadboard around that without having to un-install the entire toilet. Bleh.
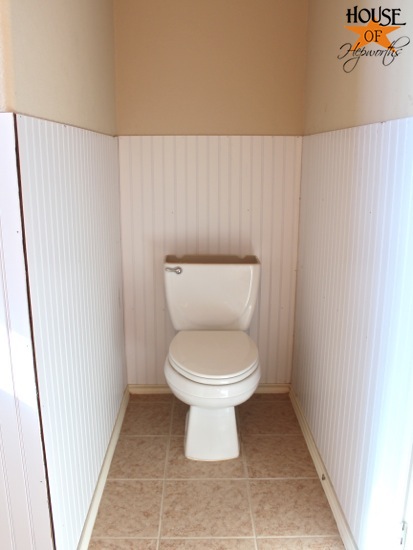
I cut the smallest of notches into the beadboard and just slid the board behind the toilet.
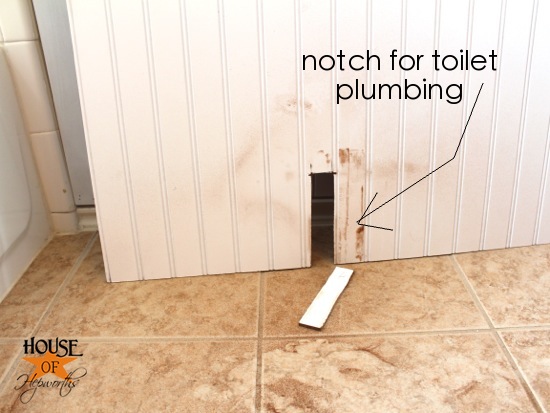
It fit perfectly. And once I paint everything white that little section of sheetrock won’t even be noticeable anymore. Besides, how often to people look behind the toilet? If you are super concerned about it, you can just take your scrap piece that you cut out, trim it down a little, and glue it in with liquid nails.
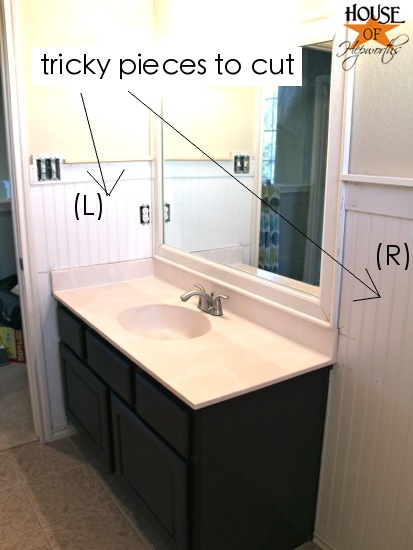
Because of the small and awkward space in the bathroom there were several tricky cuts I had to make. If you are a beginner and have never cut beadboard before, you might want to start on a more square room without a sink to cut around.
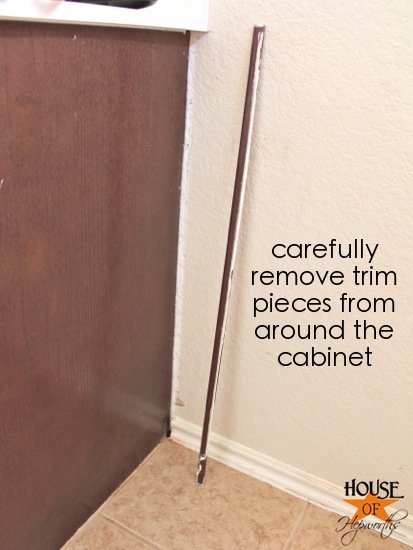
If you are brave and want to try to cut around a sink, measure twice and cut once! I found that removing the little strip of moulding around the cabinet made the end result look more professional (I will just reattach them on top of the beadboard once it’s all painted).
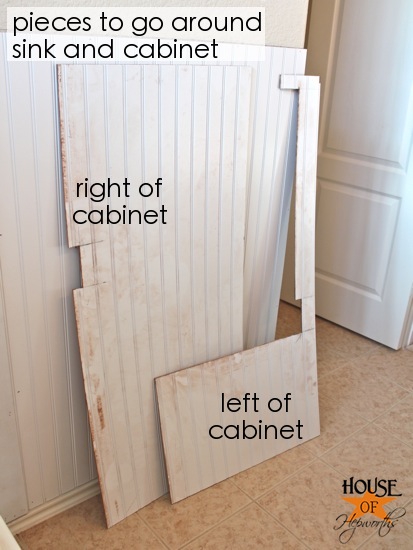
The easiest way to cut the pieces out is to first sketch the area onto a sheet of paper. Then take every single measurement you can think of. Up and down, left and right, from the baseboard to the bottom of the countertop, then from the baseboard to the top of the countertop, etc. Once you have all your measurements you can start transposing them onto your beadboard. When every measurement has been marked, finally you can cut it out. (I did all the cutting in the garage).
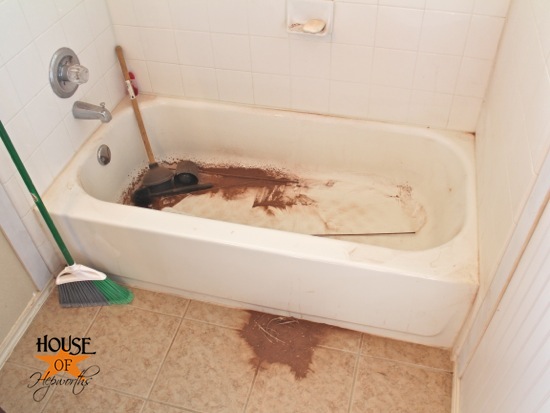
I still had a few spots that were too tight, and I forgot to cut out my plug outlet, so I opted to trim it in the bathroom with my Dremel. Huge mess! Yikes!
All the awkward cutting was worth it in the end. Now I have a seamless look.
Here’s how to cut around the plug and reattach it.
For the plug outlet, once the hole was cut I just pulled the plug through the beadboard hole (make sure you shut your power off before doing anything with electricity!).
*edited to add: it has been pointed out to me that you need to use an electrical box extender to keep everything to code. You don’t want any electrical current catching the beadboard on fire. Here’s a good one to purchase and here’s a youtube video explaining how to install it.
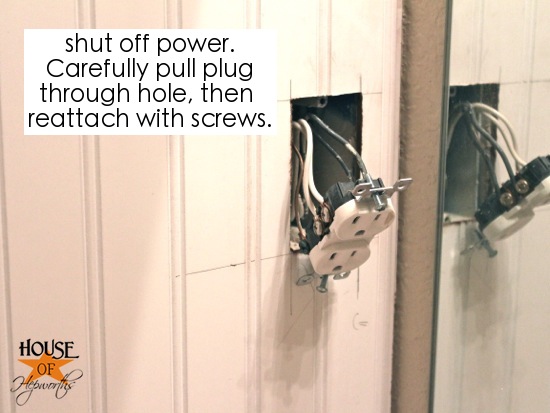
Then I used the same screws and reattached the plug back into the wall.
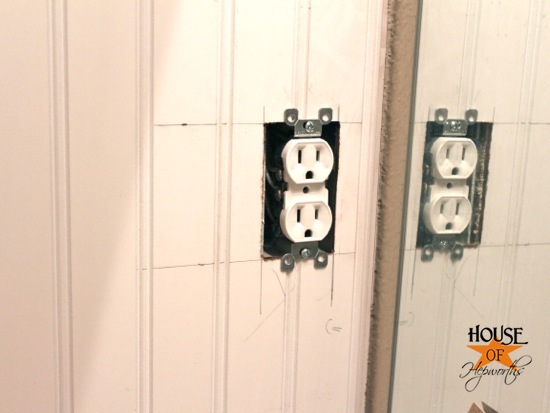
After all the tricky cuts, now attach your 1/2″ x 4″ MDF strips. These are a breeze compared to the beadboard! Once those are glued and nailed to the wall, top it all off with a 1′ x 2″ board.
For the one outer corner I opted to miter the corners so it wouldn’t have any raw edges showing.
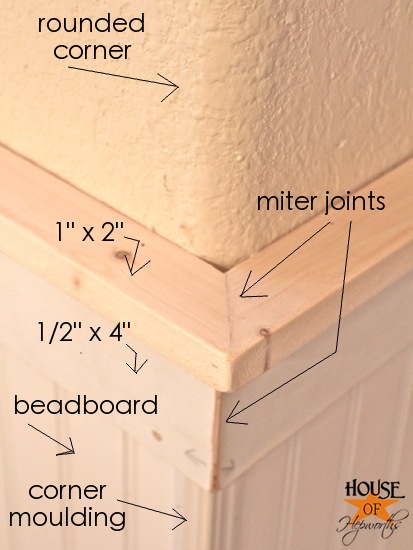
And here’s a breakdown of all the layers of moulding:
The switches were a little tricky because of the MDF board.
*edited to add: it has been pointed out to me that you need to use an electrical box extender to keep everything to code. You don’t want any electrical current catching the beadboard on fire. Here’s a good one to purchase and here’s a youtube video explaining how to install it.
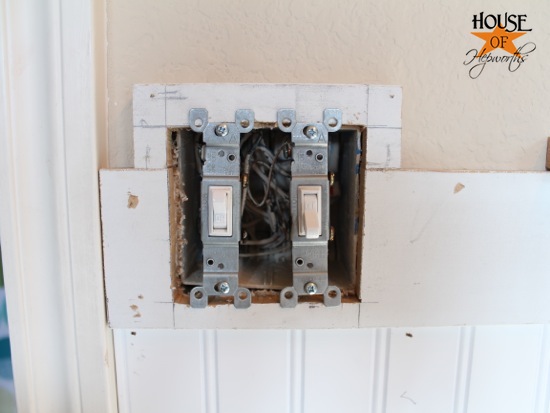
When I did the beadboard in the laundry room I opted to cut around the light switches. They don’t look bad, but it kind of annoys me that they are inset, so for the bathroom I wanted the switches on top of the board, not inset into the board.
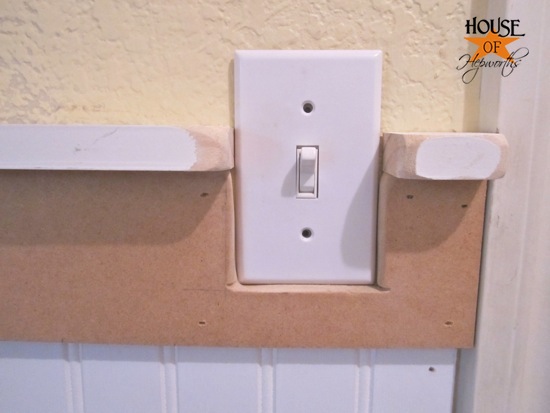
In order to have the switches sit on top of the board, I had to make the board wider. I started with my 1/2″ x 4″ MDF board. I took the switch plate cover and cut out an additional piece of the MDF to fit around the plate cover. Then I cut a square out of both that the plugs would fit through.
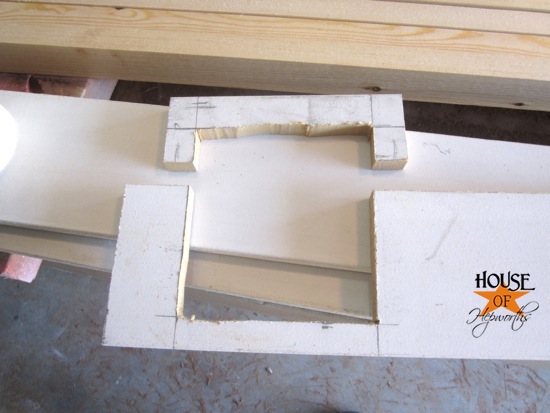
Added some wood glue…
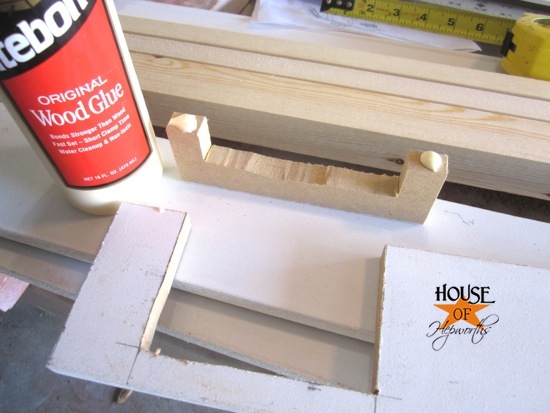
And clamped it together for about an hour while it set.
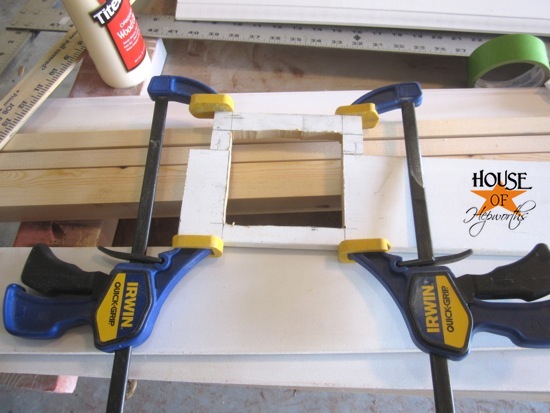
I was left with a board that now fits around the switches.
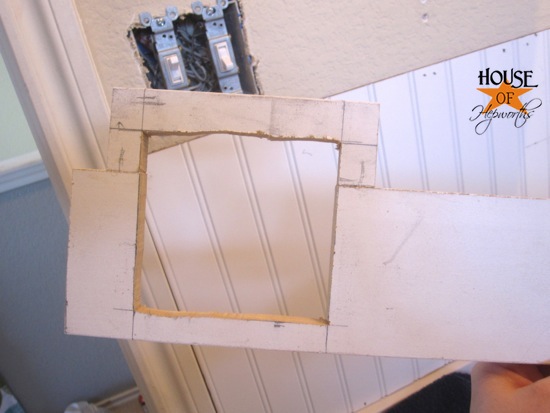
With the breaker shut off, I unscrewed the switches and pulled them through the hole. Then I attached the board to the wall. After that I reattached the switches into the same screw holes they came out of. I had to find longer screws though because mine weren’t long enough now that I’d added an additional 1/2″ depth to it.
*edited to add: it has been pointed out to me that you need to use an electrical box extender to keep everything to code. You don’t want any electrical current catching the beadboard on fire. Here’s a good one to purchase and here’s a youtube video explaining how to install it.
**I will be installing these today on both switches and the plug. Gotta stay safe!

Whew! We made it through this long-a$$ post! The reward? Some side-by-side before and “current” pictures. This will be fun!
Doesn’t the toilet area already feel more open and less claustrophobic?

The new trim makes the room feel bigger and taller.

I snuck a picture of the finished mirror in. 

It seriously amazes me time and time again how much a little bit of moulding can make such a huge difference in a room. It goes from “builder grade” to “custom home” in just a few hours and less than $100.
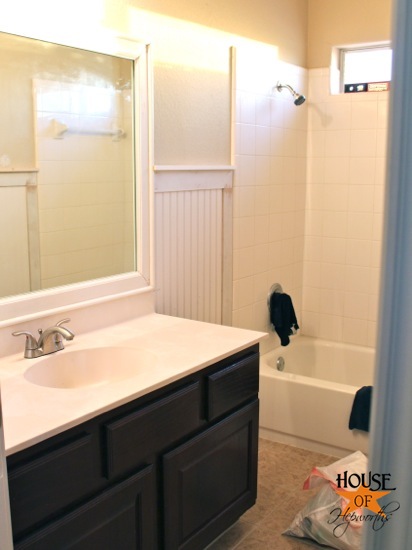
I’m going to tackle the mirror tutorial in the next post. This post is already waaaaay too long. Plus, I want to dedicate an entire post to framing out the mirror so I can get more specific with it.
So there ya go! The bathroom is totally trimmed out. I am so excited to have that behind me. Now I get to putty, spackle, and caulk the heck out of everything. And then… wait for it… paint! Fresh white paint.
I’m still torn on the wall color. I’m leaning towards really light neutral gray (with a beige undertone, not a black or blue undertone). I want to keep the walls neutral and bring in color through accessories. Thoughts?
**this post contains amazon affiliate links.


Looks great!! I am a BIG fan of beadboard in the bathroom. When we redid our teeny tiny bathroom we put up beadboard and it made it look a lot bigger. Ours is white on bottom and beige (MS stone ?) on top, that way I can ‘color’ it up with the accessories. Can’t wait to see yours finished!
wow you need to come to my house and just do all that for me, it is looking great already!
Looks fantastic!
A bit of unsolicited advice from someone who has room with pine board that was installed the same way… You really should consider either using a “box extender” (a plastic square ring you can buy at the home center) on those switches or at least wrap around the screw areas with electrical tape as an extra safeguard against the beadboard edges igniting.
Its looking amazing! I agree with a neutral grey-beige color would look nice and then you can just change out the accessories without being committed to a too-trendy color scheme. You don’t want any one to come along later and say “that bathroom is SO 2013”! Classic is the way to go!
I first saw the “notch for plumbing” picture before the words… and thought… now, why would she make a mouse hole in the wall? LOL.
Is that the recommended height for it? I find it’s too high (but of course, I am 5′ 1″ so it would be up to my chin) I am planning on doing that to my rooms but a lot lower.
Good job around the toilet!
Woo-Hoo! You did a lot of work! Looking good! Love watching how you transform the place. I may decide to do bead board in out powder bath. I really like how it transforms a room.
Ok… so weird question here, but how will the toilet nook door close now that the molding runs the whole wall where the door jamb is?
Lisa – I had the same question until I looked again – that is actually the main bathroom door. The toilet nook does not have its own door. As for the other comment about the height of the beadboard…. I personally like the 4′ height. The first time I ever saw that treatment in a bathroom was when we were house hunting. They had white beadboard up to 4 feet, and then the most killer bright blue and yellow toile wallpaper above it. It was actually a poweder room, so smaller than this one, and it could handle a vibrant print. I loved that bathroom! Can’t wait to see more! Thanks for all the detail.
I love love love the beadboard! I really want to put some up in our master bath! It looks absolutely gorgeous!
Daaaaaaaaaaaaaaang, girl! That is a lot of work….you are seriously talented at the hardcore DIY. That bathroom is going to look so great! A total upgrade, for sure!
I want to do beadboard in our master bath, but my husband is convinced that we’d have to remove and then replace the baseboards. It doesn’t look like you did that here, that you just made sure the beadboard was flush to the baseboards. Is that right?
Your bathroom looks GREAT! Love the mirror, too!
Looks great! We did a similar project a couple years ago. In hindsight, I don’t think I caulked enough or put quite enough paint on to really seal it. Next to the tub, where we have torrential typhoons due to a 5 year old’s adventure / combat / baths, the bead board has started to swell in spots, looking like it’s bubbling. It absorbs water like crazy, especially in the recessed dados in the board.
Love it!! I love your posts because they are so doable!! You give us great thoroughly instructions too!!! Thanks;)
Whoa, major job, but well done on the execution! This looks great, Allison!
Thanks Beth!
How would you cover the raw edge of the beadboard on the outside corner if you weren’t continuing the beadboard onto the other wall? My eat-in area in the kitchen leads into the hallway with an outside corner, and I only wanted the beadboard to be in the dining area, but I have a raw edge to hide. I was thinking about doing corner molding anyway, but I was nervous of how it would look. I’ve been scouring Pinterest, but can’t find anything!
Looks awesome! We are currently remodeling our master bath & putting beadboard on the walls. We decided to go up about 54″ so we didn’t have the “weird” cutouts for the switches & it didn’t cut the room in half like it does at the 4′ level in our 8′ ceiling home. The reason we chose 54″? Because then there are 32″ cuts left over for wainscoting down our hallway later! I plan on painting the walls above the beadboard a pewtery-purply-gray…now to convince hub that’s a gender-neutral color….ha! Next hurdle after that is what color fixtures…I’ve always loved oil-rubbed bronze, but the “old fashioned” look of the beadboard is making me think chrome would be best. Decisions decisions!
What do you do if breadboard is all the way to the ceiling? How would you finish that off?
Probably with just a thin piece of moulding around the top, or add crown.
I love how you did the beadboard. I have a question, how did you attach the 1 x 2 at the top? Liquid Nails and/or nail gun. If you used the nail gun, where did you put the nail in? The sides or into the top? Thanks!!!
Nail gun into the top, then fill with wood filler and paint over it.
Did you Prime the beadboard before painting?
It came pre-primed
lol girl did your post / amazon affiliate link get hacked? check out the final line of your post and where the link points? not repeating what it says so I don’t get caught in your filter. think of this as a public service
Wow, omg thank you so much for letting me know! Clearly I was hacked. Fixing now.