This “The Fence Post Post” post is brought to you by Bob Loblaw from the Bob Loblaw Law Blog. {wink}
Name that TV show! Who else wants to give Netflix big wet kisses for bringing this series back?
We’ve had fairly good weather here in Austin for the past few weeks so Ben and I have tried to take advantage of it and get some much-needed outdoor work done. The biggest project on our list was to replace a section of our fence that fell over two years ago.
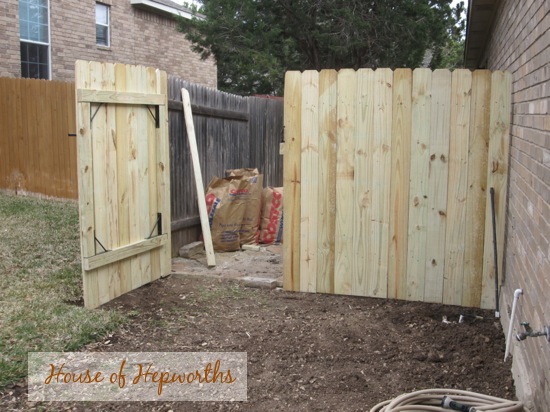
Yes, I said TWO years ago. We have spent the last two years holding our fence up with a large rock and some 2x8s leaned against the fence. The last big wind storm we had was enough to convince us to finally fix the fence once and for all. The wind blew the whole thing over and broke the gate completely off the post. You can see it propped up against the fence (backward I might add) in this photo. We are classy, y’all.
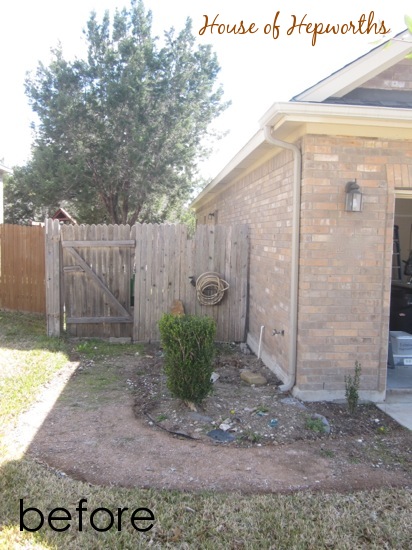
This side yard has been a work-in-progress since we moved in. It use to have an ugly walkway that I tore up and it also had a few dead shrubs that I tore out last year. The plan is to fix up the fence, then sod the entire dirt section, throw in a nice big shrub, and add a few stepping stones.
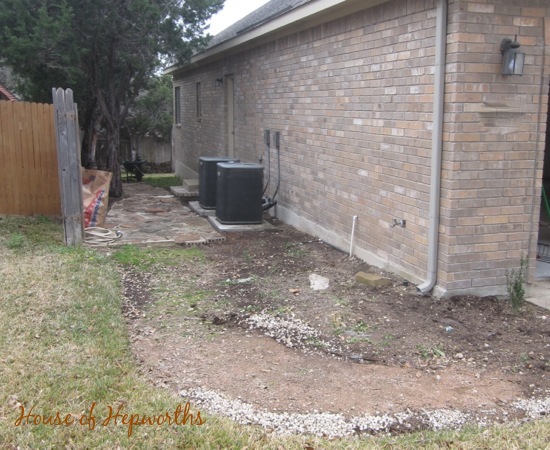
When the fence fell over and broke to pieces we figured it was time we’d better build the fence once and for all. Truthfully, we have put off the fence repair because we were both intimidated by building a fence and a dreaded gate! I even got a quote to have a fence company build a fence for us. The quote was for $500. I will tell you up front that by sucking it up and DIYing it ourselves, we built the entire section and gate for less than $170. We saved more than $330 by spending a weekend and doing it ourselves.
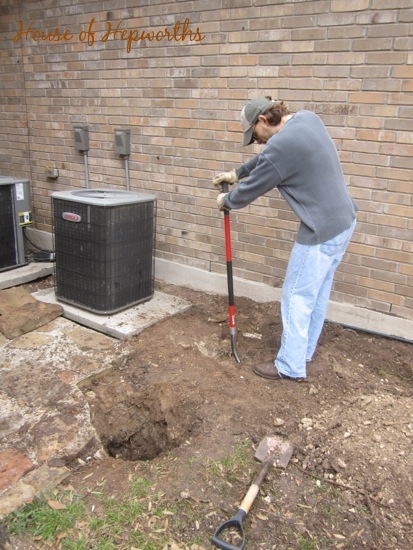
The first thing we did was dug two new holes for the 4×4 posts (I say we but let’s face it, I made Ben do all the digging). The old posts broke off at the ground, so we had to dig up the old cement.
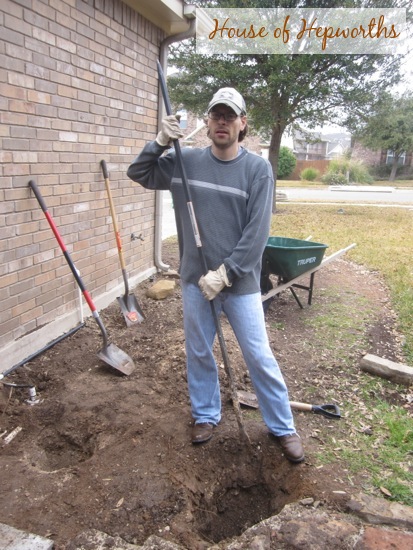
In Austin we have lots of limestone and rocks to deal with so digging holes can be a real pain in the rear. To break up rocks and make it a little easier we use a long heavy (17 lbs!) bar called a San Angelo digging bar. You can buy them at your local hardware store, but amazon also carries them and even offers free shipping which surprised the heck out of me because the bars are so freaking heavy. They work though!
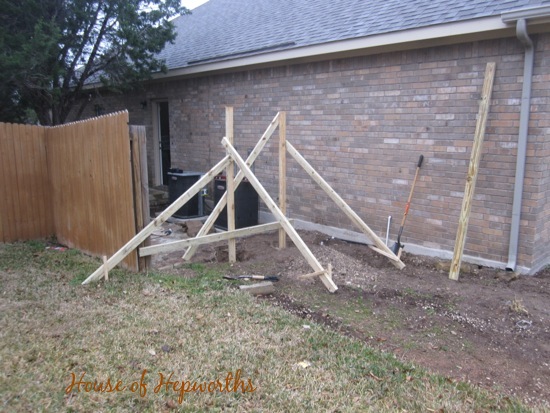
Once our holes were dug we set our 4x4s into the holes and braced them with some 2x4s, stakes, and nails.
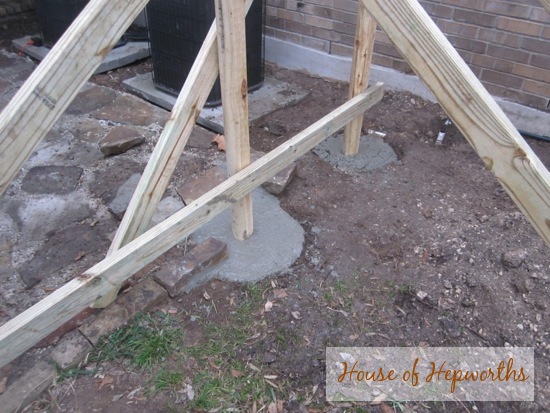
When everything was level we added our concrete. We purchased Quikrete Concrete Mix, mixed it in our wheelbarrow, and poured it into the holes. We used a total of 7 bags. Make sure to wash off all our tools and wheelbarrow right away or the cement will dry on it.
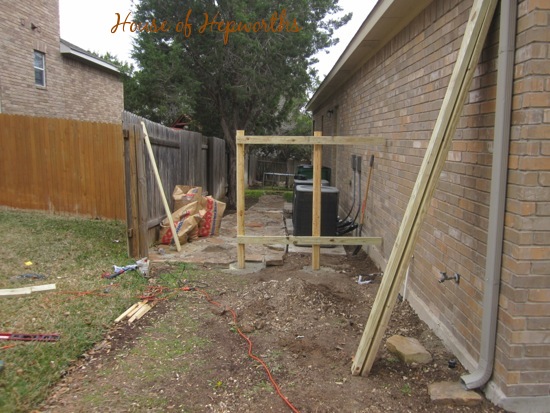
We let the concrete set overnight. The next day we removed the 2x4s, which we reused as the crossbeams on the fence. Some fences have 3 horizontal 2x4s, some have 2. We used 2 so that the fence would mimic the rest of the fence.
*Also, usually you would put your 4×4 closer to the house, but we have a sprinkler system in the way complete with three very intimidating PVC pipes and a fist-full of wires. We had to set the 4×4 away from the house that far, even though we weren’t that thrilled about it.
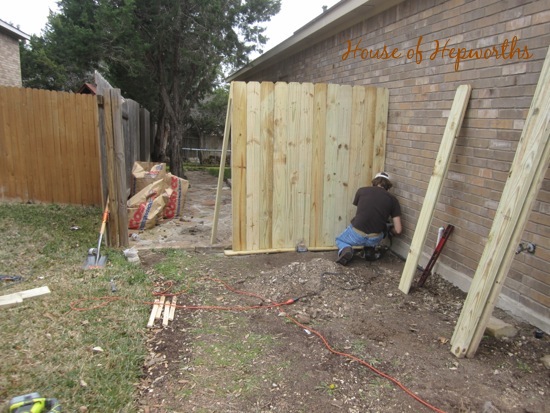
From there it gets pretty easy. We laid one fence picket on the ground and set all the other pickets on top of it (to keep the fence the same height along the top). Another way is to run a string along the top to level the pickets. We opted for screws instead of nails because screws hold better and wont pop out over time.
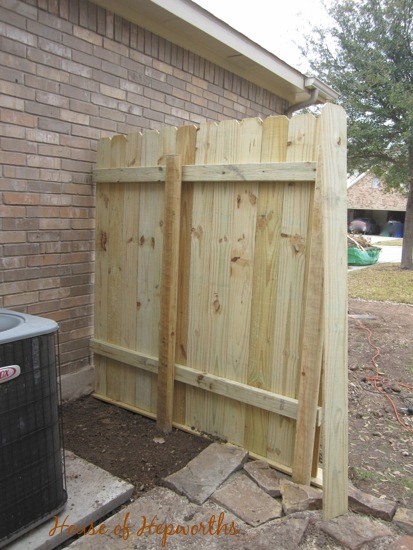
And there’s a view from the back.
The gate was more tricky and had us putting off the project for two years. Yes, we were both terrified of building a gate. How does one even go about building a gate? This step had us frozen in our tracks. Fortunately, I watch a LOT of DIY TV (my favorite type of show to watch!) and I saw a gate kit that was supposed to make gate-making a breeze.
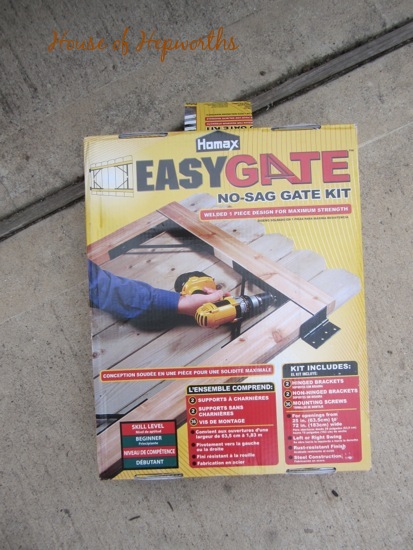
The kit is called the Homax No-Sag EasyGate Bracket Kit. *I am not affiliated with this company. I am simply sharing my experience with using this product.*
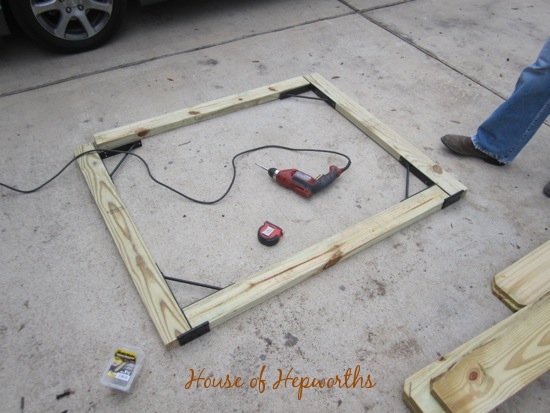
This kit made building and hanging my gate SO easy. The directions are on the box, easy to follow, and require only basic cuts. I also like that it makes the gate extra strong and keeps it from sagging. I know you can make a gate for cheaper with some 2x4s but for a first time gate-builder, I’m glad I bought this kit.
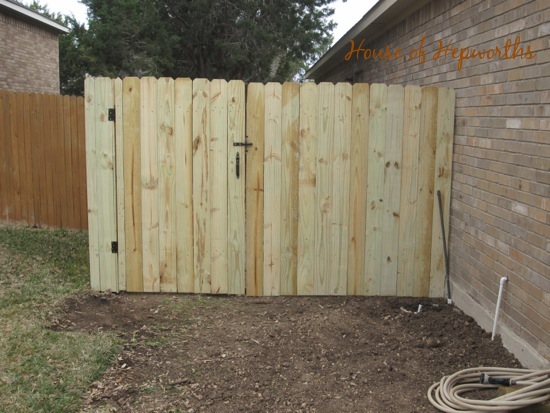
I would most definitely purchase it again, however I need to be 100% honest about my review.
The worst thing about the kit? The bolts that came with the kit were too big for the holes in the hinges that also came with the kit. I had to use some big wood screws I already had on hand instead (and I will be swapping them out soon for big bolts that actually fit.)
Also, the kit says to hang the pickets onto the frame before attaching the frame to the fence post. This is good in theory if your ground is totally level, but ours slopes just a bit. We attached a few boards before hanging the gate, and it looked ridiculous. We ended up hanging the gate, removing all the pickets, and hanging them again the same way we hung them on the fence (we placed two pickets on the ground for the fence section to leave room for the bottom of the gate to clear the future grass then we set the pickets on top of the stack of two, then screwed them into the gate). This way the fence pickets created a nice even line visually along the top.
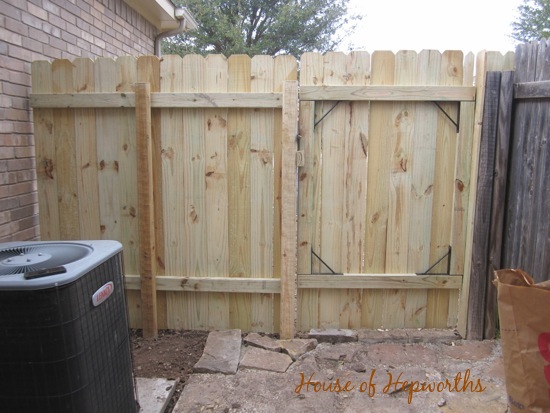
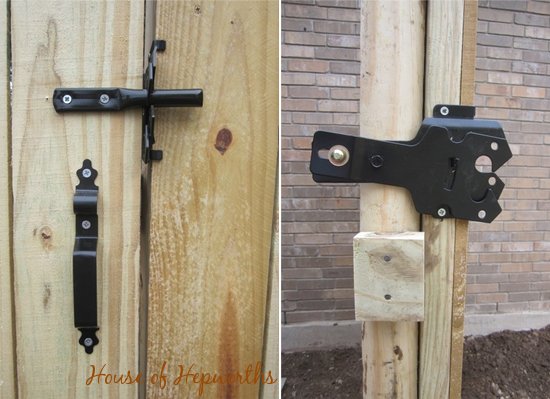
Other than those two complaints, I really liked the gate kit. It made building a gate very easy for amateurs like my husband and I. The kit does not come with a latch system, so we purchase that separately. Here’s something similar to what we bought:

Our latch is a little different but they both work the same.
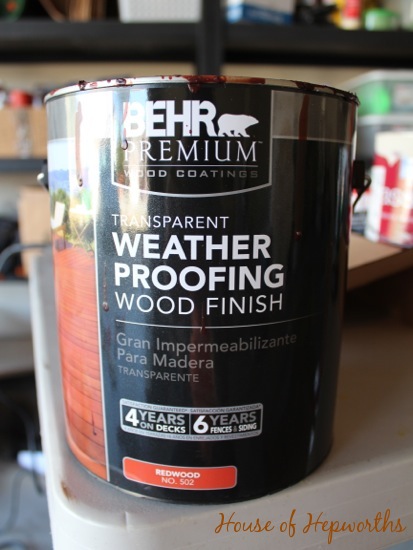
When the fence was finally done we added some stain – mainly to protect the wood and keep it lasting longer, but also so it would blend in more with the neighbors fence. We picked up some Behr fence stain. Here’s a picture with all the details on it:
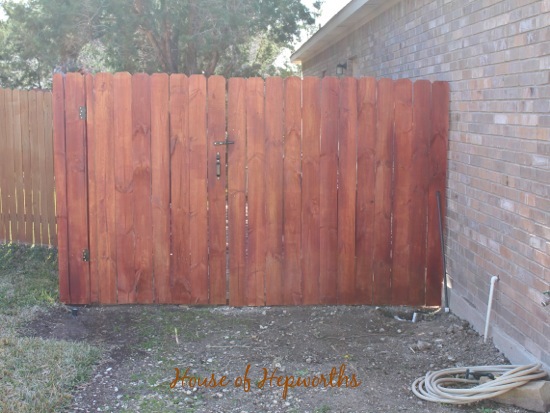
Ben used a regular 2.5″ paint brush to get in all the cracks while I used a small foam roller to roll the stain on.
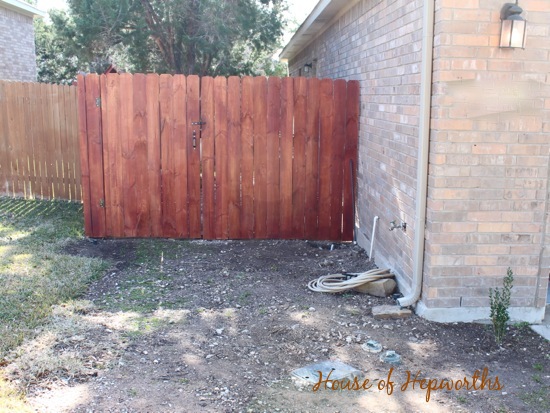
We made sure to get the front and the back of the fence.
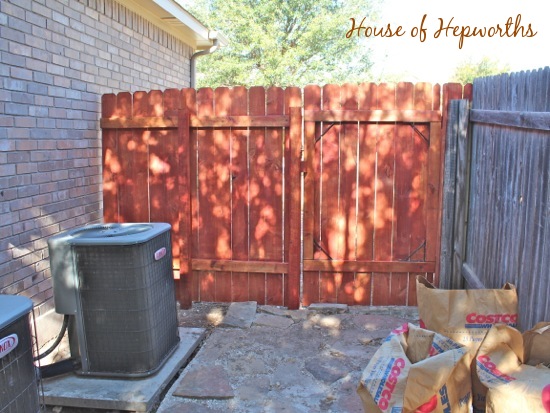
All in all we spent 3 days on the fence. The first day we prepped the area and set the posts, the second day we added the pickets and built the gate, and the third day we stained it. It is probably the first “big” DIY project I’ve ever done without my dad and I have to say Ben and I are pretty darn proud of our accomplishment.
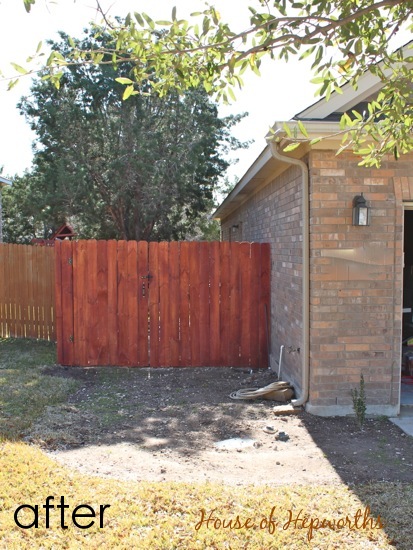
And just to save your finger from scrolling all the way back to the top, here’s a side-by-side to see how far this little area has come. Up next? Grass and shrubs!
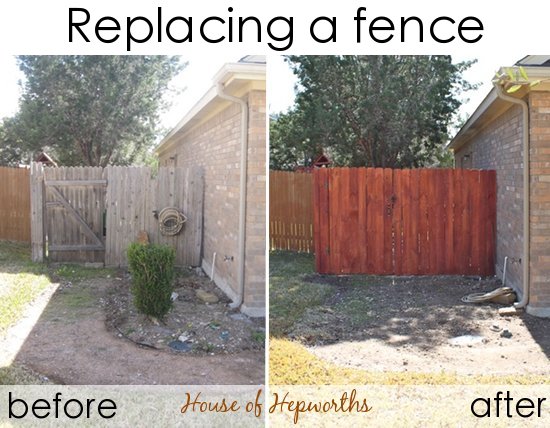
If you have any questions, please feel free to ask! I’m not an expert, and this is the first fence we’ve built, so I can assure you we probably made some mistakes along the way, so please be kind!
This post contains affiliate links from amazon.


Fence looks good! We call that tool the rock buster! When we first moved to our last house, we dug one test hole to see how much rock we would hit. The hole was a piece of cake and we hurried off to the local nurseries and bought several large oaks, red bud trees and crepe myrtles. Wouldn’t you know it, the only hole we dug that didn’t hit rock was the “test hole”! Sure am glad I have such a strong hubby and father!
~Jamie
ARRESTED DEVELOPMENT! I can’ t wait until it comes back either.
Beautiful job on the fence!
Great job Ben and Allison!!!
Way to go! You are brave. We have a big fence project coming up, but we decided to wimp out and hire a pro. It is expensive and will reduce our DIY budget for inside the house, which makes me grumpy. Good idea to stain the fence to protect your investment. Also, we love Arrested Development at our house too!
So many things to say: 1) I LOVE Arrested Development. So much awesomeness in one little show. 2) The fence looks awesome. I’ve been toying with the idea of DIYing ours when we move soon, but I don’t know if I can handle a whole fence. Looks like a lot of work! 3) Just saw on IG that you had a fence section blow down – how irritating!!! At least you’re pros now though!
wow that looks really great, never would know it was not professionally done.
GREAT job! Those gates can be a BEAR! OK, I have to ask, did it survive all the wind yesterday??? I’m sure it did, you did it right!
It looks great! I find it funny that you made this repaired fence post on the day the winds were so high here! I hope your fence survived those!
I believe they call those “Breaker Bars” around here in the sometimes frozen North East. We have used ’em to–break cars free of ice; snow; mud; get trees off of things they fell on and on to other things where we can then cut them up; crack the then frozen and now ice covered firewood from the downed trees out of the uncovered pile-can you say The Wind Blew Off the TARP? I can!!!—and other needful things around farms and home. Always handy! Oh and they come in handy digging HOLES too! Around here we have a variety of rock forms including shale ledge–mmmmm shale ledge!!!–impossible to get thru even with a breaker bar. TNT is needed. In fact in our county we have: Rocks. Potatoes that LOOK like rocks. And the biggest cash crop I cannot mention on a family blog but it is green n leafy and loves to grow where there are rocks! And cows. Sometimes the cows look like rocks too. Or maybe we are just so used to looking at–rocks.
Nice job with the fence! Is the kit basically the triangle cross braces? Cause they look suspiciously like the regular old cross braces sold at Lowes and other places. I am more used to building fences for holding in animals but most gates follow the same pattern and I am sure any farming mags or websites could give you time tested gate and fence advice. Should you decide you know to get a cow or something. The kids would love you for it!!!!!! You know you want one! Think of all the milk money you would save!!!!
We so got netflix just so we can watch the new episodes! And final countdown was my ringtone for a loooooong time. I already thought you were awesome, but now you are super awesome!
Well, Allison, you and Ben should be proud of yourselves; you did a great job! Funny how we can procrastinate because of intimidation of a project.
about how much did it cost you?
I need the make and model of the fence latch system you installed.
I need one just like that.