Today I’m going to show you a very basic DIY repair that you should know how to do. If you already can do this, awesome! If not, then this tutorial will save you at least a hundred bucks or so (that’s how much you would pay a plumber to come to your house).
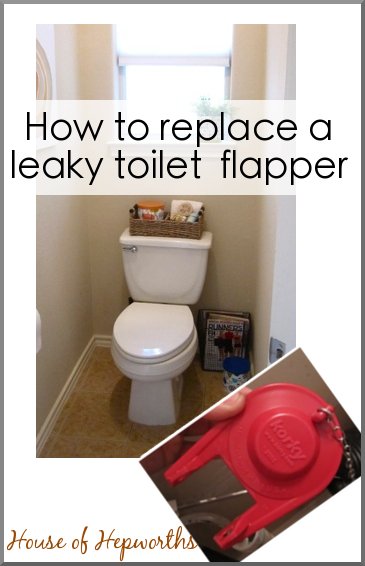

Several weeks ago one of my toilets started running continuously. I would go in an jiggle the handle to get it to shut off. It seemed like the tank just would not quit filling up. Not only is the sound of a toilet continuously filling up like mega super annoying, it also wastes tons of water and costs you a fortune on your water bill.
I finally had enough and went to investigate. Turns out, the flapper was rotten and wasn’t functioning anymore.
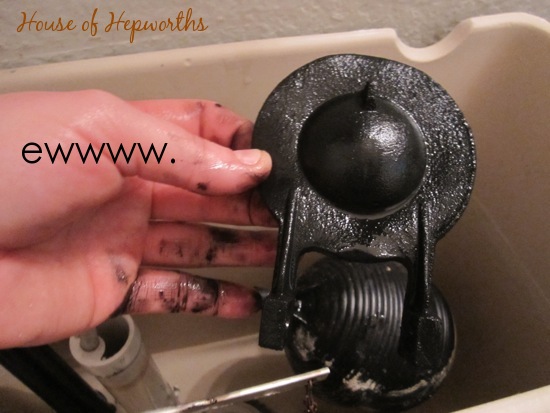
The flapper is the plug that keeps your water in your tank. When you flush the handle, it acts as a lever and pulls the flapper up, releasing the water to flush the toilet. Once the tank is empty of water, the flapper falls back down and plugs up the hole again while the tank refills with water.
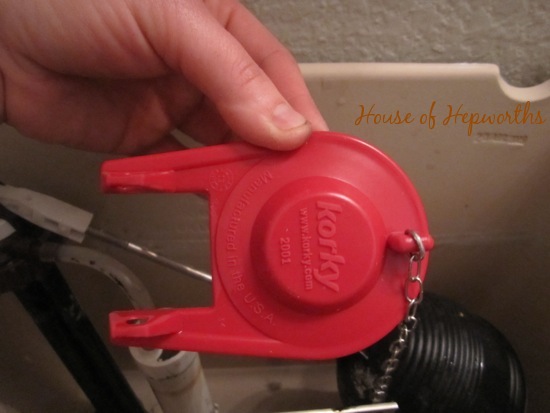
The red piece in the bottom of this tank is the new flapper.
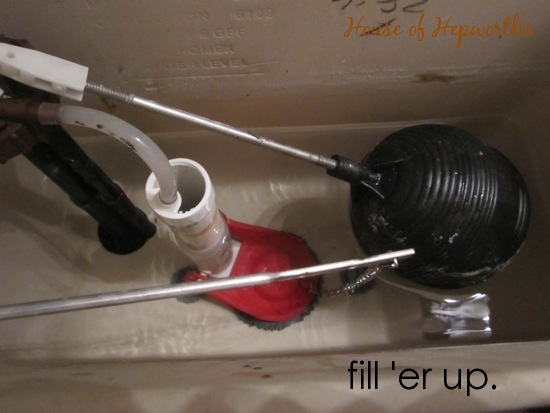
Because this piece is made of rubber, after several years of sitting in water and daily use, it will rot. It is the cheapest and easiest thing to fix in your toilet and chances are you will probably need to replace this every few years.
To replace the flapper, you first need to purchase a new flapper. I purchased 4 because I have 4 toilets. I might as well just do them all at once. Here is exactly what I purchased (not an affiliate link). These flappers run around $4 each or 3 for $10ish.

The directions say to shut off your water (the shut-off is behind the toilet) before you switch these out, but if you are confident and quick (and a little rebellious) you can just do a quick switch-a-roo while your water is still on.
Basically, detach the old disgusting flapper and try not to throw up at how disgusting it is. It should just pop right off. Most are attached on either side with little prongs (double check your tank innards before you begin).

Here’s a good picture of how the flapper attaches:
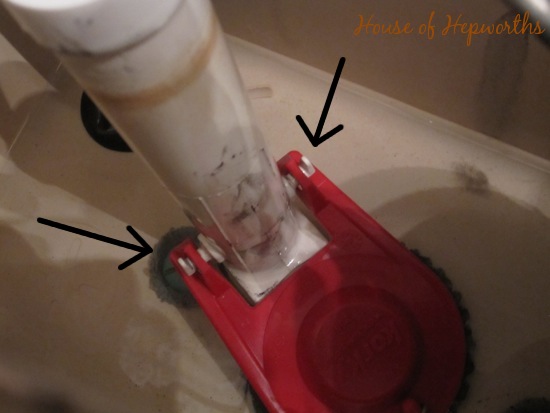
Now take your new flapper and attach it the same way you unattached the old one. It should just hook right onto the white PVC pipe at the base.
Again, it will look like this when it’s attached properly.

Once your flapper is in place, take the metal chain attached to the flapper and hook it on the bar at the top of the tank which is attached to the flush handle. Now when you flush the toilet, the bar will lift up pulling the chain that lifts the flapper.

Test it and make sure it works. And now you are done. Seems like such a simple fix, but after talking with a few friends I realized that most people don’t know how to do this. I was told a few times by different people that they would have just called a plumber. Yikes! Don’t “flush” your money down the drain. Just do it yourself.


*A quick note – there are a few varieties of fill valves and flappers. Some attach differently than this tutorial. Double check your commode before you begin this project to make sure you purchase the proper flapper attachment.

Awesome! Thank you so much for this tutorial! Our toilets aren’t doing this now, but I know they have in the past and it’s super annoying. Glad to know it’s pretty easy to fix! Pinning this!
Thank you very much for this simple job tutorial! Pinning for others to learn.
Come to my house! Ours aren’t running all the time, but one makes a dripping noise all the time and I think every faust in our house is leaking. Thanks for sharing!!
This was one of my very first plumbing projects! Now, years later, I laugh at the excitement I felt over accomplishing it, but it gave me the courage to learn more (and wow! that buzz from saving $100 with a $4 plumbing part!)
If you are a newby, don’t just look at what you need. Either shut the water off and remove the flapper and take it with you (eww!) or take several photos so you can show the photos to the very helpful guy/lady wearing the orange or blue vest.
Alison,
Thanks for posting this. Unfortunately with my luck it wasn’t just the flapper and I needed to replace the entire innerards of the tank. Oh, well. At least my money is being spread around thanks to me having to call a handy man. ( I had surgery on my knee and am having trouble getting down on it. Told you I had the worst year ever last year. )
)
Maureen
It must be the time of year to replace toilet innards. I had to fix our toilet on Friday last week. Ended up replacing the floater and ballcock with a new one, as well as replacing the supply line. Wasn’t too bad once I got the right parts. Took me about 45 minutes with two raging toddlers around me, and I’m not handy at all. Hubby double checked it when he came home from work and I got two thumbs up. *puffs chest proudly*
You would not believe how long I procrastinated about doing this. Literally months…and it took less than 5 minutes (and I had the new one in the house all that time).
Easy and inexpensive! My kind of project.
Thanks so much for posting this! I have been listening to a leaky toilet for months and your post inspired me to do something about it instead of procrastinate on calling the plumber. It took 2 minutes and $4 for me to solve the problem!!!