In addition to renovating completely gutting and starting over in our kitchen, we are also replacing all the flooring in the common areas of the house (kitchen, entryway, family room, dining room, hallway). The majority of the house has tile so it had to be removed first.
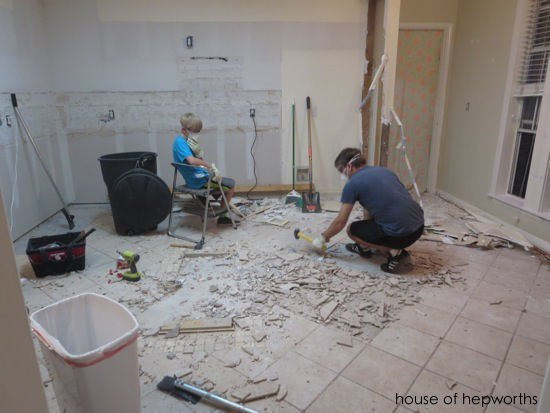
Ben and our son, Travis, spent several days with sledgehammers breaking up all the tile.
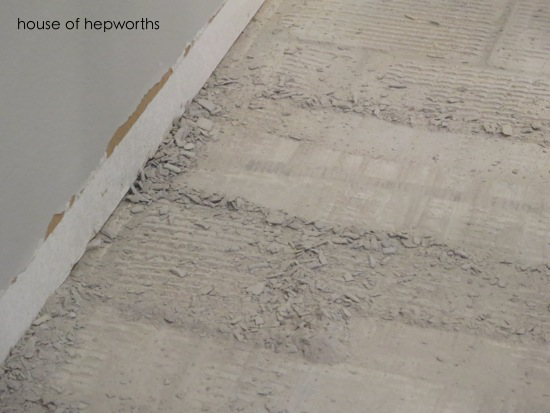
We were then left with thinset under the tile, adhered to the cement foundation. Thinset is an adhesive mortar made of cement, fine sand, and a water-retaining agent. It is usually used to attach tile to cement.
I did tons of research online and read a bunch of forums and everything I read said to rent a chipping hammer with a scraper attachment, so thats exactly what we did.
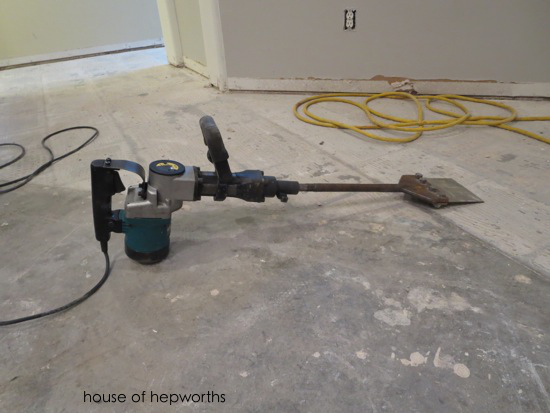
After clearing out all the tile it was time to start chipping the thinset off the floor. We even found a few youtube videos of the chipping hammer in action and it seemed like a slam-dunk. We were naively excited about this project and thought we’d chip it all up and be done in time for dinner.
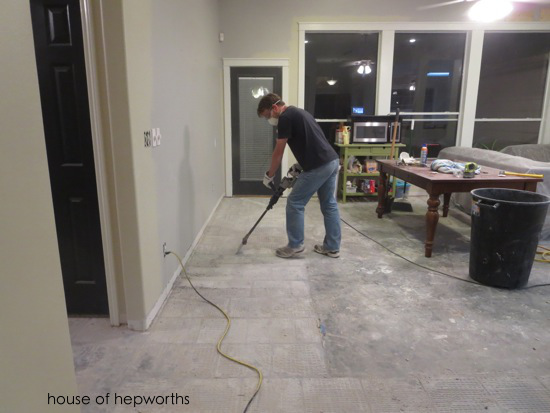
Um… ya, NO. Ben and I both spent a couple hours with this chipping hammer and pretty much got nowhere. We did a small patch, probably around 6 sq ft worth of flooring. I’m sure the chipping hammer is great for other applications, but for removing thinset it was a big fat FAIL.
We called our builder, John, who is overseeing this entire kitchen renovation production and he said he’d send a guy over. Long story short, a crew came over to remove the thinset and brought with them a… chipping hammer. And, like us, they got nowhere fast. So they came back a few days later with this bad boy:
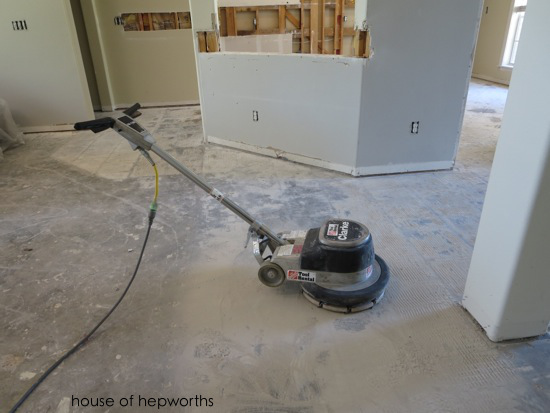
This is a buffer tool called a Floor Maintainer. They attached a special disk to the bottom called a Diamabrush.
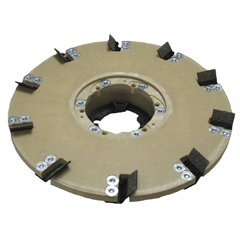
This buffer not only removed the thinset, it pulverized it. I don’t understand why during all my research NOTHING I read suggested renting this tool. It made removing thinset a breeze. If we had known how EASY it was to remove the thinset using this Floor Maintainer we would have probably just done it ourselves and saved the $500 we had to pay to have the work done for us.
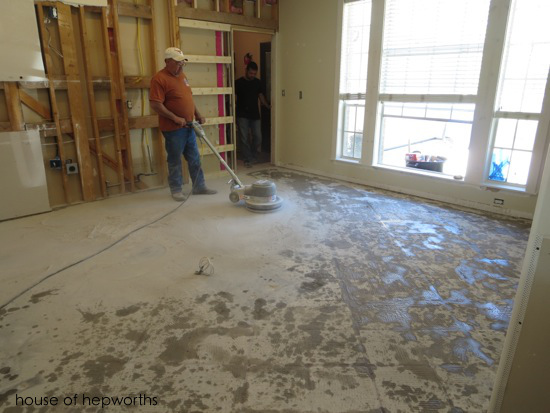
The only negative to using the Maintainer is that it created a huge amount of sand-like dust on the floor. Of course, it wasn’t any worse than the little bits of thinset flying all over the place when we tried the Chipping Hammer. And believe it or not, the drywall removal and repair caused way more dust in the house than all the other work combined.
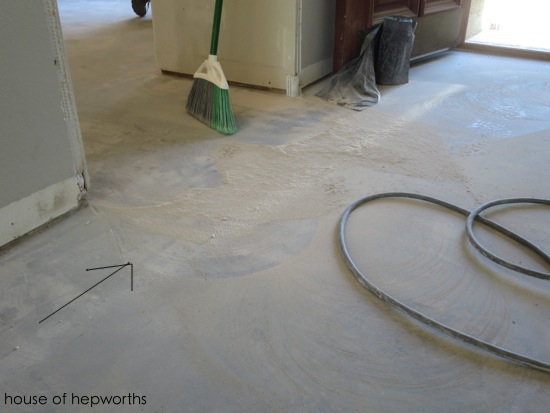
For a moment there I felt like I was in a Trading Spaces episode and Hilde had decided to turn my kitchen into a beach oasis by pouring sand all over the floor.

Now my floor is clean and smooth and ready for hardwood!
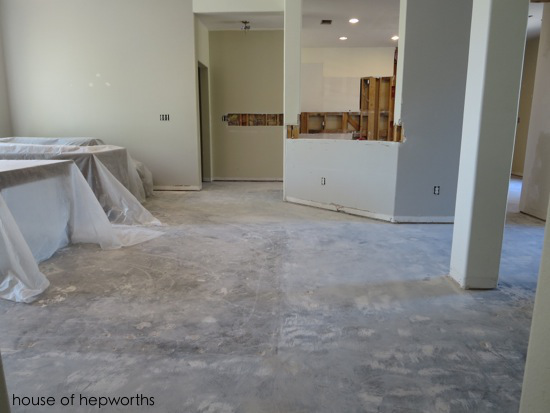
We aren’t actually putting down the new flooring until the kitchen is mostly complete, so it will be another several weeks before we see a pretty new floor in here. The flooring company wants to put it in last to avoid other work crews coming in and out possibly damaging it.
So, the moral of the story? Ignore the internet at large and rent a Floor Maintainer with a Diamabrush instead of their recommended Chipping Hammer. You are welcome.


Instagram || Facebook || Pinterest || Youtube
Thanks for reading! Have a wonderful week!

I’m enjoying seeing the progress on the kitchen. I recently started reading your blog after seeing the article on DIY in the Angie’s List publication. I quit my job after 30 years with the same company, and I’m trying to figure out what my next step is. (I’ve started blogging about that.) I’m very interested in flipping houses, but I don’t know anything about it. So, I’m trying to learn a little about renovations through your blog.
This is so exciting to watch! I’m not kidding.
How’s the alternate kitchen working out?
Returning to the new fab kitchen will be dream-like.
Congratulations on all the work you’ve done so far.
I love seeing the progress. It will be years before we get to redo our kitchen, so I am living vicariously through your updates Thanks
Allison, I feel your pain! We had the exact problem a year ago!!! We bought a HUDD house in Dallas with 2,500 sq feet of BLUE tile. That was bad enough, but we had to fix the foundation so many of the tiles were already cracked, or uneven. My husband bought a small chipper hammer from Harbor Freight, and did an awesome job knocking the tiles up. We got our money’s worth on that aspect, but we were so discouraged when it came to the thinset! We rented an even bigger chipper hammer, and that was a fail too. We ended up renting the same sanding machine, and even still it took several passes to get it level. The dust was unbelieveable. You have my sympathies, but I cannot wait to see how it turns out! Good luck
Where can you rent this machine? I couldn’t find a floor maintainer at Home Depot, is there another name for it?
Thank you for posting this! I have 2000 square feet of 90s white tile to tear out. I had no idea how to tackle the thinset that will be stuck to the cement foundation. After reading this, totally hiring it out lol!
Allison! You kill me! Augh – the dusty mess. And you just triggered so many Trading Spaces memories! Didn’t you love that show??? I’d have wrung Hildi’s neck.
I’ve been following your blog since you made your own lined curtains. I’m disabled and unfortunately am renting, so I live vicariously through you on fixing up a home. lol! I do love what you’re doing with your home and I really enjoy your different ideas when it comes to crafting.
By the way – the lined curtains?
I keep that favorited because at some point, I want to do that myself.
Just wanted to say thank you for sharing all your ideas and plans.
I keep holding onto hope, that maybe someday too…I will have my -own- home…my own fixer upper.. to play around with and then sit back and be able to say “wow…I did that!”
Sue, I appreciate your sweet comment! I am glad you enjoy following along on the blog. I try to share the good, bad, and ugly in an effort to keep it real and entertaining. Hopefully one day you’ll have your own little fixer-upper too!
Trading Spaces and Hilde!! Oh the memories! My favorite of her was the room she “wallpapered” in felt. THe owner had 3 very fluffy cats. You know that room is a big hairy mess to maintain!
OH HAPPY DAY! The floor maintainer with the diamabrush is EXACTLY what I need to tear out the horrible thin layer of stamped concrete on my patio. I just watched the Home Depot demo video on their “Tools we rent” site. I too have spent hours looking on line for something that would do the trick! Thanks so much for your input!
Part of the problem you had was the blade you were given was for removing vinyl tile and adhesive. There are much stouter blades made for removing ceramic tile and thin set. An air chisel with the correct blade would have made short work of it all and been much much cheaper than $500.
Also there are floor grinders that have available vacuum attachments that dramatically reduce the amount of dust that would get into your home.
Check out your locally owned rental stores, avoid HD rental as you likely won’t get the information or equipment you really need.
I feel so encouraged by this. We are renovating our home from the flood that happened in late April and filled our house with 3.5 feet of water. We are at the point of starting the tile removal. My hubby has been dreading this project so I sent him this post and hope it will be an encouragement to him also. Thank you for documenting this process (and all your projects!). I hope I maintain my blog after the flood recovery is over and we are back home and comfy. If nothing else maybe it will help motivate me to get some DIY projects done and prove my Mr naysayer wrong
Hi. Recently did this myself and have a couple of observations. I just removed tile from our kitchen eat-in area (around 300 sq ft). Just like you, my wife and I researched how to remove tile and thin set. We also thought it’d be straight forward. Haha…not so much. We ended up using two tools: First a floor scraper that works like the impact hammer, but has wheels. We used that to bust up the floors, after of course cracking them with several hits of a hammer. This took a good 6 hours. Then as you experienced, we had the thin set left to deal with. I actually saw the floor buffer + diamond brush outfit online and quickly went and rented it at Home Depot. It was an epic failure for me! You see the machine is heavy (which it needs to be) and also quite powerful (which it needs to be) but that combined with the fact that I’m only 170 lbs made it impossible for me to control the thing! It would engage the rough floor and easily push me back or turn me around! So the ultimate (and very easy) solution was actually the impact hammer. This is the MOST IMPORTANT thing about the impact hammer though– at least with the one I rented at Home Depot (a Makita). It has a small wheel at the top, numbered 1 to 5. It controls the speed of the hammer. This is VERY important. It makes all the difference between it working and not working. When I first tried using it, it was set to 5, maximum speed. The hammer simply would not get anything up. It’d try but quickly start bouncing around on top of it. Then I noticed this dial. I turned it down to 3. Presto! You see the hammer needs to go slower to pulverize the thin set. If the hammer is going too fast it won’t work. Now this is the other thing I found out. Our floor was laid with 2 different kinds of thin set. One was white and the other was a grey color. The white was much softer than the grey. The grey was very hard. When I started on the white, 3 worked perfectly. However when I encountered the grey thin set, the hammer started bouncing again! So I lowered it to 2. Presto, it worked again. So the formula seems to be, the harder the thin set you’re breaking, the slower it needs to go. Now one last thing, holding the hammer. When you’re doing it, set the hammer at a 45 degree angle to the floor and let the weight of the hammer be supported more by the hammer than your arm. You will need to push down on it initially to get it started. Then it will start vibrating and moving forward. If you find it is going too fast, just lean the hammer up more vertically, and that will slow it down and it will chomp longer on a spot. I hope this helps someone avoid the first 10 minutes of frustration I had when starting this! In the end, the impact hammer was very easy and predictable, and it did most of the work. That’s very important, let the hammer do the work. If you’ve set it correctly and you’re holding it at the correct angle, it will “chew” at the thin set and slowly advance forward, leaving a smooth path behind it.
Thanks Dan for the comprehensive info. I was wondering why the impact hammer was ineffective for so many people. Have an up coming project and was wondering which way to go. Your explanation about setting the dial to the correct speed is key. It’s like trying to ride a bike up steep him in high gear. Low slow gear equals more/effective power. Doy!
I’ve been doing flooring for 15 years and so far best thing is a o pneumatic hammer with a Thinset Removal Bit. Works realky well for small areas like kitchens or bathroons. The larger chipping hammers are a pain to operate and the wide blades actually walk over the thinset so you need multiple passes. I prefer a 2 inch blade make sure you get a quality one or it’ll break. I like the Thinseg Removal Bit brand about $25. For really large jobs your probably better off renting an i dustrial grinder but thise will cost a couple hundred per day and tough to transport.
Thank you!! This is the only site that mentions this way to remove thinset. Every contractor I found mentioned scraping or renting a large machine. It took me around 7 hours to do 460sqft with a handheld version of this. The large version you used would constantly quickly veer left, after a couple of holes in the wall I went tor the handheld version. Saved me at least $900.
You have any ideas where I can rent the machine at?
Probably a local tool supply or Home Depot.
If you are going to use the Diamabrush use water on the floor. It will keep your dust down to a minimum. These machines are made to work with water.
You are mistaken if you think there is an easy way to accomplish this task.
I burned through one of the stone disks in a 4×7 tile area. you will need both by the experience I’ve had.
I resorted to a burpgun or some call it a air hammer. It is not an easy task any way you look at it. Remember you are trying to remove cement from concrete Have fun
WARNING: Grinders work ok but create hazardous dust that you DO NOT want to breathe. Thinset is carcinogenic and even with a decent dust mask not worth the risk. You’ll also be spending a boatload of money renting a grinder and the appropriate grinding wheels.
I’ve been doing floors for a while and I ALWAYS use a rotary/demo hammer with a chisel. My preference is the SDS Max type. The two products that I found to work the best and be the best value are the 6 inch and 4.5 inch Thinset removal bits. I over heard a couple guys at the hardware store talking about it and they recommended getting them on Amazon they’re only 99 for the 6 inch and 39 for the 4.5 inch (way cheaper than what they charge at the store) and free shipping.
Just search for Thinset removal bit on Amazon you can’t go wrong with either the 6 or 4.5 inch.
Our local home depot tool rental won’t allow us to use this tool in our condo because they say it flies all over the place and will damage the walls. Did you have any problems with this? Did you ise it along the edges of the floor as well, ie:against the walls?
The $500 you spent won’t buy you the disc they used, so I would say you got a good deal!
Thank you so much for this post! I am hoping my tool rental place has this tool (or Home Depot) and I’m hoping it will work on my patio. I ripped off the ugly tile and now I’ve got a “thinset” patio! Can’t wait to try it!
With the diamabrush, did it cause a lot of dust in the air?
It did, but I don’t remember it being too bad.
I’ll have to go with Dan’s advice. My nephew and I rented a floor maintainer and it was difficult to control. Went back to a rotary hammer with a chisel bit.
Just a note on using the floor maintainer or floor buffer; it is an acquired skill. When you first squeeze the handle to turn it on, it will definitely take off to one side. The trick is to learn to “drive” it or, as I like to say “fly it” Your main control is the handle. Push down (a little) and the buffer moves one way. Lift up, it moves another.
Practice with just a piece of sandpaper on the buffer, or a brush. You are trying to find the “balance” between the two positions to keep it in one spot. Then, you’ll be surprised at how a little lift will move it along, and a little press down will move it back.
The diamond bit is very aggressive, and I have only used it once.
Good tips! Thanks!
For small areas where a floor maintainer cant reach soak thinset with water and use a 4” razor scraper and lots of blades. BUTTAH!!
YOU SAVED MY ENTIRE WEEKEND!!! Thank you for posting about this, we thought we were going to be spending the three day weekend grinding, but I read your post, went to Home Depot and BAM! 2 hours later, we were done! It even took off the pesky carpet glue!! Thanks again!