In order to install the kitchen island completely, it took several additional steps to make sure it was secure. We definitely don’t want the island accidentally tipping over or having a heavy piece of granite falling on top of one of us.
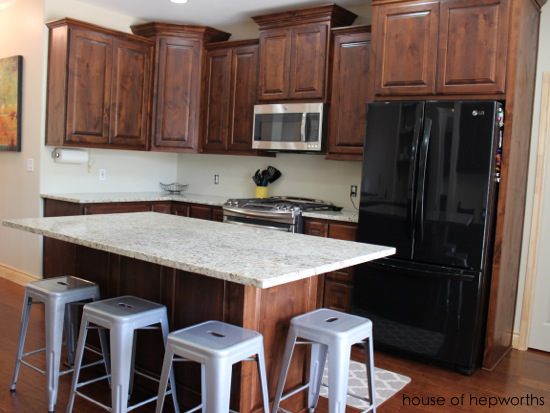
It looks pretty and simple just sitting there, but there was a lot of additional thought that went into getting this beast secured to the floor. The cabinet guy started by gluing several 2x4s to the floor with liquid nails. He then used the coolest little tool to sink huge nails through the wood and into the actual slab foundation.
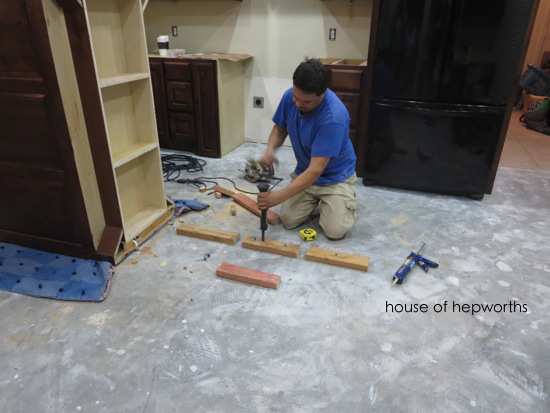
After some google sleuthing I figured out the tool is similar to this one on amazon: .22 Caliber Single Shot Powder Hammer 00022
He loaded a bullet into the tool, added the nail, and then slammed the top with a hammer. The bullet added the additional force to get the nail to sink deep into the cement. It was crazy cool and I was totally tool-geeking out.
Once the nails were in place in the foundation he added additional liquid nails to the underside of the island.
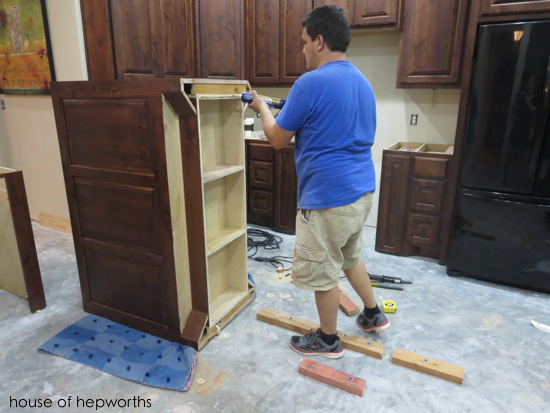
The island was then set into place and additional screws were driven in from the base of the island into the newly installed 2x4s on the cement. The entire point of the 2x4s on the floor is so that you can attach the island to the 2x4s with screws, which are then attached to the floor.
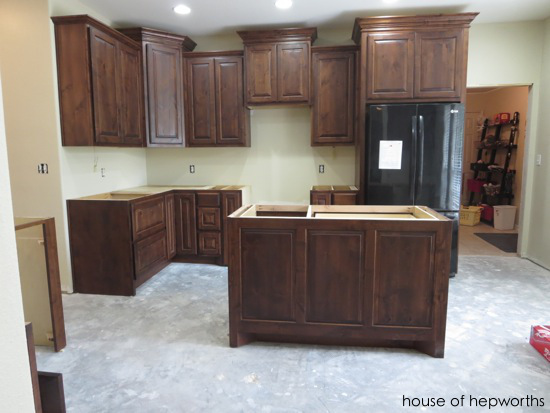
Once the island was officially anchored to the floor, we could now add the island countertop. Here’s where things started to get hairy…
After lots of research, I learned that if you want to comfortably sit at a counter-height bar, you need 15″ of leg room. We want to sit on two sides of this island in order to have enough seating for at least 4 people, so we planned for 15″ of overhang on two of the 4 sides of the island.
I also learned from lots of research that if you plan on extending your bar more than 10″, you need to support the counter overhang with braces. When the countertop people came to install the countertops, they acted clueless about the brackets. I assumed the entire time that they would be adding some hidden brackets. They told me that was the cabinet makers responsibility and should have already been done.
They were about to just slap a 40″ x 55″ heavy piece of granite on top of a cabinet with no bracing whatsoever. When I saw what was about to happen I FREAKED OUT. I called the builder, he came over. I called the cabinet maker. We all argued about it. They wanted to just finish the job.
Our builder, the cabinet maker, AND the countertop guy all insisted I did NOT need any braces. At one point one of them even told me, “just don’t let your kids sit on the counter and you’ll be fine.” Um, do you know my kids? They will absolutely sit on top of the counter because they are part monkey!
I flat out refused to let them install that island granite without any braces. No one had a solution. Apparently bracing an overhang is not necessary? Not going to fly with my island. Sorry. My only option was to DIY some braces myself while they were doing the other counters. It was either that or be a neurotic nervous mess for the rest of my life knowing there weren’t any braces under the island. I could have added corbels after the fact as additional support, but I wanted hidden support. I had been vocal about this from the start of the renovation, but somehow that ball had been dropped and no one would accept responsibility.
Also, our island cabinet is only 25″ deep, so with an additional 15″ overhang, we are talking about having one third of the entire counter hanging off the cabinet. Not bracing this beast just did not sit well with me at all.
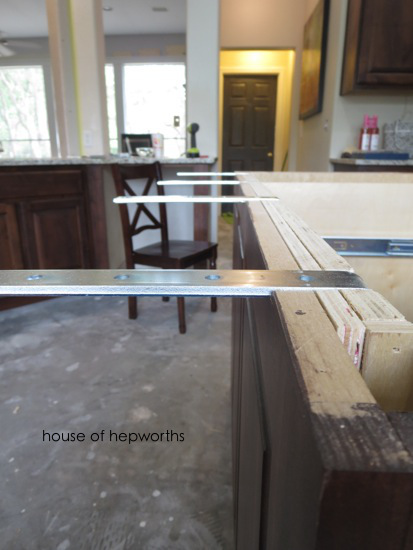
So I DIYed some brackets on the fly. I hit google quickly and found this tutorial from YHL where they used some 10″ L brackets as braces. It was a brilliant last-minute plan, but I did not like that they left the braces exposed. I raced to Lowe’s to purchase these L brackets and all the screws and washers needed for the project and then busted out my Dremel to carve notches into the cabinet.
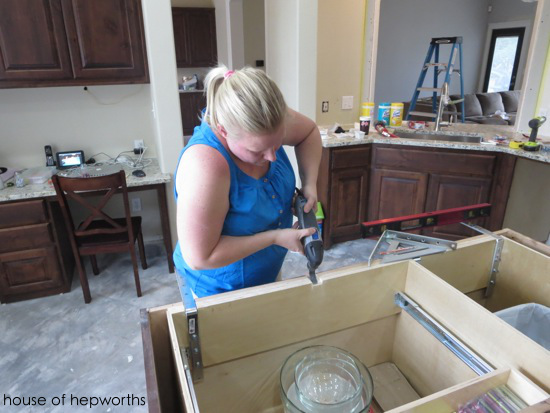
The notches allowed for the L brackets to sit flush with the cabinet while remaining hidden. In addition to screwing the L brackets into the cabinet, I also added some liquid nails under each bracket for extra reinforcement.
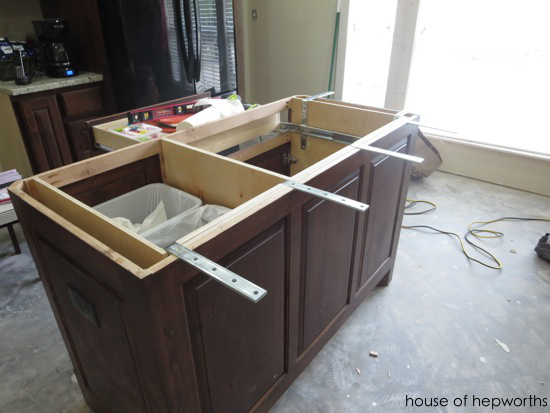
I feel like there are probably better bracing systems out there, but with zero notice and people waiting on me, I had to find a solution that I’d be happy with that could be completed asap. They don’t look “pretty” from inside the cabinet, but they are so deep in the back of the cabinet that I never even see them when I open the cabinet doors.
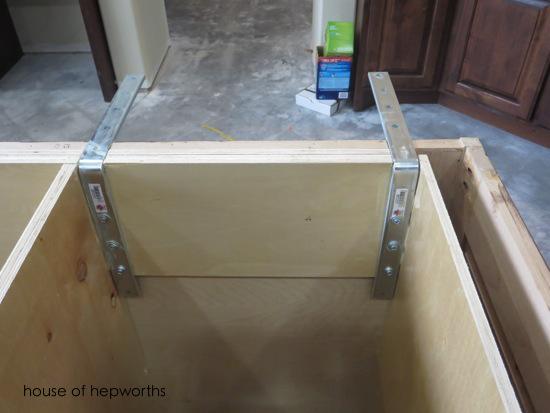
The brackets are 10″ long, but because I installed them inside the cabinet, they ended up only sticking out about 8-9″. They are well hidden under my 15″ overhang, but add additional support that helps me sleep more soundly at night.
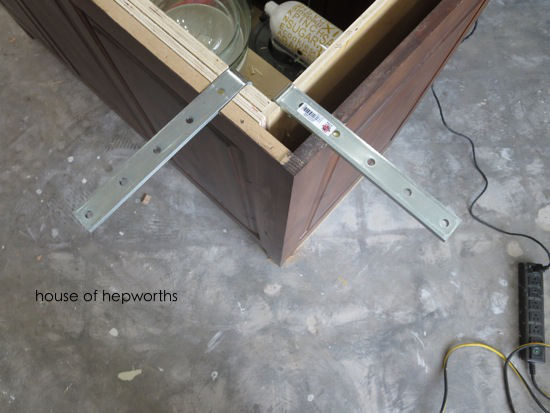
Whew, that was a long-winded story! I just wanted you to see why we chose this short-cut L bracket option instead of an actual bracket made for island overhangs. You can see in this picture below how they all sit flush with the cabinet.
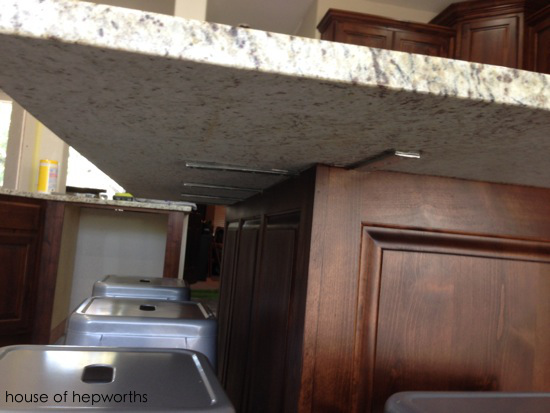
Finally my little derailed side-project was complete and the countertop guys could finish their work. They installed the countertop and added silicone around each bracket.
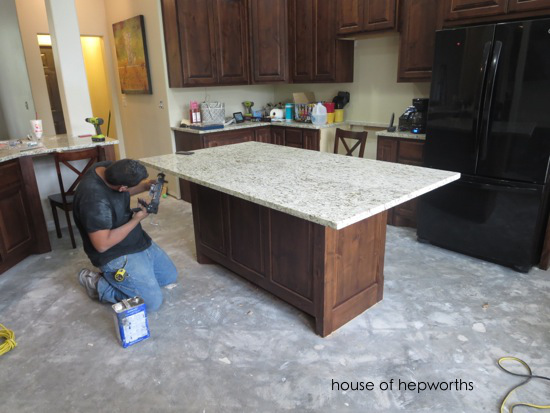
You can see in this picture the brackets are adding additional support but are completely hidden and out of everyones way. I could have added corbels instead but I really wanted some hidden support instead. I think they look great and I’m pretty darn proud of myself for coming up with this dirty solution on the fly.
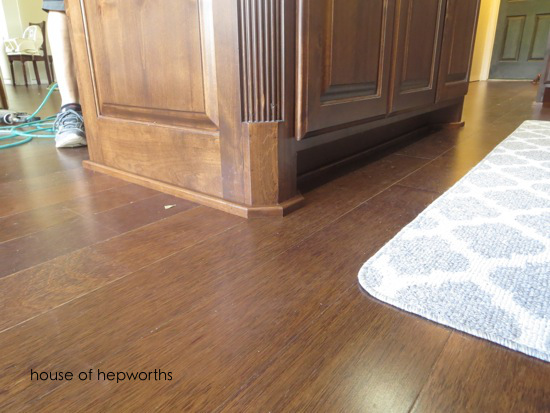
To finish up the island, once the wood floors were installed the cabinet guys came back and installed shoe moulding around the base of all the cabinets for a clean look. I LOVE the shoe moulding he used. It isn’t a quarter-round, it’s more square with the edge knocked down. He said he makes it all himself in his shop. Yet another reason to love this cabinet maker.
So there you have it! Who would have thought that a little kitchen island would require so much additional work?

I guess my takeaway from this that I want to share with you is, even when you hire out work, do your own homework. If I hadn’t researched kitchen islands and countertop overhang, I wouldn’t have known to make my overhang 15″. The standard a builder does is around 10″ I believe. I also wouldn’t have known that a 15″ overhang requires additional support. I wouldn’t have known to fight my builder on this issue, and make sure the project was done right. Yes, we hired out for a lot of the work, but I researched each step of the way and I stayed on top of these crews and micromanaged them so the work was done the way I wanted it.

Good for you for getting the job done right, even if you had to do it yourself! It looks fantastic.
It looks amazing! And I’m totally jealous of your entire kitchen make-over/re-do. I giggled a little reading this because my friend and I had a discussion about our kitchen bars the other day. We were trying to decide why our bars looked different than each others. Our kitchens are laid out the same. We used the same builder and chose very similar cabinets and countertops. And then it dawned on us- our overhang on our bars are different sizes. Unbeknownst to us (13 years ago) the builder did my overhang at 15″ and her’s at 10″. I never specified, as far as I can remember, but it’s 15″ with NO bracing. Now I’m thinking I should put corbels under there. Currently googling and Pinterest-ing corbels…
Excellent DIY solution. I am a kitchen designer, and the one time I had a client who did not want any kind of visible support under their granite, it was a group effort to accomodate his request. The contractor (and cabinet installer) added 2×4 bracing to the inside of the island cabinets around the top, then the granite fabricator installed several HUGE pieces of flat stock steel, notched and recessed into the 2×4’s. (I have pictures of this…it’s pretty impressive), and then the granite top was set as usual. There was a lot of coordination between cabinet installer, granite fabricator, and myself (whose job it is to make sure my client gets what he/she wants). Someone definitely dropped the ball on your island, and no one wanted to take responsibility because those steel supports add A LOT of money to the cost of the counter top.
Good for you, you can never be too careful.
Wow, I cannot believe that your granite company didn’t add the braces! i used to work at a company in Austin called Alpha Granite, and we would route out a half inch portion of the granite for them to lay in so you wouldn’t see them or bump into them. I’m glad you insisted because if the overhang is longer we would always add them.
Allison, your kitchen is absolutely gorgeous! Major swoon! Everything about it is just beautiful and am so happy to see the finished product turned out like you wanted. Kudos to you for doing such a great job with redesigning certain elements like the island and cabinet configuration. BTW, I love the desk area, it’s a really nicely designed one and it really adds something to the kitchen.
Now, about this island and the fact that none of your contractors would take responsibility for the brackets: First, good on you girl for coming up with a quick and dirty solution that all the men working on the project couldn’t be bothered to pull out of their @$$es! At least one person in the room (you) out of all those present had a brain that worked fast and came up with a viable solution. Second, memorize these words: “Do you really want to assume that kind of liability?” and use them next time no one wants to take responsibility for doing a job the correct way and the phrase “just don’t __________ and everything should be okay” is uttered! If “professionals” are giving you bogus advice like they did about the bracketing a massive slab of granite, they are assuming a certain amount of liability should any bodily injury or property damage happen because they couldn’t be bothered to secure the counter-top to the island. There’s legal responsibility on their part, and they tried to shirk it off. That should never happen, and I’m glad you at least attempted to hold them responsible for finishing the job properly and with future safety in mind.
Congrats on your new kitchen, it looks really good. I like the light granite with dark wood.
Hi, just wanted tto tell you, I loved this post. It was funny.
Keep on posting!