Oh boy am I tired today. Pooped out. In addition to finishing the laundry room, I’ve decided it would be the perfect time to have a huge garage sale this Friday.
Yes, I am insane. I have no boundaries.
{If you live anywhere near NW Austin and would like to stop by my garage sale, it will be this Friday at 7am. I am opening it up to friends/blog readers Thursday night from 9-9:30pm so you can shop/snoop early. Please email me for my address. I don’t feel comfortable just posting it online.}
Anyway, I am so tired. Between tackling this next chapter in the laundry room renovation and planning for a garage sale I have really outdone myself.
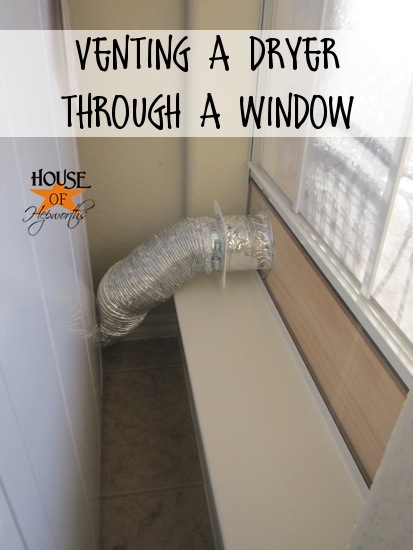
I didn’t get that far with the laundry room today because I had to install a vent pipe through the entire mudroom furniture. Do you remember back when I told you about the venting issue we have and how I vented the dryer through the window instead?
Well, we still have the same vent situation. The builder installed a vent up the wall that makes TWO 90-degree turns. The hot air gets trapped inside and it takes forever for the clothes to dry. So I just fixed it my venting through my window instead. Works amazingly well.
So today I had to extend my vent all the way across the laundry room. The only problem is, the new shelves and bench are in the way. This is my solution.
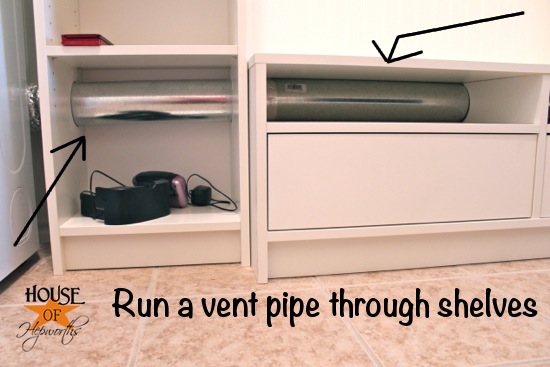
I wanted to vent through the wall. I wanted to hire out and have the vent professionally installed horizontal through the wall and then exit the house next to the window through the brick. However, unfortunately, the wall that I need to vent through is apparently a major support wall.
This is called being stuck between a rock and a hard place. I can’t use the current vent because the hot air can’t escape. I can’t vent through the wall to the front of the house because the wall is a support wall. I really have no options here other than the current solution – venting through the window.
Now that you know the “why”, here’s how I did it.
I started by purchasing a big honkin’ huge drill bit. It’s a little over 4″ wide (4 1/8″ I think). The big round bit and the drill bit attachment had to be purchased separately and let me tell you, they were not cheap. The two pieces cost me about $35. ::sad face::
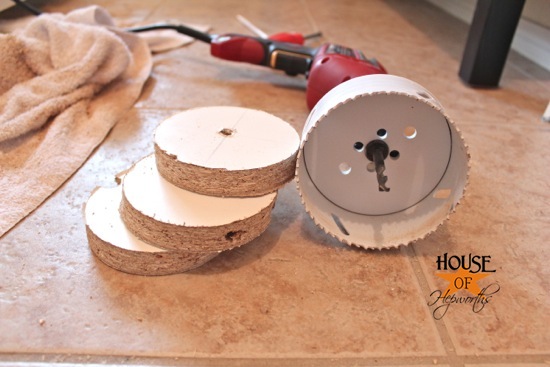
I tackled the bench first. I needed the 4″ vent pipe to fit through the back of the bench and rest between the top shelf and the middle shelf. Any lower and I’d be cutting into the drawers below. I removed the top shelf, and after lots of measuring and math I drilled my 3 holes. Then I inserted the pipe to make sure it all fit.
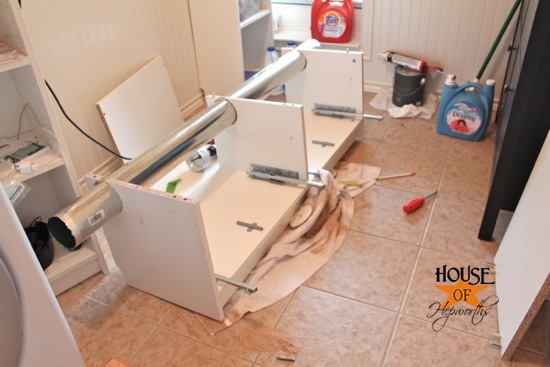
From there I measured some more and then cut holes through both side shelves.
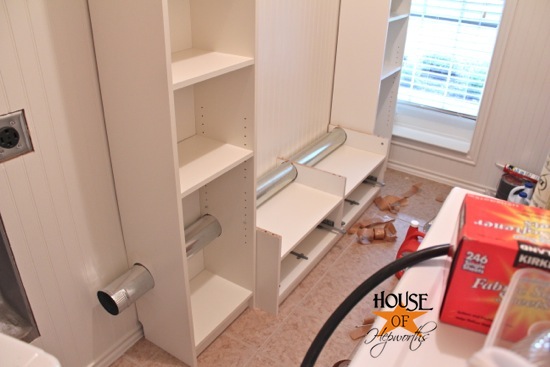
Once all the holes were cut, I attached the hard metal vent pipe to the section in the window using foil tape and the accordion-style cheap dryer vent tubing.
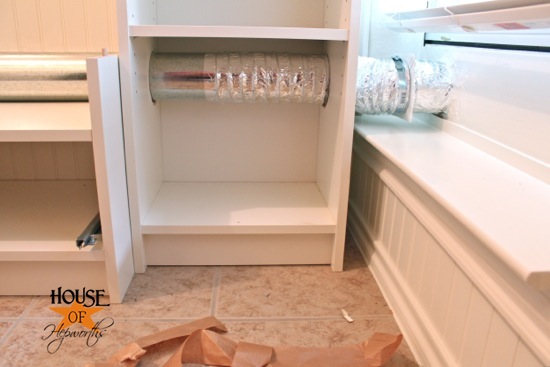
After making sure it all lined up and fit snugly it was time to reattach the top shelf.
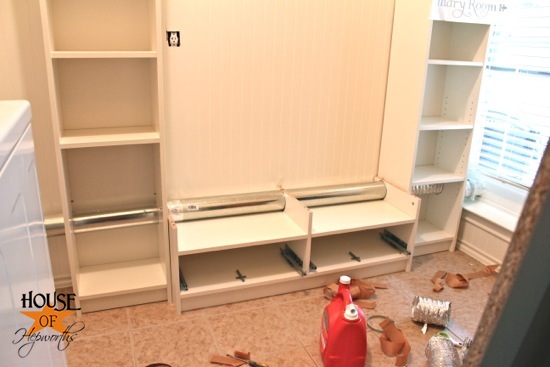
I added wood glue to the raw edges before attaching the shelf just to insure it fit properly and didn’t wiggle. Check it out. You can hardly even see the vent pipe now that the seat and shelves are in place.
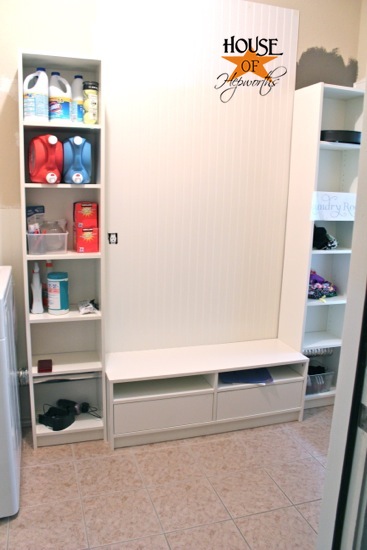
I’ve used the vent a few times already just to test everything, and in case you are wondering, yes, it gets hot. However, I don’t feel like it is hot enough to do any damage to the furniture or start a fire or anything. However, I know this probably isn’t “to code” so if you copy this tutorial do it at your own risk.

I also finished hanging the beadboard behind the washer and dryer…
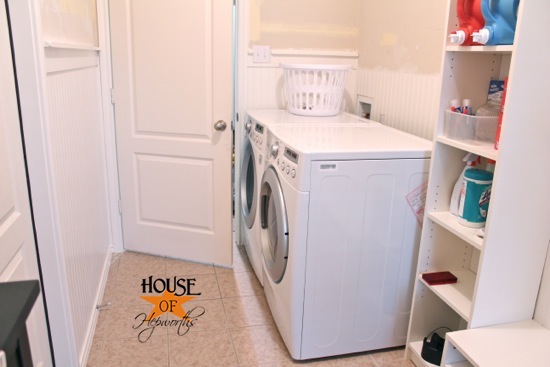
And I spent the rest of the time filling nail holes, caulking every single visible seam, and painting all the new trim work. If you notice, it is the exact same white as the furniture. I took a shelf to our local hardware store and had them match the ikea white exactly. I purchased Behr paint and primer in one. I will give you the exact formula on the next laundry room update post.
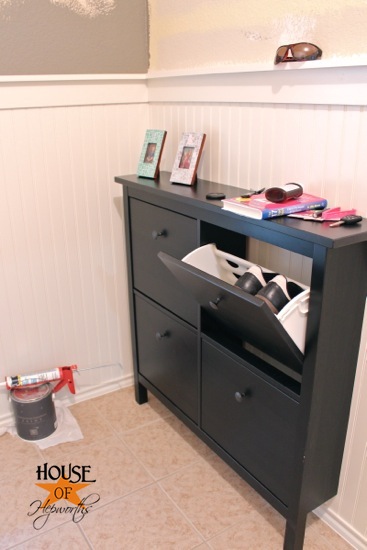
So as you can see, the room is coming along. I tried out Restoration Hardware’s “slate” paint on the wall (same paint as my dining room) but I really don’t like it in here, so I’ll try out another color soon. I probably won’t get much done in the laundry room for the next few days now that I’m planning for a big blow-out garage sale for Friday.
If you have any questions, leave them in the comments section. If you want to flame me because this project “isn’t to code”, please don’t bother. I’m already assuming it isn’t. If you want to pay like a billion dollars to have a brand-new header put in my support wall so I can run a new vent pipe through the wall, let’s talk.
Here’s my 1st laundry room renovation post: How to install beadboard.
Part 1: How to install beadboard and turn ikea furniture into mudroom lockers



What about those insulating blankets for water heaters? They’re white, and you could cut it down to wrap around the pipe. If you tape it on the back side, the tape won’t show. Just a thought.
What will you do with the beadboard that extends higher than the shelving unit? Are you planning to cut that to be the same height as the tall shelves? I think you’ve done a super job working with the obstacles you have in there (window, venting, etc) It looks like you’ve maximized the space well. I hope you take pictures of your garage sale…I can’t be there, so I’d love to see a post about it (tips and funny stories too). Every garage sale has a few crazies show up
I am not sure if you have heard about the product dryer ell- and am hesitant to mention it after you did all the custom cutting, but if you ever looking for another solution it might help with your 90 degree turns, they are elongated curves and a dryer vent box- I have used both for greater efficiency to my long run on dryer venting. Love your blog and I am inspired by your projects. Great creativity in so many ways!
You are abso genius. Seriously. I have no idea if it’s “to code” so you don’t have to worry about any stink eye from me, but I cannot believe you thought up that idea. Absolutly amazing. I am super impressed. I would have curled up in a ball and cried. But not you. You made it work. Nice job!!! Btw, that drill bit thingy looks so scary. I am also impressed that you used that.
Wow! You are v handy. I have two minor design suggestions… You can take them or leave them… I think it would be a nice focal point to move your shoe rack under your clock. Also I would group the two tall shelves next to each other and scoot the bench next to the window. I know it will throw off the symmetry but it will block less light and you could add a comfy cushion and some throw pillows for a nice little nook. Not sure if you’ve already glued the shelves to the wall… Anyway, looks fab regardless! Great job!
Allison, you are a genius!! You get more done in one day than I do in a month of Sundays. And your home is so spotlessly clean. Do you clean it just for us? Always love your step-by-step instructions, camera work, & your eye for style. Keep going! My suggestion for your laundry room paint color is something in the Tiffany blue category — I have recently fallen in love with all things aquamarine and pure sky blue — makes a whole room look fresh and happy.
Got it! Thanks a lot again for helipng me out!
Wow. I just think you’re amazing and the room looks awesome.
This is just AMAZING!!!!
Jan @Door251
Visually pleasing solution…probably not up to code, but it looks fabulous. One question: Why didn’t you just insulate the vent pipe?
Howdy! I know this is somewhat off-topic however I needed to ask.
Does managing a well-established blog like yours require a large amount of work?
I’m completely new to blogging but I do write in my diary daily. I’d like to start a
blog so I can share my own experience and views online.
Please let me know if you have any kind of recommendations or
tips for new aspiring bloggers. Appreciate it!
Hi,
I LOVE your blog. I was wondering about the shoe storage. Did you build it or buy it?
I’m interested in understanding how the pipe exits the window and if it is anyway insulted. I live in the north east and like this idea but With subzero temps in the winter months I’m not sure how practical it would be for me.