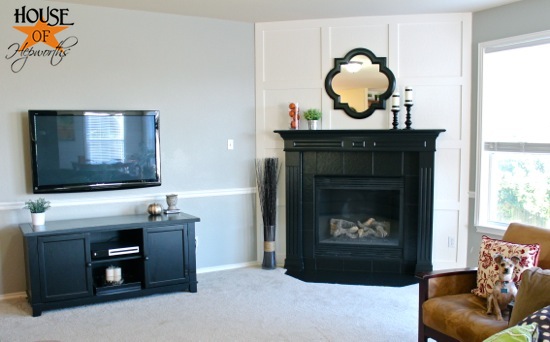
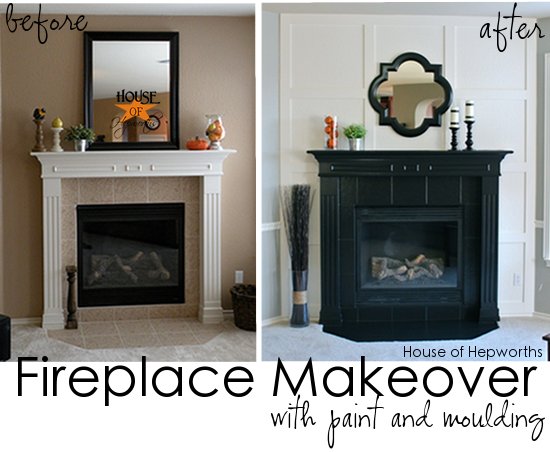
I just finished a project that didn’t take too long and wasn’t too difficult, but has a huge impact. The fireplace in our home is in the corner and angled. It seems like the perfect high impact focal point, so to enhance the fireplace and make it really stand out, I added a bunch of moulding and painted the mantel black.
Check it out.
Here’s a refresher of what it looked like when we moved in, and a week ago:
{Way Before and Before}
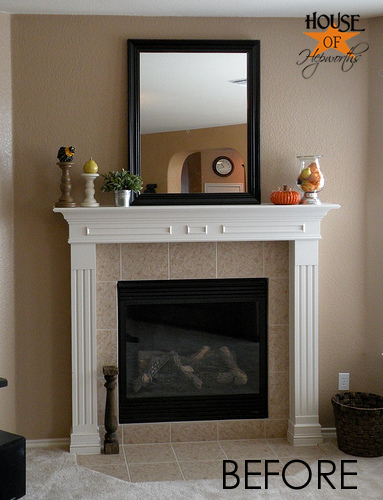
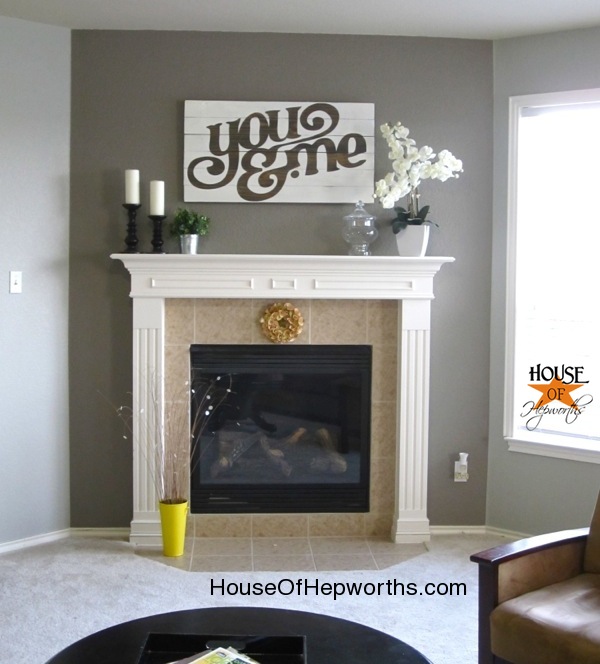
Such a dramatic difference, right?!
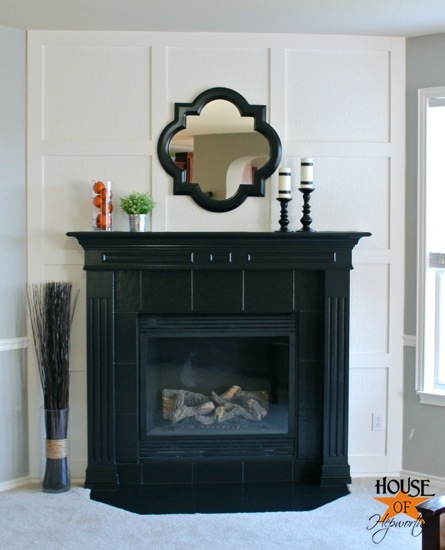
I couldn’t be any more pleased with how it turned out. It definitely has that WOW factor that jumps out at you the second you enter the room.
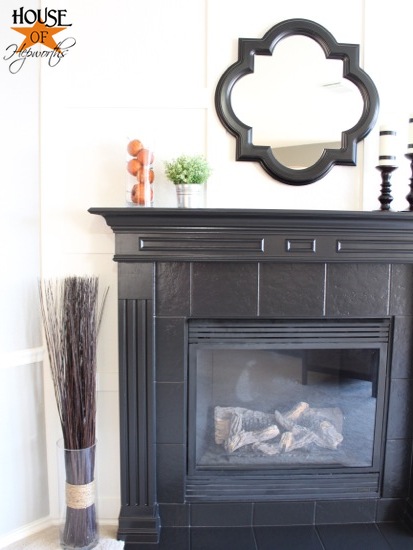
I gathered lots of inspiration photos before I tackled this project. Too see all my inspiration, visit my Fireplace Pinboard. I have to say though that my love for a black mantel is directly inspired from Sarah of The Yellow Cape Cod. Her style is amazing.
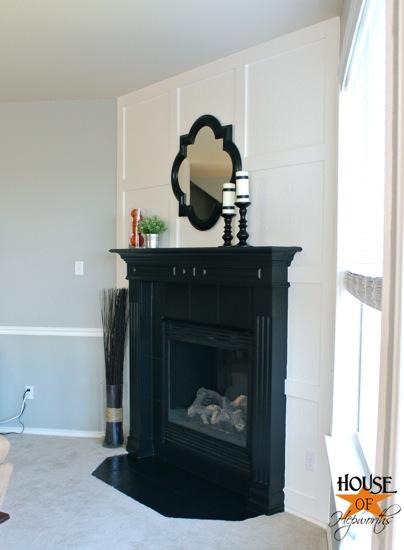
This fireplace has come a loooong way. Check it out when we first moved in. Looks like a bachelor pad with that art and the gumball machine.
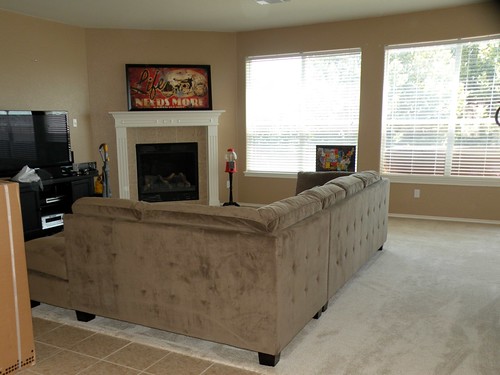
and now!
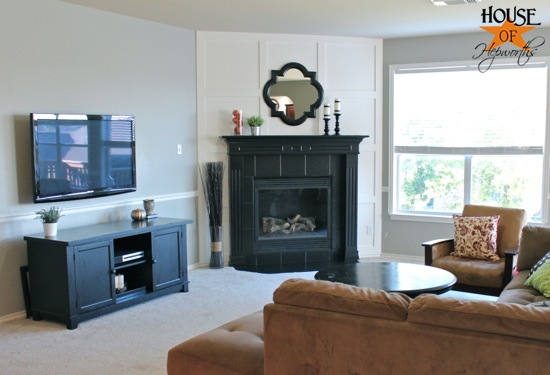
Even I do a double take. It’s seriously amazing what a little elbow grease and some paint will do for a room.
What good is a post without a tutorial? Here’s how I went from blah to Vavoom.
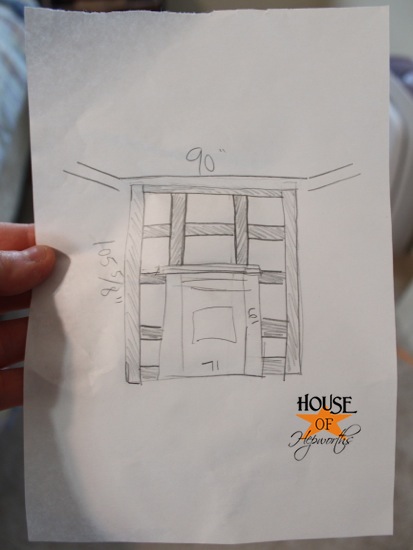
I started with a drawing. Most of my projects start on paper as chicken scratch. I drew a very-not-to-scale sketch of the fireplace, then added my trim. Once it was drawn I measured the entire fireplace and added my measurements to the drawing.
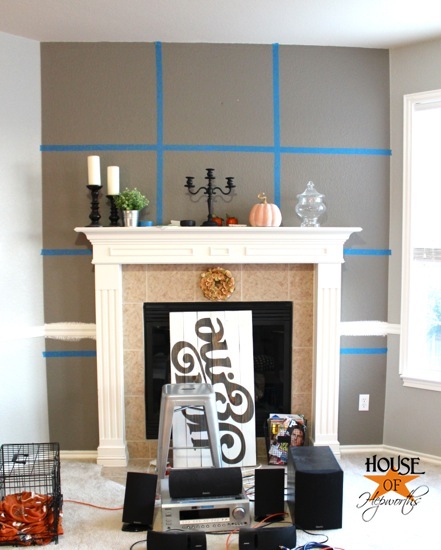
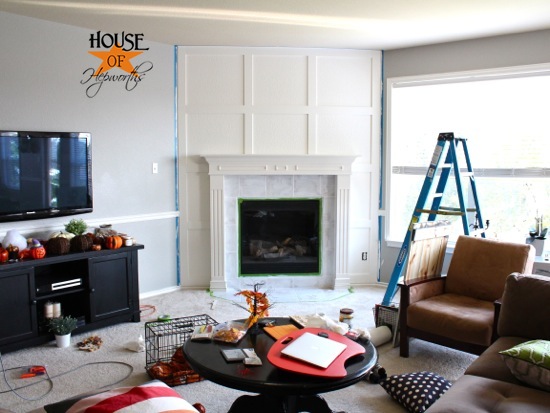
Before I started nailing wood to the wall I did a trial run with painter’s tape just to make sure I liked the look and spacing of everything.
When I did the board and batten in my daughter’s room, I bought too many sheets of MDF. I have enough strips of 4″ wide MDF to board and batten this entire house! I’ve been finding all sorts of projects to use this stuff on.
For this project I used my 4″ wide strips of MDF to frame out the mantel. I started by adding strips down either side of the angled wall.
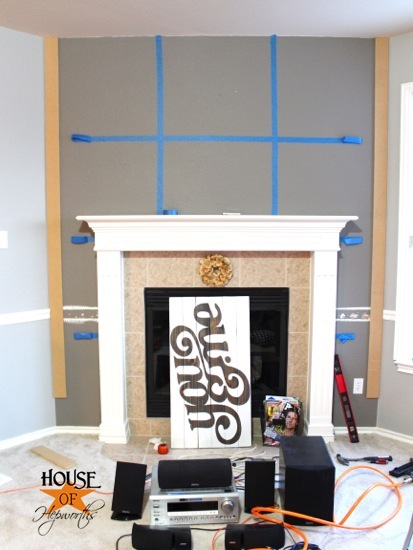
Pardon all the stereo equipment on the floor. Ben was tinkering with all of it and then had to leave town for business, so I worked around it until I got sick enough of stepping over it. Then I moved it. I love keeping it real over here.
Then I added my horizontal strips. Make sure you measure and use a level before nailing your boards to the wall.
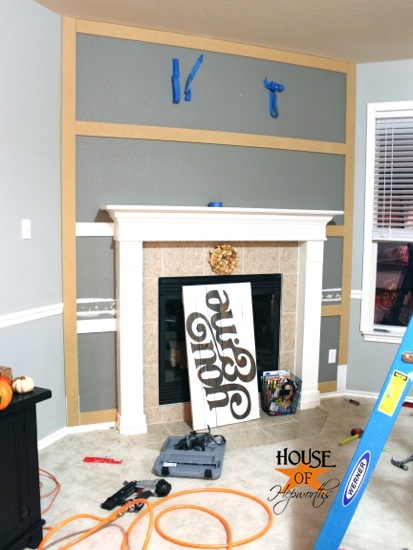
I finished up the MDF planks by adding the vertical ones. Some pieces are white because they are leftover from another project.
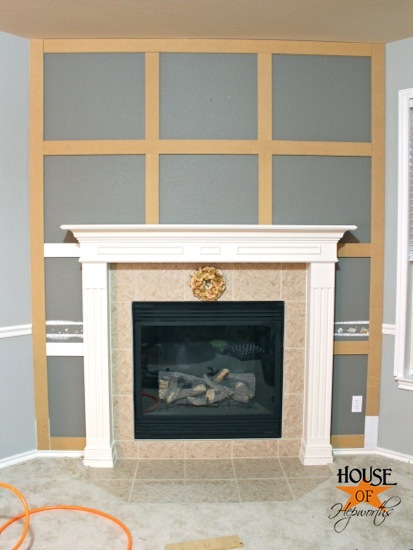
After that I was pooped and went to bed. I guess that’s what happens when you start a project at 7pm.
The next morning I got the kids off to school and finished my project. I spackled all the holes in the wall and I used wood putty on all the nail holes in the MDF. Then I used paintable caulk to fill all the edges for a crisp clean look.
TIP: when filling nail holes in MDF, use wood putty instead of spackle. The spackle is too wet and will cause the MDF to swell.

I also taped off my ceiling and side walls to help protect my gray walls from getting primer and paint all over them.
You always want to prime the MDF before painting (unless using a primer and paint in one). Otherwise you will end up doing 20 coats of paint to cover the MDF. For the planks I used Zinseer Bull’s Eye 1-2-3 Primer. I’m not married to it, but it works well and is what I had in the garage. Please note, I used a different primer for the tile. Read on for those details.
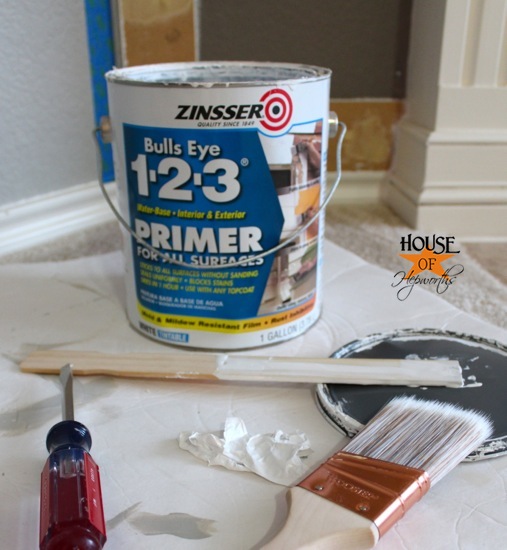
I primed all the MDF planks with a paint brush. I didn’t want to dirty up a roller as well. But when it came time for painting I did use a roller on it.
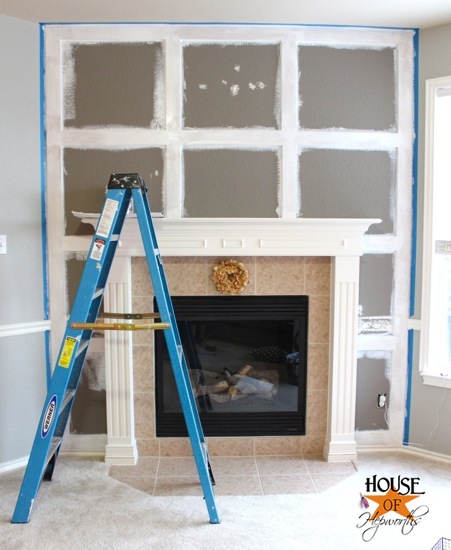
In the middle of all the planking and priming I also started to prep the tile for a new paint job. There is absolutely no reason I used blue and green tape on this project other than it’s what I grabbed first. The blue Scotch tape and the green Frog tape both are such exceptional products that I really have no preference of one over the other.
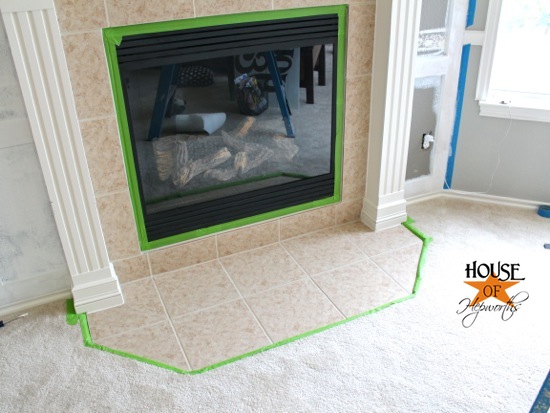
I used a Zinseer primer called BIN Primer. It’s suppose to adhere better to stuff like tile.
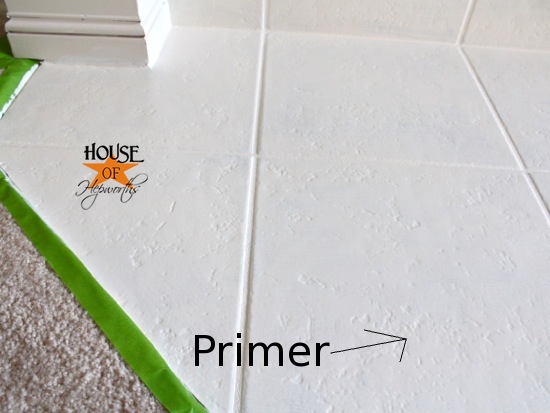
After priming the tile I got busy painting all the new moulding and wall. For all my trim work in my house I always use the same color – Alabaster by Sherwin Williams (except the laundry room trim is color matched to the ikea built-ins). For this trim I bought a satin finish so the texture on the walls wouldn’t be so glaringly obvious.
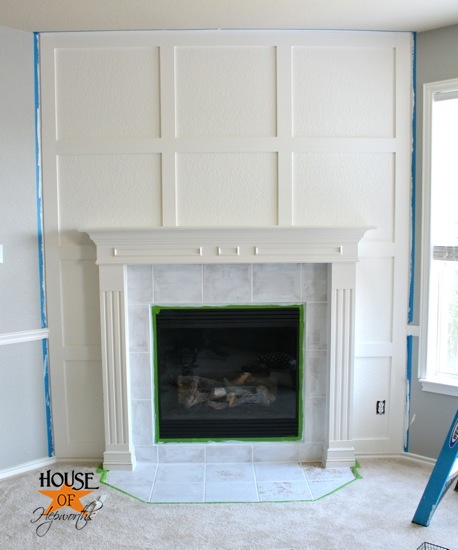
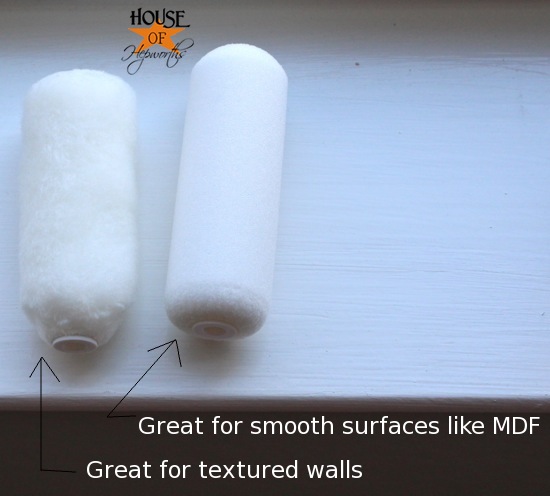
To paint all the trim I first used a 2″ wide angled brush (my favorite is the stubby one from Purdy) on all edges. Then for an extra smooth finish I rolled the white paint onto the walls with a little fluffy roller for textured walls. I also rolled the paint onto the planks using a very smooth roller for smooth surfaces.
During all of this fireplace chaos did I mention my husband was on a business trip? Oh, and the kids insisted they “decorate” for Halloween. While I’m cutting and painting and trimming, I also went in the attic and got out all the Halloween decorations. THIS is literally my life:
Finally it was time for all the black paint! It took me two coats (plus some touch-ups) to get the mantel and tile covered. Here’s the mantel after the first coat.
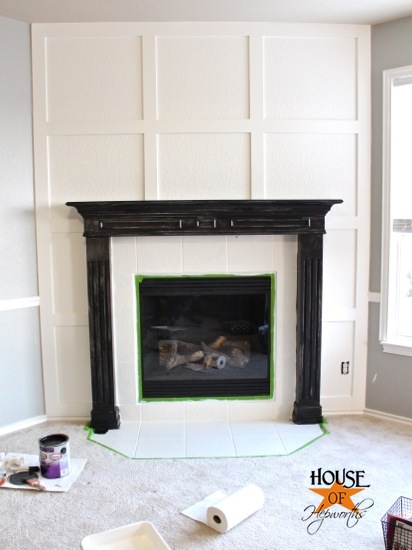
The black I used is called Francesca by Martha Stewart. I got it in the Glidden primer and paint in one in a semi-gloss finish. I used this same paint on the tile as well.
I have no idea if it will stick to the tile long-term. We never touch the tile or walk on it, so ours will probably work fine but if you do this project yourself you might want to double-check if this type of paint will work.)
When I was done I had a few little touch-ups and hard to reach places so I used a very small paint brush for that.
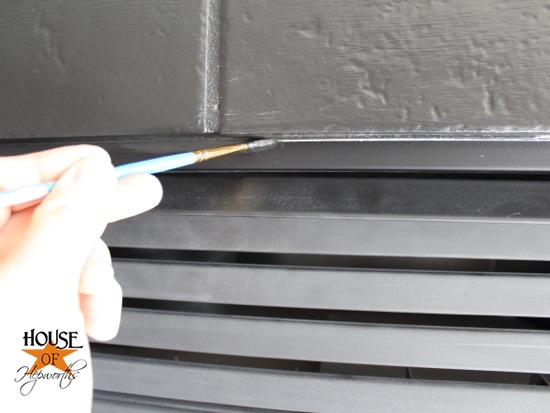
After two coats, it’s looking pretty fresh. I didn’t roll any black on, I used a paint brush for everything.
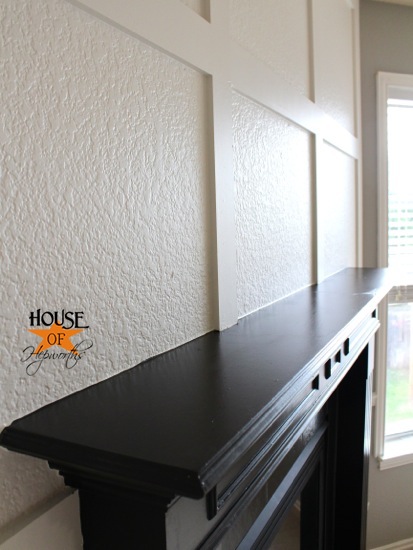
So, what do you think? Are you a fan of dramatic black mantels?

I love going back to my archives and looking at pictures of my house two years ago. It’s amazing how much my style has transformed and also how far this house has come. It was fun pulling old photos for this post.


Looks amazing! I love the moulding and great contrast between the white and black. Great work!!
I like it! I didn’t know you could paint tile.
I love the black fireplace, but now I think your tv stand is trying to compete (and losing). I’d like to see it painted off-white!
It might end up getting a makeover. I was kind of thinking the same thing.
It looks awesome, Allison!! Fab-u-lous! LOVE the contrast and the moulding is the perfect touch. Well done, my friend.
ohmygosh! it looks Beautiful! So, so BEAUTIFUL! Great job! you must be so proud of all your hard work. It turned out fabulous! I love the MDF squares, so elegant.
Awesome! I LOVE the white molding treatment, the contrast is gorgeous. Corner fireplaces can sometimes be tricky, your project made it an asset!! Thanks for the mention and kind words. Best, Sarah
Thanks Sarah!
AWESOME transformation! I love the contrast and great focal point you have created here. It looks fantastic. Well done. All of these transformations are getting me itching to do my own!
Looks great Allison! Love it!
Wow, it is just gorgeous Allison! Love the black and the white together. It just pops. So very pretty!
That looks awesome! And makes such a dramatic difference! I really love the black mantle and fireplace!
Wow! It’s stunning! The before reminds me of the standard fireplace most of us have with newer houses, not bad just not attention-getting either. Your remake really draws our eyes to the fireplace. I love it!
Love it, a project like this would take me weeks! Where did you buy the mirror? I love the fun shape
I just bought the mirror a few days ago at Hobby Lobby. I really love it, but I may keep my eye out for something a little bigger for above the fireplace.
Wow! Looks amazing.
I’m very envious you changed it up so much…looks really good.
Allison…That looks amazing!!! I love it!
Love it! Gives hope to my boring corner fireplace..now to paint my tiles! thanks!
Love Love Love it! What a journey for this little fireplace. It turned out fantastic! Great job again girl! I just e-mailed the link to my husband and titled it – “We are Doing This” lol
That is so awesome! I hope you do it and if you do, send me pics!!
Amazing transformation! I love the contrast the black fireplace adds to the space!
Allison, LOVE the grid!!!! I want to do this to my master bedroom ceiling so bad but it is a weird slope and I am not sure how it would look in the end. Plus, we have a ceiling fan that we don’t want to remove (it is used WAY to much for that). Any suggestions? I love Sarah’s blog too, one of my FAVS (along with yours) you are both so creative!
I really like the transformation! Having two big black items right next to each other would bug me though. Any thoughts on changing up your entertainment center? I love that Alabaster color!! You’re awesome, Allison!
I’m considering painting it.
Hi Allison! Love this transformation! Quick question:
I have the same textured walls (and rounded corners for that matter!) in my house, and doing board and batten scares me when it comes to the texture. Does the textured wall ever bother you with MDF on top? And how thick of MDF do you use? Thanks!
Hi Erin, you can definitely see the texture, but if you use satin or eggshell paint it really camouflages the texture pretty well. In my daughter’s room I used semi-gloss and the texture is pretty glaring, so I am going to repaint her room eventually with a satin finish. My MDF is about 1/2″ thick. If I could go back I would have definitely bought the thinner one, but this is what I have so I make it work.
I LOVE the molding- like, seriously adore it. You did a fantastic job.
But I’m just not feeling the black mantle, especially the tile.
That looks great!! I love it!
This is gorgeous! I love dark colours on walls and as major accents and you so rarely see it!
Wow! Love the board and batten. I just loved it more before it was painted black. I love a bright white molding, so I loved it to the point when you had it all painted with primer. The black is definitely bold. Maybe you’ll consider going back to white at some point when you’re ready for another change.
I am not typically drawn to black fireplaces but yours looks AMAZING! The contrast between the black and white is gorgeous.
That looks great! The mdf makes a huge difference and it looks really custom now. So funny…I painted our brick fireplace white…then eventually painted the mantel black. And use MS Francesca!! You’ll love it…it somehow looks great in every season, and helps ground whatever decor you put on your mantel.
WOW~ what a difference that makes! Looks great!
Looks great. It works well with the tv and credenza and really draws your eye across the room. Very bold. Can’t wait to see it all Halloween-y and then Christmas-y. Will be awesome.
Thank you! I’ve started to figure out that it’s very polarizing – you either love it or hate it. Good thing I love it!
I love love it! But i am gonna miss the you & me sign. You can always bring it over to my house wink
wink
I’m going to hang the sign in my bedroom, so it’s not totally wasted! ha!
That looks absolutely beautiful! Thanks for sharing all your tips. Megan
What a difference! I am a sucker for black and white in any room! Great job!
That looks fantastic!! I love the board and batten look, and it’s extra classy around your fireplace!
Thanks Kristen. You are too sweet. xoxo
Beautiful done!!! Love it!
Your fireplace looks lovely! I recently did the same thing with my mantle, painting it black. I also did the brass on my fireplace itself but didn’t even consider the tile surrounding it. I LOVE the mantle now but still hate the tile. You inspire me to paint it, however I can’t tell in the pictures if, well, does the tile LOOK painted? Did you sand it at all to scuff it up prior to priming or did you just prime then paint?
This is so stunning! I love it! I have a corner fireplace that looks EXACTLY like that! We never use it and I fantasize about doing something , anything, to make it less boring. I am so impressed with your transformation. We know we will be moving in a few years and I’m worried about doing anything that can’t be undone. Especially since I would probably use blue or dark grey. And not everyone may like that. If you wanted to make this blend back in do you think it would be difficult? Or do you think potential buyers would accept it done up like that? Thanks!
We have the same type of gas fireplace and are wanting to also paint our tiles. We were unsure if we could use regular paint or if it needed to be high heat. How did this hold up? Did you eliminate the need for high heat paint? Thanks for the info!
You’re looks better than yellow cake code…especially the accessories