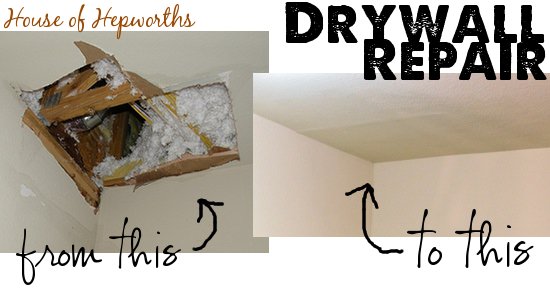

Three years ago, right after we moved in, we had a flood in the laundry room due to a leaky dryer duct on the roof. As the water traveled down the dryer duct in the attic, it dripped over and over onto our master closet ceiling, causing some seriously soggy sheetrock. (Contrary to our roofers opinion at the time that the flood was caused by raccoon poop.)
After removing all the soggy sheetrock we were left with a gaping hole in our ceiling. See exhibit A:
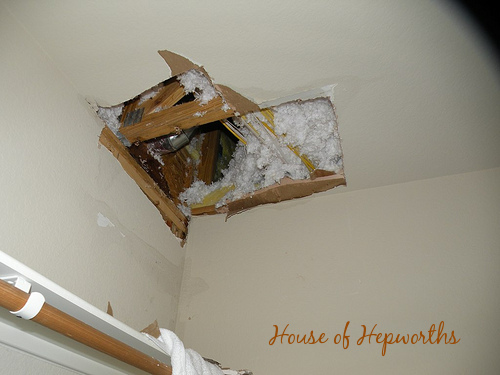
Having a large gaping hole into our attic kinda creeped me out (hello, what if there are bugs up there?!), so I quickly installed some sheetrock (drywall? what’s the difference?) to cover the hole. You can read all about that here. We’ll call it Phase 1 of Operation Repair That Hole.
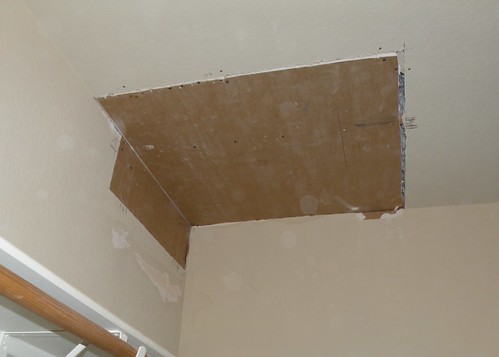
You guys were so kind as to point out (repeatedly I might add) that I did, in fact, attach the drywall on upside down. Let’s just get that out of the way right now. No flaming needed. I am completely aware that the sheetrock is installed upside down. Duly noted.
And can I also add another disclaimer? I am not an expert! I am figuring this out as I go. I read DIY blogs just like you. I watch DIY tv shows. I read DIY books. And I call my dad and ask him. These posts are merely my attempt at sharing my newfound information with all of you. I do not guarantee that my way is the correct way (it probably isn’t). Just because I show you how I did it does not mean I am the expert or that I even know what I’m doing. I’m just a homeowner with a big gaping hole in my ceiling and enough time on my hands to attempt fixing it myself.
Okay, whew! Where was I before that soap box got in my way? Oh, right, the upside down drywall…
Now, after far too long, it was time to just suck it up and patch the area once and for all. The one thing I hate more than actually repairing drywall is repairing drywall on a ceiling. Can you say muscle spasms in your neck? Yee-ouch. But it was time. Time to suck it up, get a crick in my neck, finish the job, and then soak in an epsom salt bath in celebration of my accomplishments.
I started by gathering my supplies:
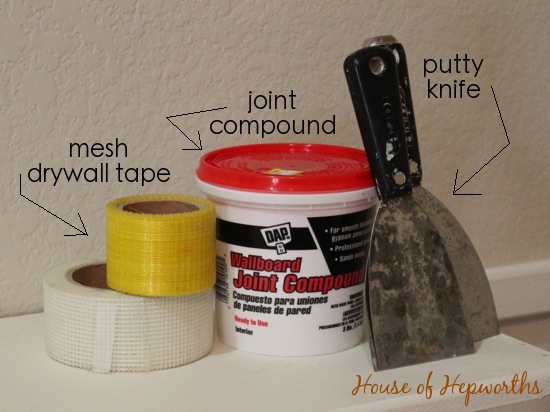
The ain’t my first “Repairing Sheetrock” Rodeo, so fortunately I already had most of this stuff on hand. To repair your damaged area you will pretty much need 3 things. 1) Mesh drywall tape, 2) Joint Compound, and 3) some putty knives.
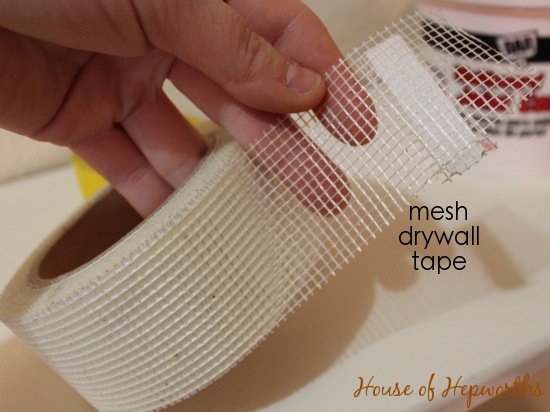
I have two different kinds of mesh tape because one is a standard thickness and one is really thin. Here’s the standard mesh tape. All it is is mesh that is sticky like tape.
Here is the thin one which is good for smaller projects and covering nail holes.
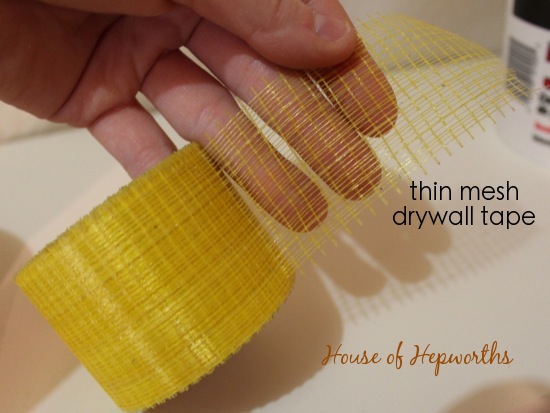
I like to toggle between the two tapes depending on the job at hand. For this repair job I used both sizes.
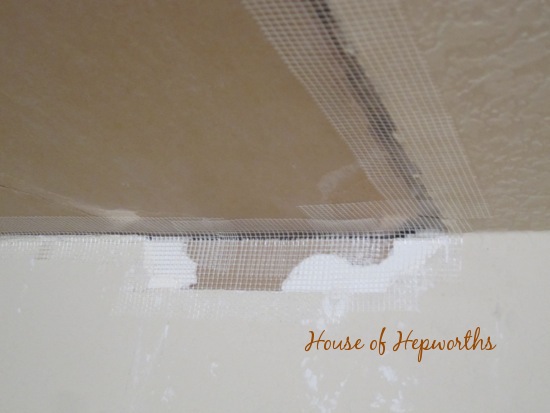
I started with the standard size mesh tape (the white one) and covered all the seams from the original sheetrock to the new sheetrock. The point of the tape is to create a barrier for the joint compound to stick to (or at least that is my assumption).
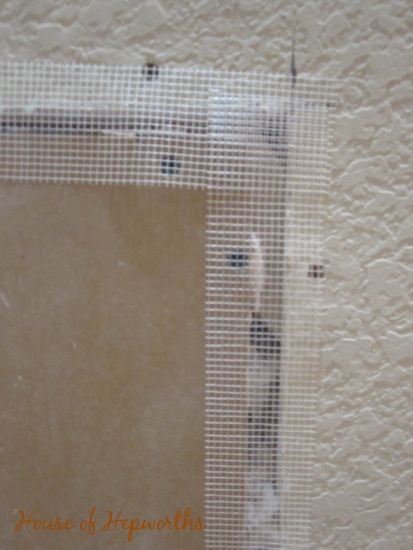
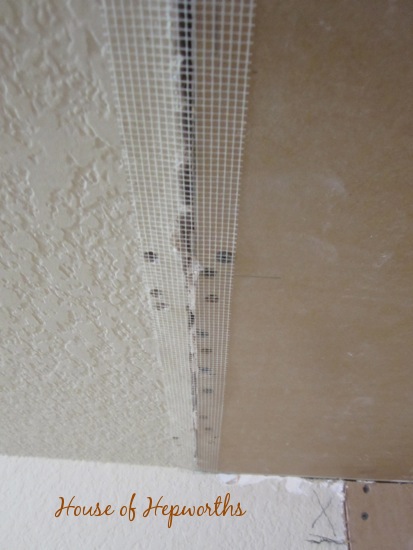
When I got to the 90 degree edges (the area where the ceiling and wall meet) I just folded the tape down the center horizontally and stuck half on the ceiling, half on the wall.
Now it’s time to bust out the joint compound. Contrary to popular opinion, this is actually my favorite part. It takes some artistic skill to be able to smear the compound on and then smooth it out to rid it of all blobs, bumps, and hard lines left from the putty knife.
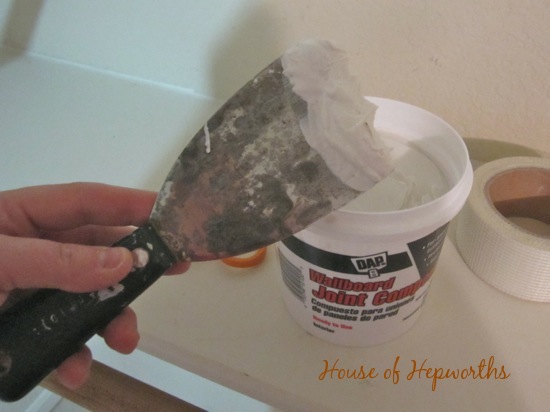
Start by putting a very thin layer of the joint compound over the tape. If I were a baker, I would compare this to putting the crumb coat on a cake. You will still see the tape, this just helps the tape to adhere to the wall.
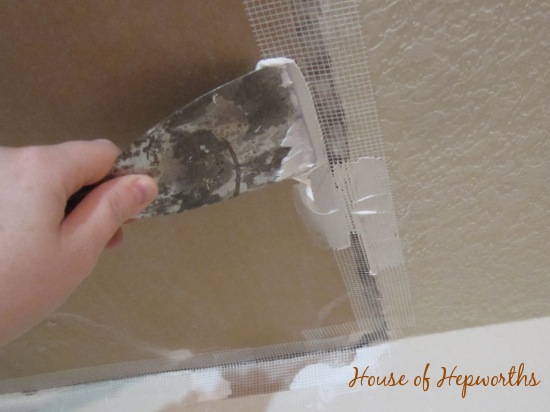
Here’s my “crumb coat” of joint compound. When I was finished with all the seams I got the thin yellow mesh tape and ran it along all the screw holes and less damaged areas that still needed repair. Then I did the “crumb coat” to that as well.
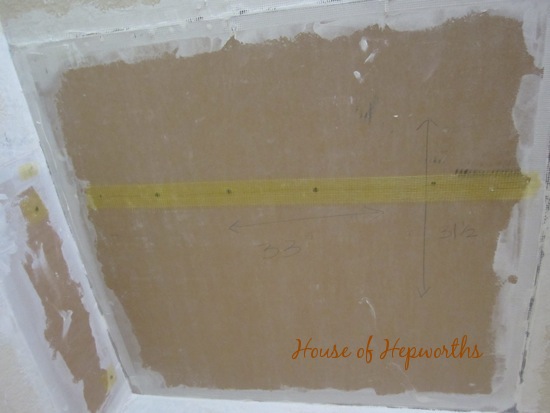

And the finished 1st coat of joint compound. It doesn’t look near finished because it isn’t. Don’t get too excited yet. You still have a ways to go.
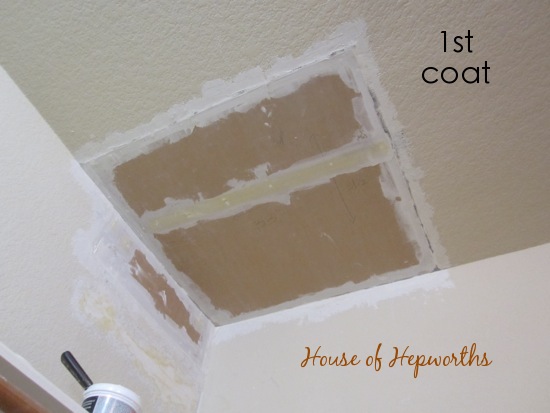
Lightly sand your first coat with some fine-ish sandpaper (like maybe a 120 grit or so), and then do a 2nd coat of joint compound. This time make it just a tad thicker, but not near as thick as if you were actually icing a cake.
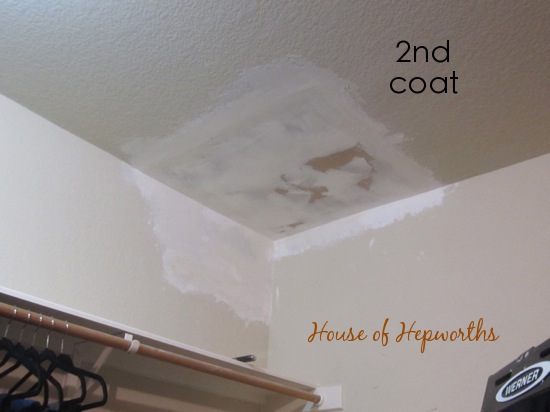
Now get your sand paper and just lightly sand the beejeebers out of it. Make it smooth and soft. Remove all bumps and raised areas. Sand any ridges smooth. And just be prepared to look like a snowman afterward. You might want to cover your head with a hat, cover all your belongings within a 20 mile radius, and wear a breathing mask and some eye protection. This dust gets everywhere.
When your area is smooth as a baby’s bum, it’s time to texture! Yay! (Not.) For large areas you will want to use what is called a “hopper” and texture spray gun to spray the texture on, but to use mine involves getting the air compresser out, hunting down my hopper, mixing up all the texture, yadda yadda yadda. AKA Too Much Work. So I did the next best thing… I bought a can of spray texture, which is overpriced at like $12 a can, but oh so worth every bit of headache saved.
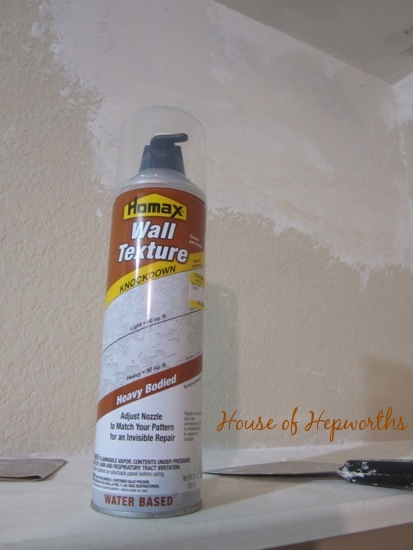
Shake that bad boy up for however long it says on the back of the can (1 minute? 5 minutes? It’s a long time) and then just go to town spraying down your area with texture. Leave it be for a good solid 10 minutes or so, then take a texture knockdown knife (looks like a putty knife but wider) and lightly “knock down” the texture (assuming your texture is the knockdown type like mine. If not, the can will tell you how to recreate your type of texture).
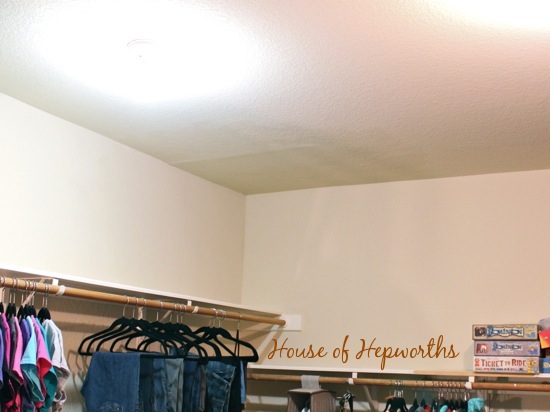
After the knock down I let it dry for a day or 15, and then I touched it up with my can of touch-up paint.
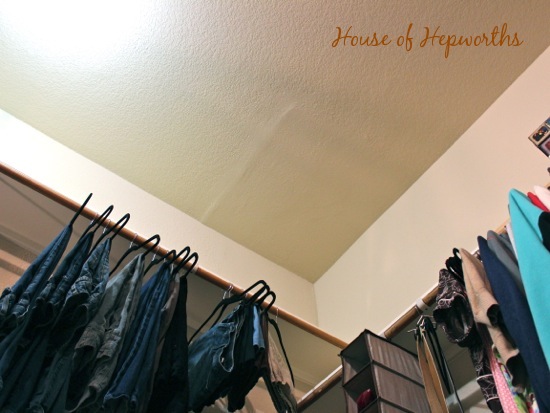
A word to the wise – it is virtually impossible to match your texture and repair job 100%. If you can do a completely seamless patch job then you are a very wealthy handyman. I’m sure if I hired a pro it would have looked better than my job, but considering I don’t even do this sheetrock patch stuff on a regular basis, I think it turned out quite nice if you ask me.
You can still see the edge of the patch sheetrock, but it’s hardly noticeable when you walk in the closet – especially if you don’t know to look for it.

So that’s that. A complete before and after that only took 2.5 years to complete. I am on a roll!


This post is part 2 of a 2-part series.
To read part 1 and learn how to remove soggy drywall, cut a new hole, make a template for the new sheetrock, and attach the new piece of sheetrock, click here.
*this post contains a few amazon affiliate links
I have been avoiding doing this myself. can you tell me about the spray texture? how was the over spray? was it very messy?
I needed this!!! I have had a hole in my dining room wall for several years where we removed an ill-placed sconce. I just covered it up with a large piece of art, which I now want to remove. My husband is soooo not a handyman (think IT geek and musician with zero time or interest in home diy.) I think I can do this myself. Thanks!!!
They blamed raccoon poop? How does that work??
Hey mistakes happen in the DIY world, don’t sweat it 😉 I’m sure everyone has goofed one time or another. The patch looks good, and unless you’re looking for it, or directly at it, no one will ever notice.
I have to replace some drywall myself and I’m not looking forward to it (even though I know it’s really not that bad). What a timely reminder that I really should get on that. 🙂
No one will ever notice? It’s a huge bulge. People will notice.
We id that to our ceiling too! Put the drywall upside down and the final renovation guys had to take it all off and put new up there! Learned the hard way!
you did a GREAT job. who cares that it’s upside down. I like that you are not afraid to take on these jobs and get them done. you’ve inspired me many times to “just do it”…so thanks!
Way to go! Doesn’t matter whether or not it’s perfect, it still looks great! Wayyy better than a gaping hole!
When we converted our one car garage into a bedroom and pantry we had a few places that we had to fix. The texture is HARD!! Yours looks great!!
Hi!!!
I think you did a great job and whoever said that bloggers are perfect?? All this is about learning…isn’t it??
Your closet looks great and it looks so spacious!!!
Thanks for helpful tips!!
Pam
I have done this before on a ceiling and NEVER again. If I have to do without a few meals to hire someone, I will. (Or call you!) Except the last guys who did an extensive plumbing disaster reno did a terrible job of it. Yours looks great. Thanks for all the handy tips. When I hire someone, I can stand behind them and tell them what to do!
ha ha I love it! I shared this with DH. We have a patch in our bedroom below where a toddler left the upstairs sink on…It was pretty bad. We have the dry wall up and it’s been mudded…but not painted. I think it’s been a year. You made him feel better 😉
Great work and keeping this post in my DIY Fixes folder. We have a couple of areas that need work and I think we can do it besides if it turns out horrible well at least tried.
You are right that knowing how to repair patches of drywall is a good skill to have. It’s funny that you just watch videos and ask your dad how to DIY projects like this. However, judging by the pictures, you definitely know how to fix drywall!
OMG………
U really left the sheetrock installed upside down………….
That repair is worthless and u will C y in time……….
UR Killin Me………………..
The sheetrock is backwards, you need more that a little putty knife to apply mud. You habe to fade it in so as not to see your patch. And the popcorn is for lazy cheap contractors who do not want to finish the drywall properly. All in all, in sorry but it’s a very bad patch.
I like how you mentioned that it is virtually impossible to match your texture and repair job 100%. My kids put a hole in one of my walls, and I desperately need to fix it as soon as possible. I will definitely keep your tips and instructions in mind when fixing my drywall.
I liked your suggestion to wear a hat when sanding things on your ceiling. My brother has to replace a section of plasterboard in his ceiling and will probably have to do some of the same things you showed off here in your blog. I’ll be sure to remind him to at least wear goggles so that he doesn’t get dust in his eyes!