New to this series? Click here to start at the beginning!
Happy Star Wars Day! May the Fourth be with you! Also, happy birthday to my husband Ben who not only is born on Star Wars Day, but is also born during the year that the first Star Wars was released (1977)! Double bonus.
On Wednesday I shared with you how we rebuilt our staircase to accommodate a newly framed out wall and set of french doors. Our goal is to turn our formal living room into a board game room! We LOVE to play board games and are creating a dedicated space for it. My husband even has a board game youtube channel where he talks about the games we play each week. He’s been vlogging the progress of the board game room, so if you want a sneak peek go watch his videos. You should check it out and SUBSCRIBE: Snow Board Gamer (because he loves snowboarding and board gaming).
Before I dive any further into this renovation, I feel like I should share with you our inspiration, or where we’d like to end up. Here’s where we started when we moved in:

And here is my favorite inspiration picture:
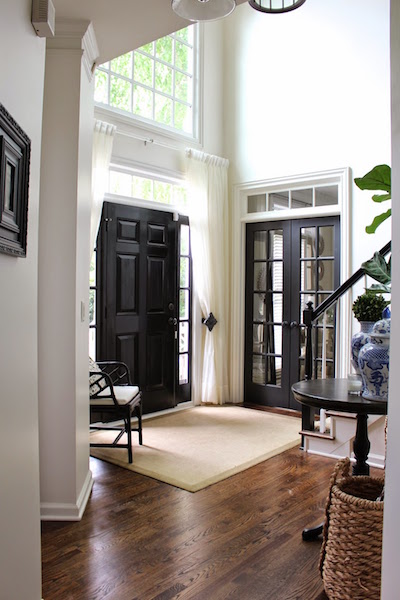
via
I just love this foyer! I love the black french doors, the black front door, and the black stair rail paired with bright white trim and oak floors. When my foyer grows up I want it to feel like this inspiration photo. I will probably do without the curtains though because KIDS. The opening and closing of doors, all the comings and goings, and all the teenagers with their shoes everywhere – somehow I feel those curtains just wouldn’t hold up in this busy house. Everything else though? Yes please.
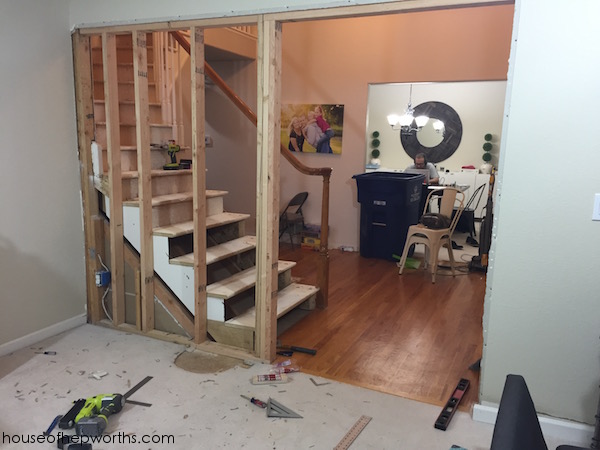
I am still patting myself on the back because until that day, we had literally never built stairs OR framed out a wall. Two new renovation projects in one day. It was a big day!
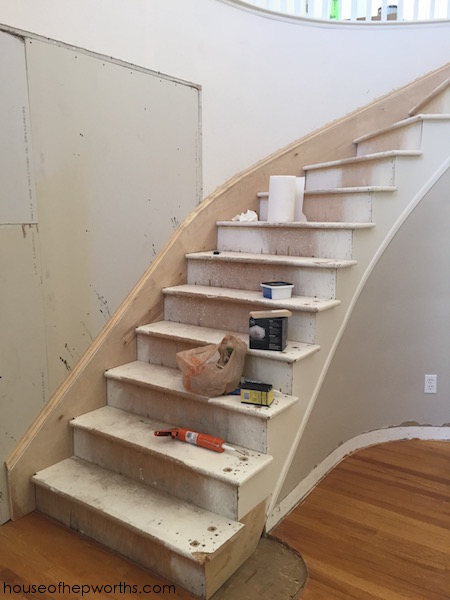
After that, it was time to drywall and add the skirt board up the staircase. First things first, add the drywall. I put the drywall on the other side of the wall and traced the stairs onto the drywall.
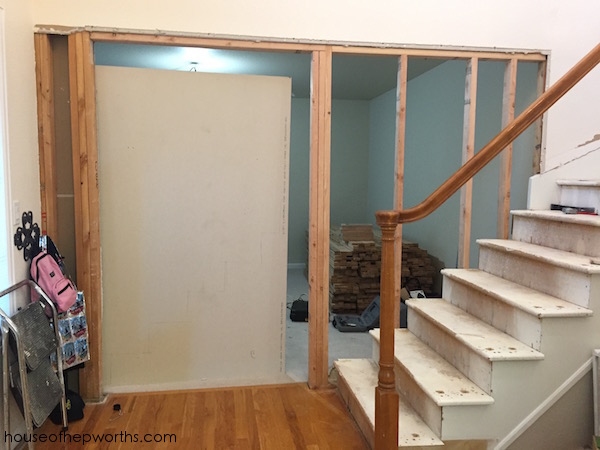
You can barely see here my pencil markings. I cut along the pencil markings and the drywall fit snug as a bug right into place.
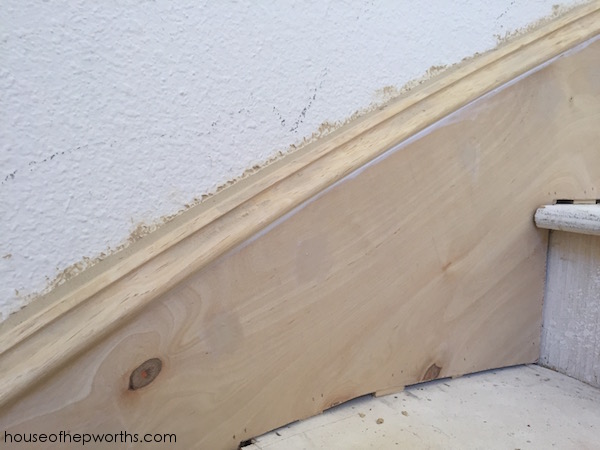
Once the drywall was hung, it was time for the skirting. Our stairs had a small skirt board, but it wasn’t pretty and for some weird reason was inset into the drywall. Most sit on top of the drywall but ours was the same depth as the drywall. Weird. So I added a new one over the old one. This accomplished two things, 1) it continued the skirt from the top of the stairs all the way to the bottom, and 2) it made it prettier.
To make the skirting, I created a pattern from leftover cardstock. I taped a bunch of paper together, then pulled it down and traced it onto my wood. I wish I could take all the credit for this genius idea, but I found this idea while browsing pinterest.
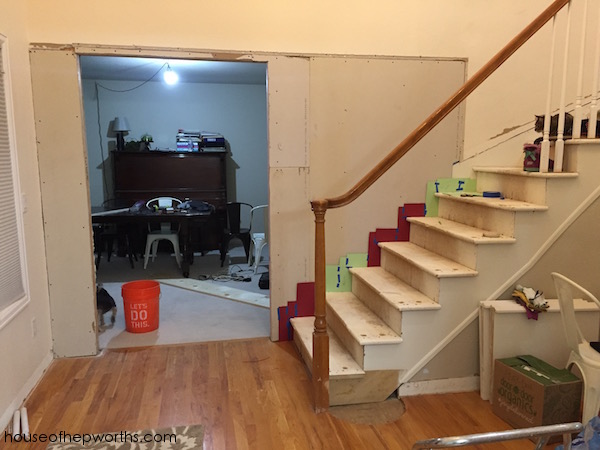
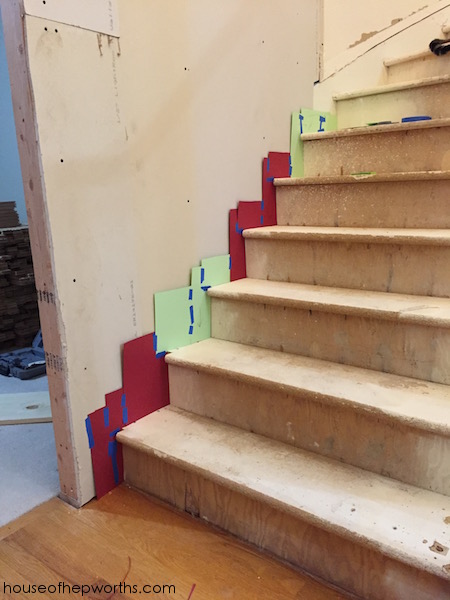
The skirt actually has two parts to it. The bottom half of the stairs has a 1×12 and then the entire staircase, top-to-bottom has a piece of underlayment as the actual skirt. The 1×12 was needed on the bottom half to correct the depth issues between the top part of the staircase and the bottom. Here’s the 1×12, cut with my nifty pattern:
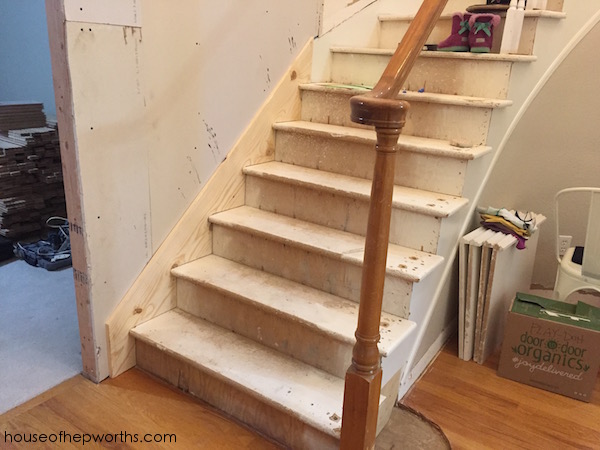
Once I had the 1×12 in place I created a 2nd pattern for the top portion of the stairs. I chose underlayment as my skirting material because it is thin and bendable. Working with a curved staircase is not for the faint of heart.
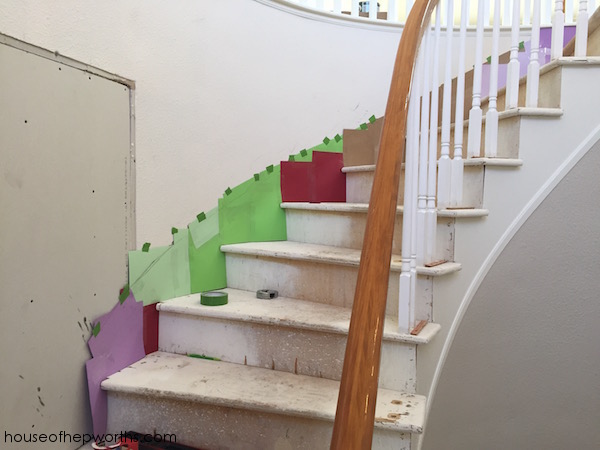
I took both patterns and cut out all the underlayment and nestled it into place. This took some math to get the curvature of the staircase correct. I used my Dewalt jig saw to cut all the underlayment. Unfortunately I deleted my pictures of the cutting process, so I can’t actually show you that step. Boo.
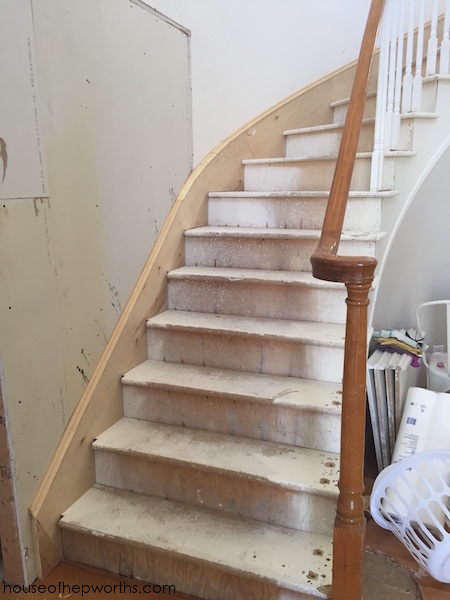
Once the underlayment was bent into place I used my Ryobi nail gun to secure it. I topped it off with a piece of trim.
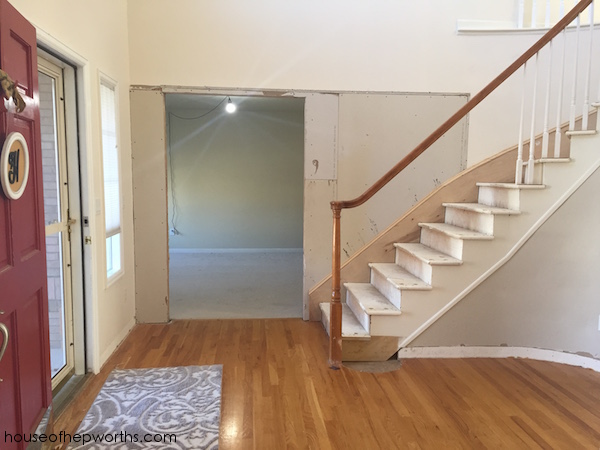
We are getting new treads and risers on the staircase. I added the skirt board before we install those so that any unfinished edge will be covered by the new treads and risers. It will give the stairs a more polished look.
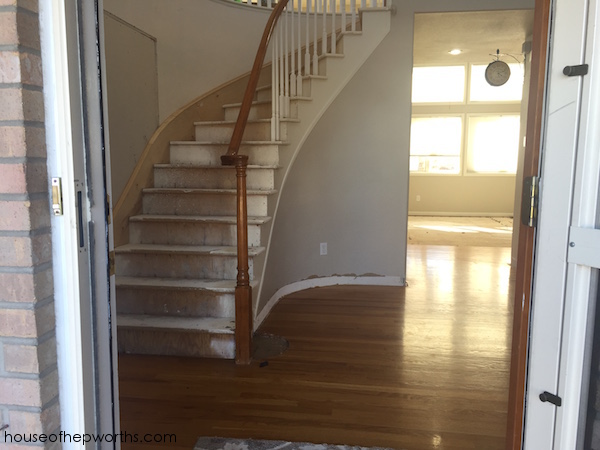
One more item on the to-do list before we can do the new floors, treads, and risers: we have to take the rest of the railing down. We left it up until the last minute so that no one fell off the staircase, but now it needs to go! We are saving the railing and will add it again once the treads and risers are done. We will order new balusters that match the old ones.
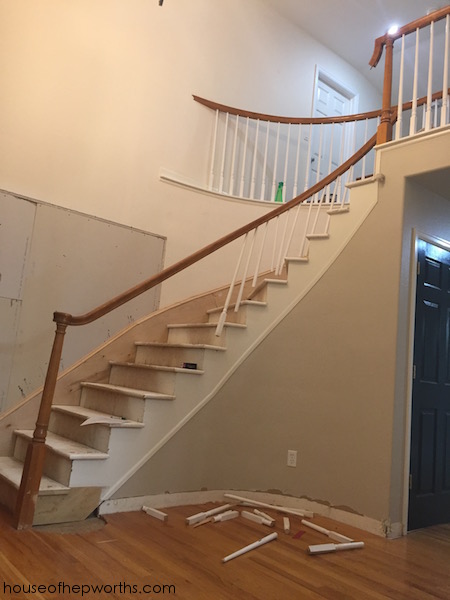
Here’s looking down with no railing on. It is scary walking up the stairs now!
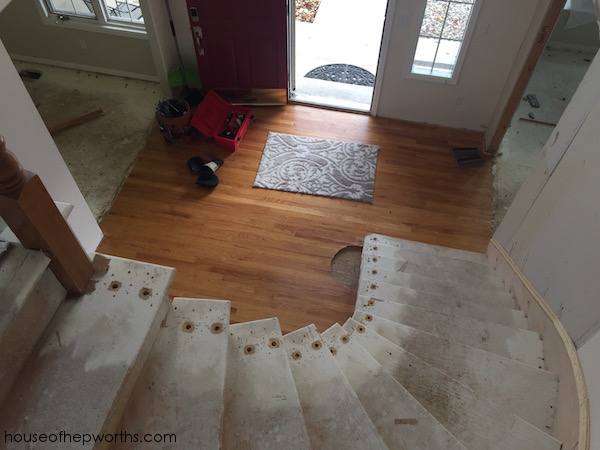
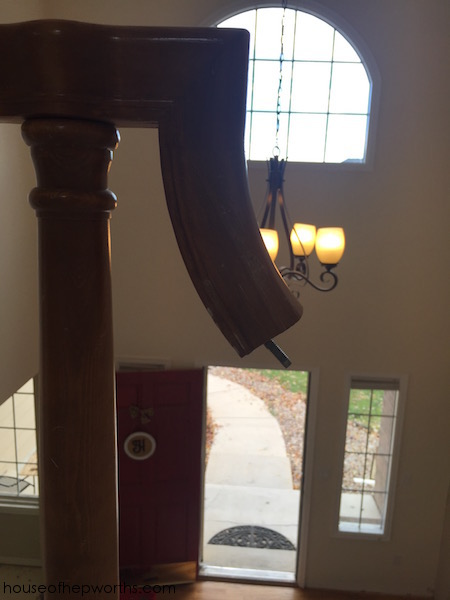
Ever wondered how a railing is attached? With bolts and nuts. Pretty cool. I love renovating because I learn so many weird things.
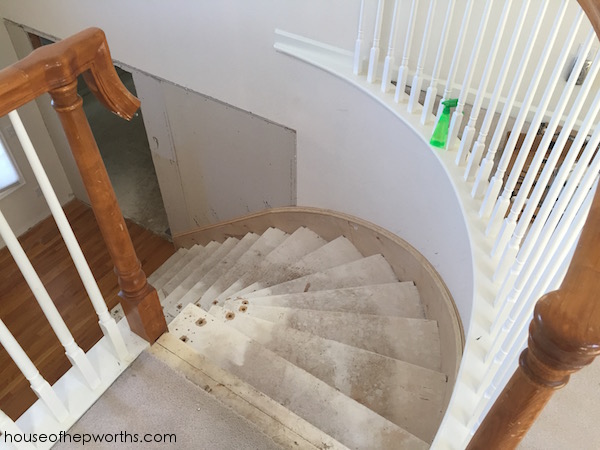
Check out that beautiful skirt board. I’m quite pleased with it if I do say so. I’ll paint it once the stairs are put back together.
Here’s a cool view of what our newly closed board game room looks like. If I can match the texture perfectly then it should be seamless and no one will ever even know it used to be open.
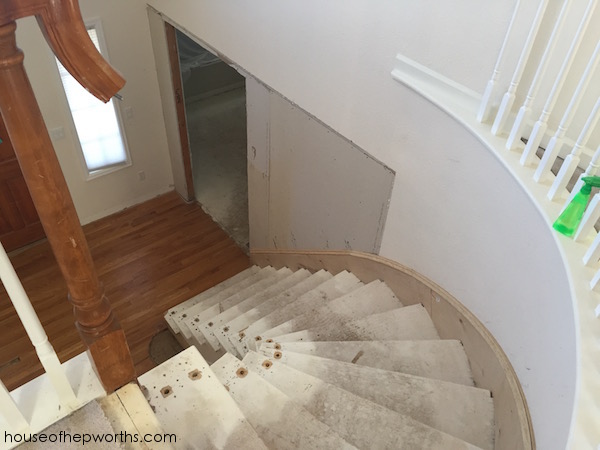
I filled all the nail holes and caulked everything before the treads and risers went in, but I’ll wait to paint until after.
Here’s a sneak peek of how the flooring company weaves the new floor into the old:
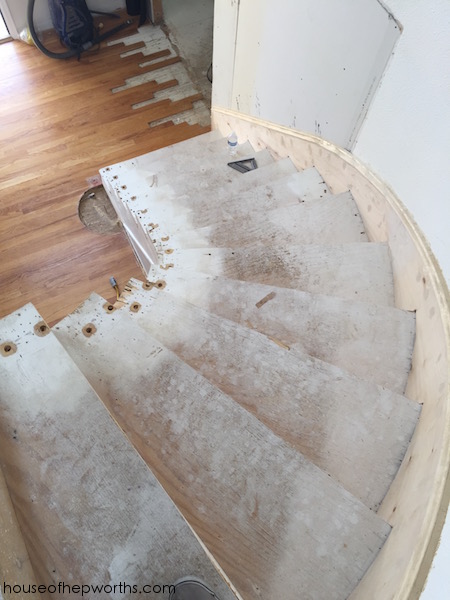
I think we are ready to have the floors finished now! Hallelujah! Check back soon to see those orange floors disappear and beautiful new greyish brown ones appear.
Here are all the power tools I used on this project:
Click here for the next post in this series
This post contains amazon affiliate links
Thanks for reading! Have a wonderful week!


I am so glad you are back to blogging! I have enjoyed all the new posts!
Rebuilding a staircase sounds like my worst nightmare. Kudos for tackling it!
This is amazing! I wish I had this information before I did my skirt boards! Mine wasn’t even curved, and it was …not fun, shall we say. You can bet your booties I’m pinning this one for the next set of stairs! Beautiful work!
I’m glad you like it! It was a lot of work but also fun and challenging.
What kind of underpayment did you use for the skirting on the curved portion of stairs? Was it still wood? Thickness?
What is the material of skirts? I just wonder how it bent. We have curved staircase and don’t know how to bend.
Good job btw.
Thanks