I am finally circling back to our IKEA kitchen series! Today is all about the custom IKEA island. We wanted a very specific island so we designed one ourselves and made it happen! If you are new here and want to start from the very beginning of the IKEA kitchen series, start here. If you have any questions about our IKEA kitchen, leave us a comment on any of the IKEA kitchen posts.
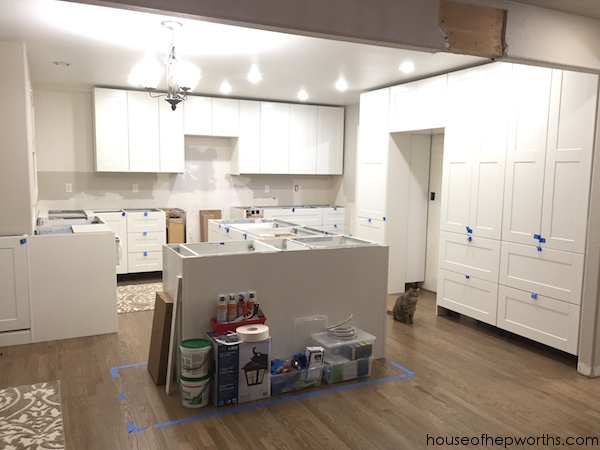
I wanted a very specific island that IKEA does not provide for you off-the-shelf. Because of this, I had to get super creative in the design. I am loving how it turned out and am very pleased with the results. I will try to write this all out in the least confusing way, but know that we customized the heck out of the island and this post may get a bit confusing.
The very first thing I did was plan (and plan, and plan, and plan!) on the IKEA kitchen planner as well as many sheets of paper. The lady I worked with at IKEA gave me some serious side-eye when I told her my plans. I guess she isn’t used to people customizing so much and I had to be firm with her on what cabinets I needed to order. By the end of our visit she was totally on board.
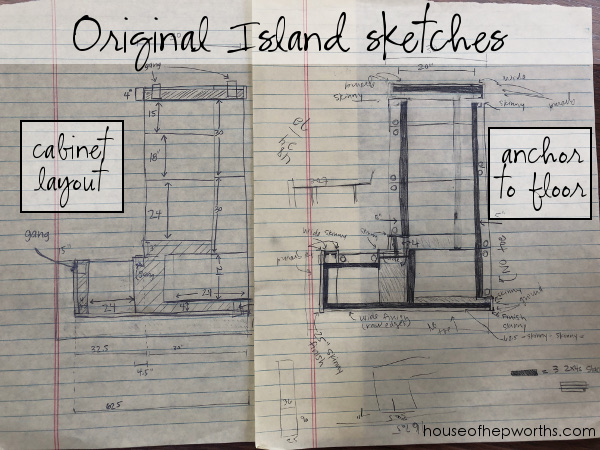
The biggest issues with customizing the island to fit our needs were that we had a specific layout we wanted and used the stock IKEA cabinets and filler pieces to fit this layout. The logistics of how the island would attach to the floor, and how the cabinets would fit together in the most efficient way were our top priorities. To make things easier I started by using painters tape to mark off our entire island on the floor. I marked the cabinet template as well as the overhang of the countertop.
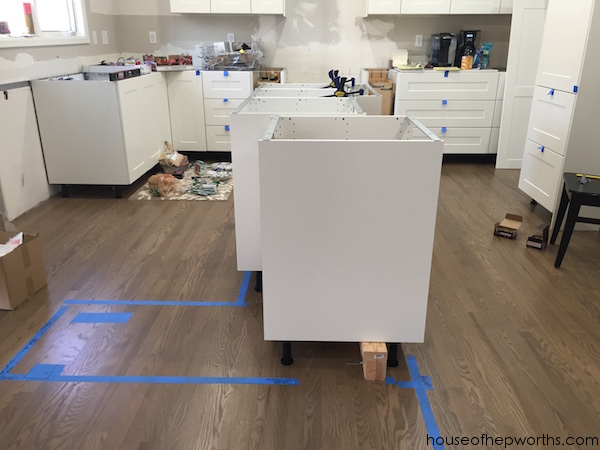
Screwing 2x4s and L-brackets into our brand new floor was nerve-racking. We used 2x4s as the base to attach the cabinets to the floor. We used IKEA’s Forbattra toe-kick vertically as side pieces to widen the island. A huge bulk of my time was spent making sure the island was level. Our floors are definitely not level, so getting this L-shaped island level completely around from all angles was not an easy task.
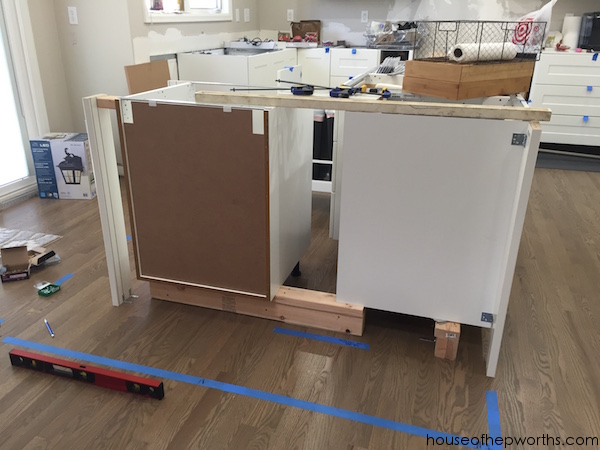
Here’s a good shot of the Forbattra toe-kicks. I chose these because they are pretty thick, are the perfect width (4 1/2″), and have a small decorative scallop on the top. We decided to use the toe-kicks to frame out the island for a few reasons: 1) It gives the island more substance and a custom look and feel, 2) it allowed for electrical boxes to hide within the island void areas instead of inside the cabinets, and 3) either side of the toe-kick are finished and helped with the logistics of using custom cut panels with raw edges.
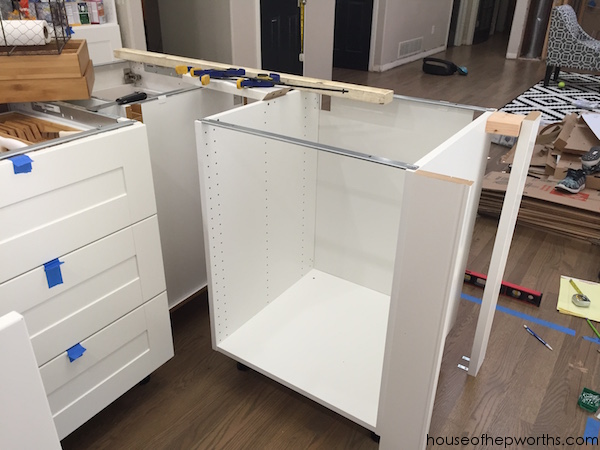
Each of the toe-kicks were attached with different styles of L-brackets. I went to our local hardware store and bought a huge variety (shapes and sizes) of L-brackets so that I had exactly what I needed as I attached the pieces.
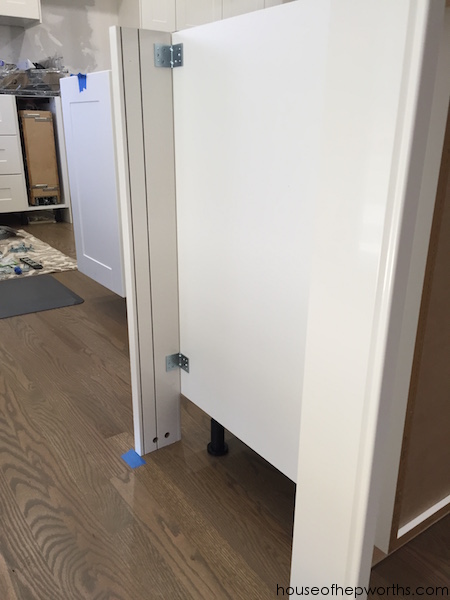
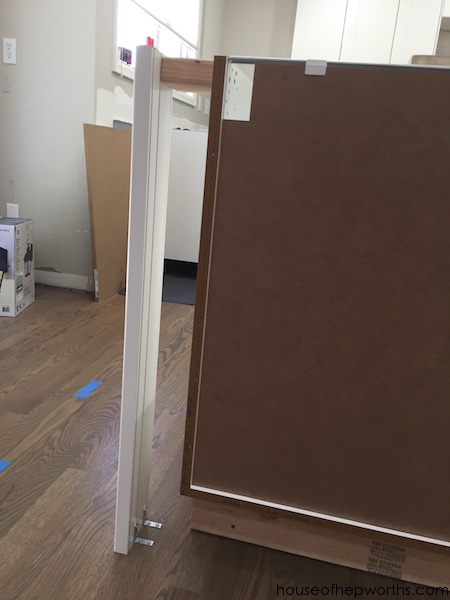
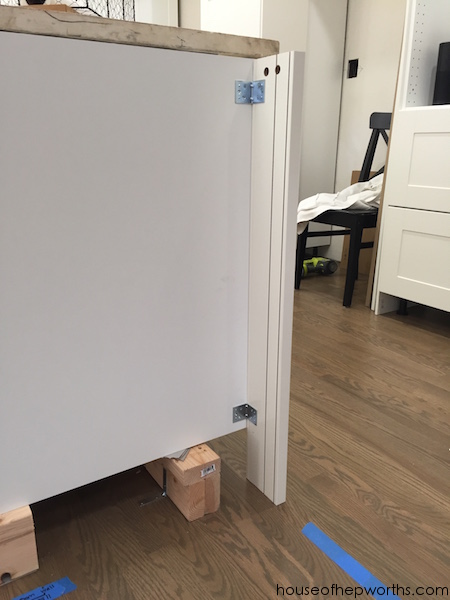
Once the basic layout was in place and we had a few of the vertical toe-kicks installed, we attached the biggest panel. I cut it roughly to size, then put it in place and marked exactly where we needed to cut along the top for a perfect fit.
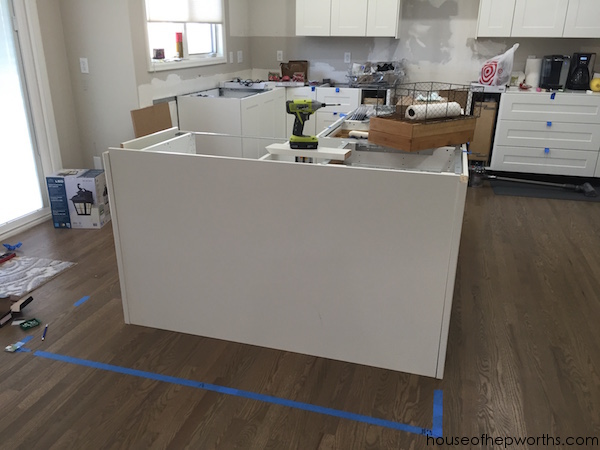
You can see here that our panel was too tall. Once in place I marked it exactly and then took it back to the garage to give it a final cut on the table saw.
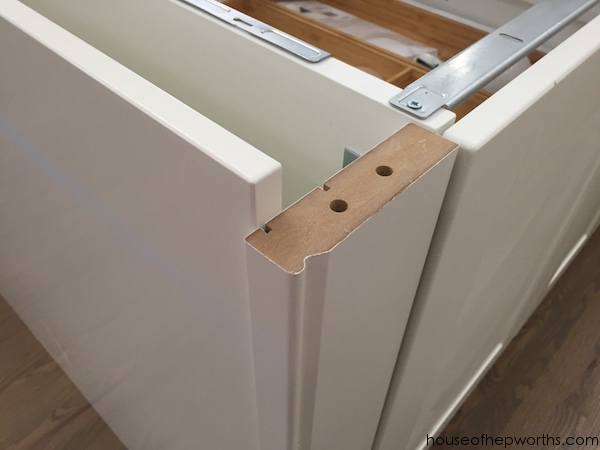
Here’s a great picture showing one of the main reasons we wanted to frame out our island – the electrical boxes fit snugly inside the void area created from using the toe-kicks. In basic builder-grade kitchens the builder would put this box inside the actual cabinet. I wanted them hidden and not in the way of the drawers and shelves.
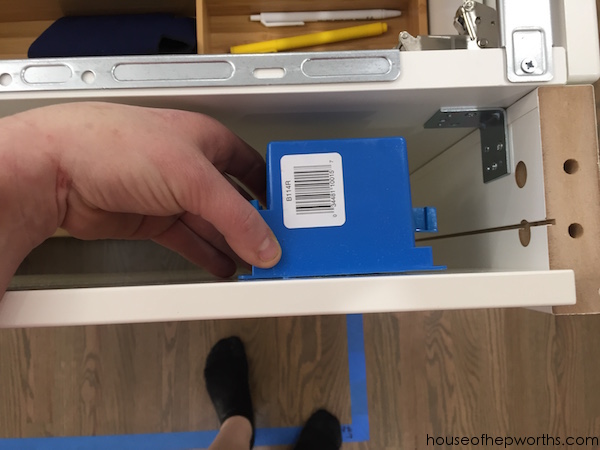
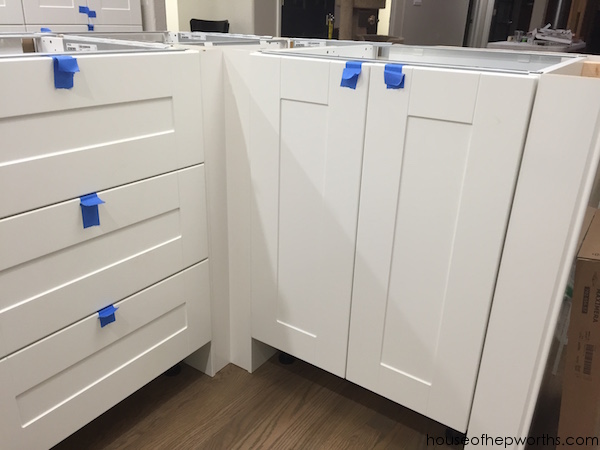
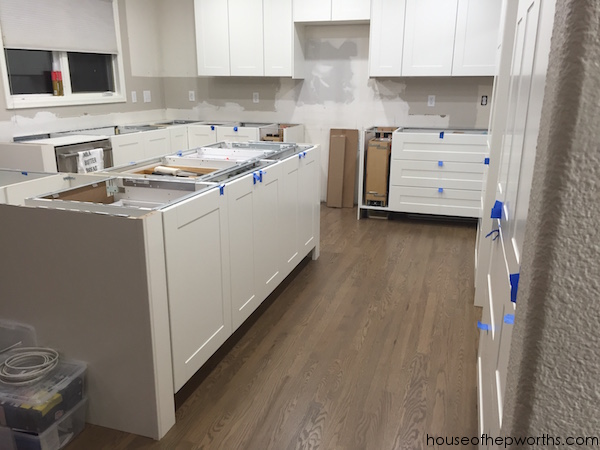
Here’s a wide view of the inside of the island. You can see all the toe-kick edges along with the custom fit side panels. The tape on the doors is just temporary pulls, otherwise we wouldn’t be able to open them. The blue tape on the side panel is where our electrical boxes will go.
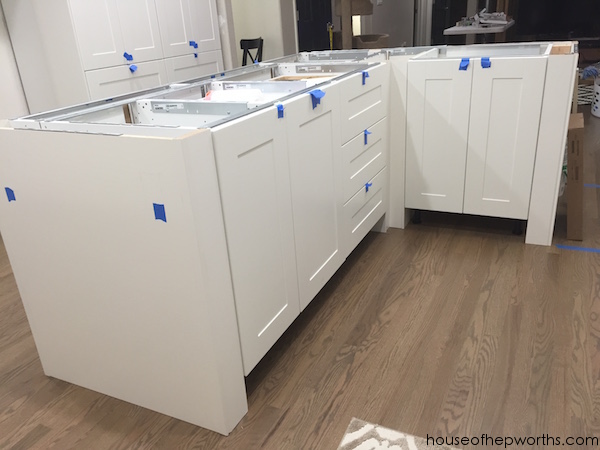
This inner corner of the island is filled with all filler panels cut to size.
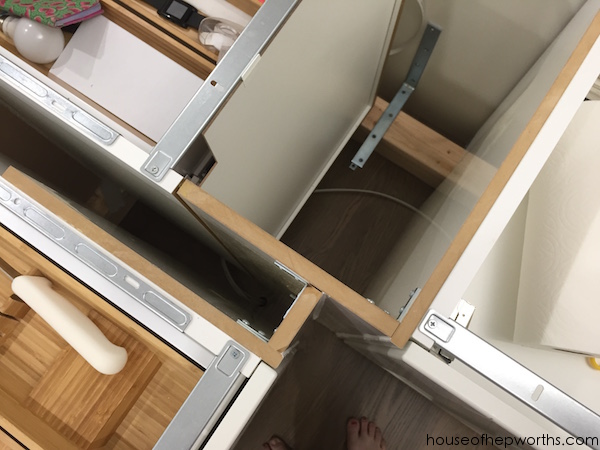
Here’s the inside corner from above. We used a lot of the L-brackets to attach everything so we wouldn’t have to put any nails or screws on the finished fronts.
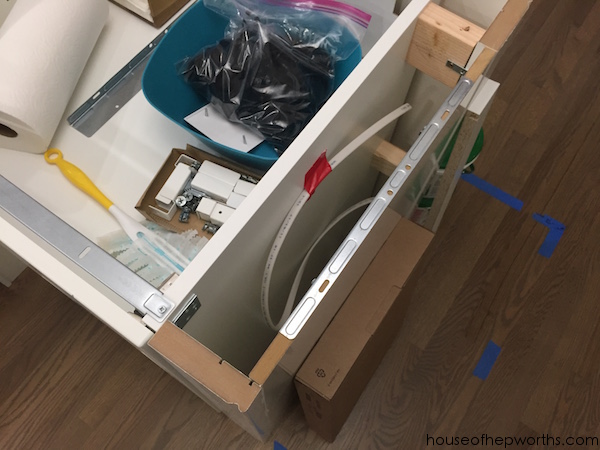
Here’s a view of how the side panel nestled between the two vertical toe-kicks. You can also see how the electrical will run inside the void areas.
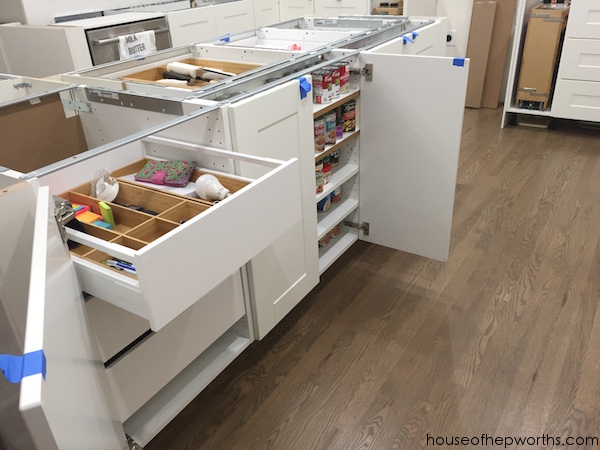
The back side of the island has very narrow, custom-made cabinets for canned goods. My next post will give a specific tutorial for making these custom cabinets, so I’m not going into a lot of detail about them in this post. We opted to custom make these narrow cabinets because our island is about 31″ wide but base cabinets are only 24″ deep, so we had an additional 7″ of space to fill. A custom set of cabinets for canned goods seemed like a perfect solution!
Below is a view of the island, standing by the pantry looking towards the sink area. This is the biggest void area, but it made sense leaving it empty for spacial reasons. The void areas definitely gave us more wiggle room for running the electrical too. You can still access all of this area by removing the floor toe-kicks under the finished island.
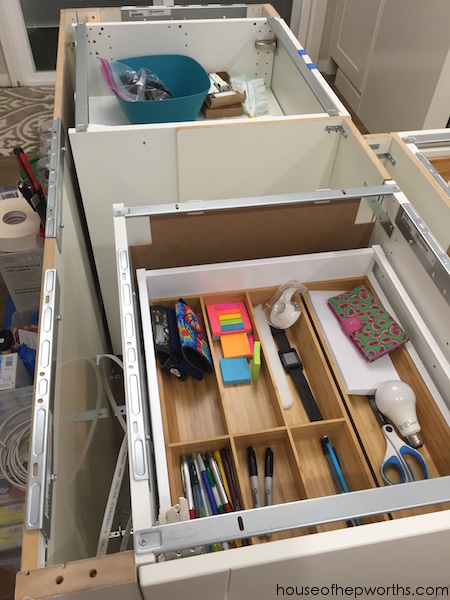
Circling back to the vertical thick toe-kicks, here’s another good angle of how they fit together with the base cabinets and the side panels. In case you are wondering how we chose what depth to set these pieces, when you purchase an IKEA kitchen they give you basic install details and measurements. Within those details they tell you that the side panels on cabinets need to be set 5/16″ deeper than the cabinet box. Because all our side pieces (next to the pantry, on either side of the microwave, etc) are all set 5/16″ deeper than the box, we also set all our vertical toe-kick side pieces the same depth.
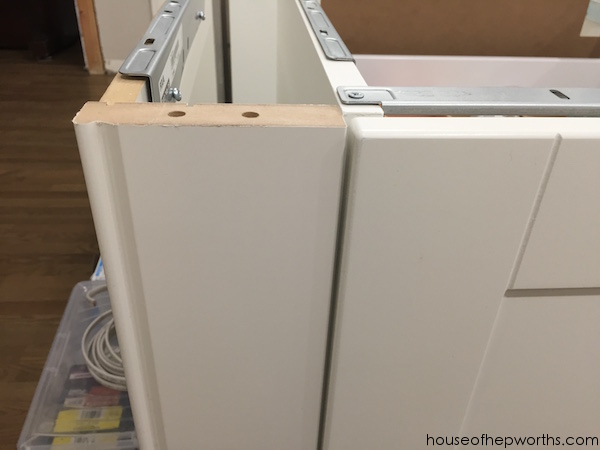
And here’s a picture of the finished electrical. Our island has 4 plug outlets. The wiring was already in place from the previous island, so we just reconnected it on the new island. If you look at the original island layout notes at the top of this post, you can see that pre-planned exactly where to place these boxes before we even ordered our first cabinet.
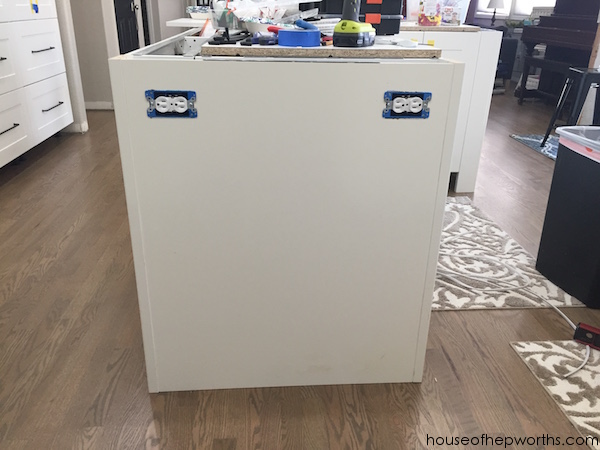
Now the island is finally ready for the template of and install of the countertop. Because we live in our home while we are renovating the kitchen, we are already using the entire kitchen while we wait for the countertop.
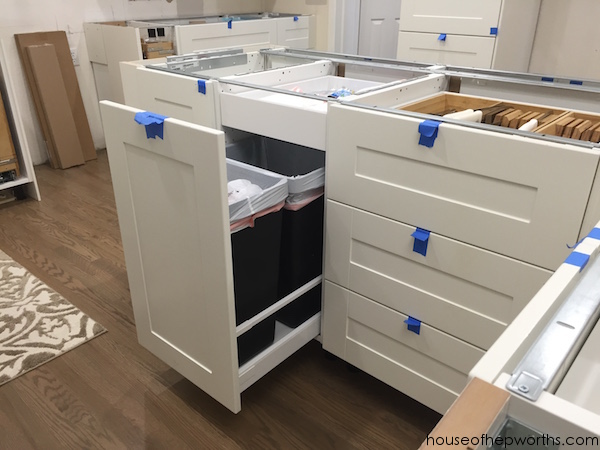
The kitchen is finally starting to look like a real kitchen! The island was the biggest worry of the entire process, and it turned out perfectly! Whew! Next up in this series will be all about building the custom cabinets in the island for the canned goods.
My biggest advice when building a custom IKEA island is to plan, plan, plan. Know every detail before you place your order. Draw out many different blueprints, each one for a different step in your island process. We have separate blueprints drawn out for the cabinet layout, the 2×4 placement and how the cabinets will attach to the floor, the electrical placement and how the wiring will run under the cabinets and inside the void areas, and also more blueprints just for how all the vertical toe-kicks and panels will fit together.
When we started building the island, I knew in my head and on paper exactly how the entire unit would fit together. We didn’t have many surprises during the process because I’d already planned it out completely. Obviously some surprises will pop up, but you can deal with those in the moment.
Our new island is hands-down my favorite part of our kitchen. It is so big and so perfect for entertaining. We chose to ditch the breakfast table in lieu of a larger island with lots of seating. Our dining room is literally steps away from our kitchen, so if we ever want to sit at a table, we still have one. Now our dining room will get used too and not just sit there collecting dust.
I know trying to explain all this can get confusing, so please don’t hesitate to ask any questions you may have.
Here are all the posts in our IKEA kitchen series:
Building your own custom IKEA kitchen || the planning & ordering process
Assembling and installing IKEA Sektion kitchen cabinets
Adding plug outlets inside IKEA pantries || IKEA sektion renovation
Pull-outs & Lazy Susans || Custom Organization in our IKEA Kitchen
Everything you want to know about building a custom IKEA kitchen island
Create Custom Canned Goods Storage from IKEA Cabinets
Creating a wrap-around cabinet & moving the dishwasher
Run Cables in-wall with a PVC Cable Drop
Installing IKEA quarts countertops – Frosty Carrina
How to install hardware like a Pro – IKEA kitchen renovation
Installing new pendant lighting in our custom IKEA kitchen
Start at the VERY beginning of our WHOLE-HOUSE renovation:
New to this series? Click here to start at the beginning!

Thanks for reading! Have a wonderful week!

Are all the spaces under the cabinets staying open or will there be baseboards underneath?
We are adding toe-kicks. On the interior of the island will be basic toe-kicks. On the outside part will be seamless toe-kicks to make it look like a piece of furniture and not just basic toe-kicks.
Wow. That is impressive. Can’t wait to see the finished results!
Thank you so much!
We are finishing up our Ikea Kitchen install and we have some similar tastes! I’m curious about your handles around the microwave. We chose the same Baganas for our uppers and ran into an issue where our microwave door hits the handle on the left cabinet door when we open the microwave. I am struggling with the thought of having to put knobs here and now where else
We don’t have that issue. Did you set your microwave far enough forward? I just checked and our microwave door won’t even open far enough to hit the handle on the cabinet. Maybe it’s our style of microwave. We have one where the entire front of the microwave is the door and the whole thing opens.
Love the island. Nice execution. Today I’m doing the power outlets and floor mounting layout on ours. I don’t recall seeing anything about the side panels needing to be 5/16″ deeper. Do you recall where it said this?
It was included in the literature IKEA gave us for the install.
Can you share which cabinet you used for the pullout drawers and waste cans?
Or the model #’s for your plans or list of what you purchased ? I’d be willing to pay for them through Etsy. You built exactly what I’m looking for.
Love it.. Do u have finished pictures?
Love it! What kind of floors are those??
Awesome job. I’m building an IKEA Kitchen and am looking to have the dishwasher on the end of my cabinets on a section that is open to the rest of the room. Where did you buy the larger panels that connect from the counter top all the way to the floor? I can’t seem to find them via IKEA and couldn’t locate the info in your post. Apologies if it’s in there and I missed it.
Hello, we’re just starting our planning process for our IKEA kitchen renovation! Your posts are amazing resources; thank you! One quick question from this post: where is the side paneling for the island from/ how did you choose it/ what is it?
Hi, we are dealing with planning planning at the moment, and I’m wondering the width of the cabinet for your trash, and also; is that a maximera medium drawer at the bottom?
Thx
We are about to add an island to a kitchen that doesn’t have one, and are doing new floors first. I am so confused on if we should install the floors first, with cabinets on top, and came across yours that does that. I suppose I need to find out if there is flooring under the existing cabinets and what thickness it is? I see you used 2x4s to anchor the island, so is it still the same height as your outer counters? Sorry if that’s a confusing question….basically wondering how you anchored it and still got all of your counters the same height. Thanks!